
How Invoice Parsing Works
Four visible stages:- The document arrives — you upload it, or a vendor emails it in.
- A parse runs — you start it for an upload; an emailed document starts on its own.
- A draft appears — one draft invoice per parsed document, with the document attached and the extracted fields filled in.
- You finalize it — the draft is posted and starts counting.
Getting Documents In
There are two ways to trigger automated invoice parsing: email an invoice to a configured inbox, or upload the document yourself.Emailing invoices in
Emailing an invoice is the simplest way to get it parsed. Send the invoice to your invoice address, with the document attached or in the email body, and AI Insurance creates an import and starts the parse for you. You do not need to upload the document or choose Parse Invoice. Find the address on Financials → Import Invoices. The Import by email card at the top of the page lists every invoice address for your company; use the copy button beside an address to share it with a vendor or paste it into an email. Each email arrives as one row in the Imports table. You can also find an address already configured for your company in Company Settings → Inboxes → Invoice. This is the place to copy, rename, or add an inbox.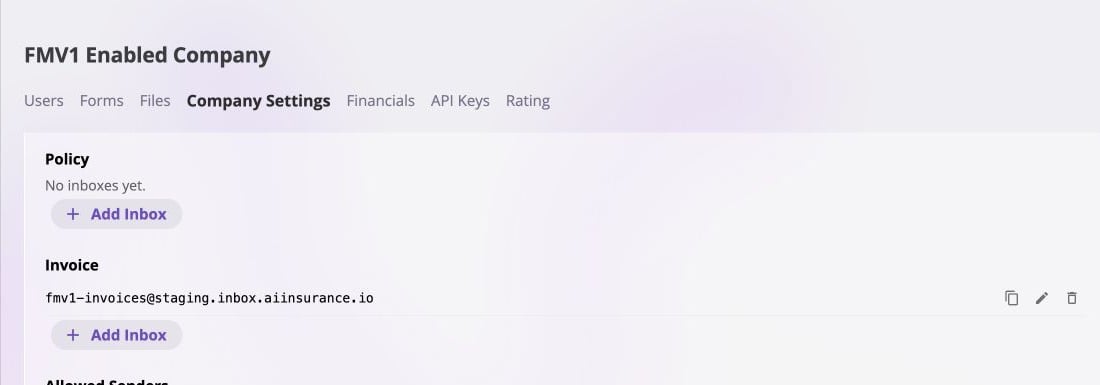
A configured Invoice inbox in Company Settings. Use its copy button to share the address with a vendor.
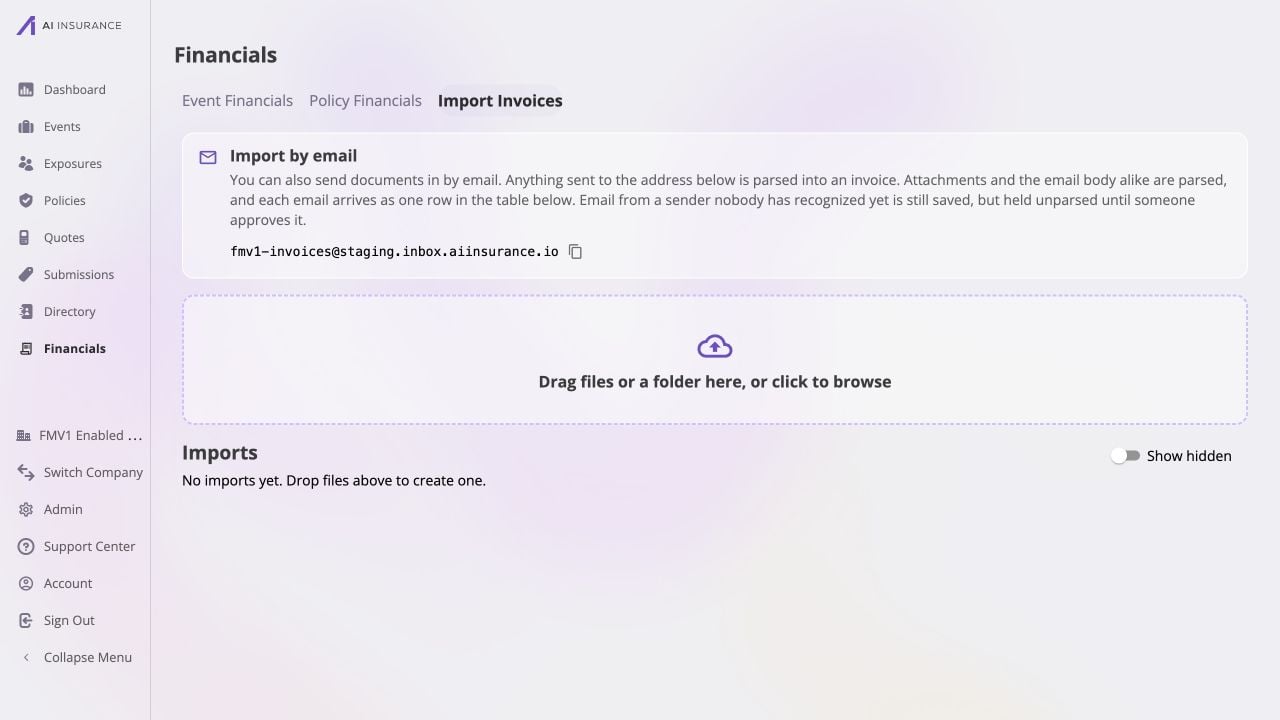
The Import by email card on Import Invoices shows the configured address to send invoices to.
- Recognize sender adds the address to your allowed senders. Their stored imports become runnable, and their future emails are parsed automatically.
- Block sender drops their future emails completely — not stored, not shown.
Configuring Invoice Parsing Inbox
If Import by email does not show an address, creating one takes just a few clicks. You need permission to update company settings — standard Carrier Admin and Policy Administrator roles have it.- Select your company name at the bottom of the left sidebar, then choose Company Settings.
- In the Inboxes card, find Invoice and choose Add Inbox. Make sure you use the Invoice section; Submission and Policy inboxes send documents to different workflows.
- Enter a short, recognizable inbox name and choose Add. The dialog shows the full address as you type. The name is trimmed and lowercased, must use letters or numbers with single dots, dashes, or underscores (up to 64 characters), and must be available platform-wide. If it is already taken, try another name.
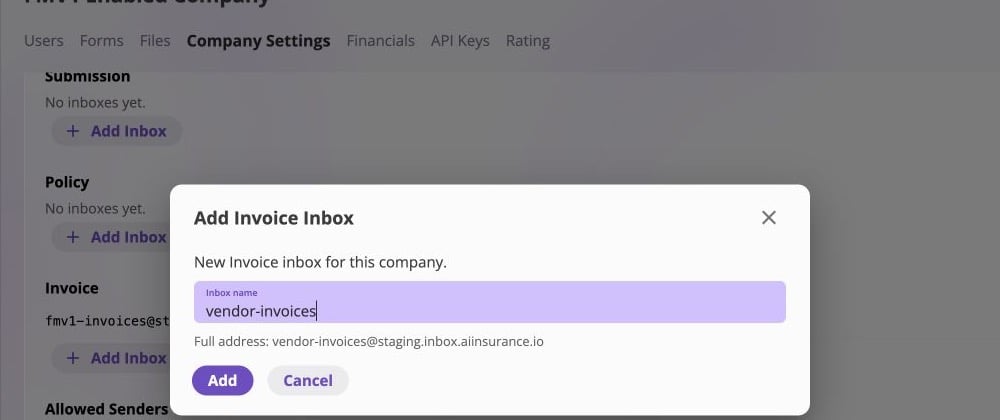
Creating an Invoice inbox: enter a name, confirm the full address, then choose Add.
Uploading
Drag files or a whole folder onto the drop area — Drag files or a folder here, or click to browse — or choose it to pick files. A folder is flattened into its files.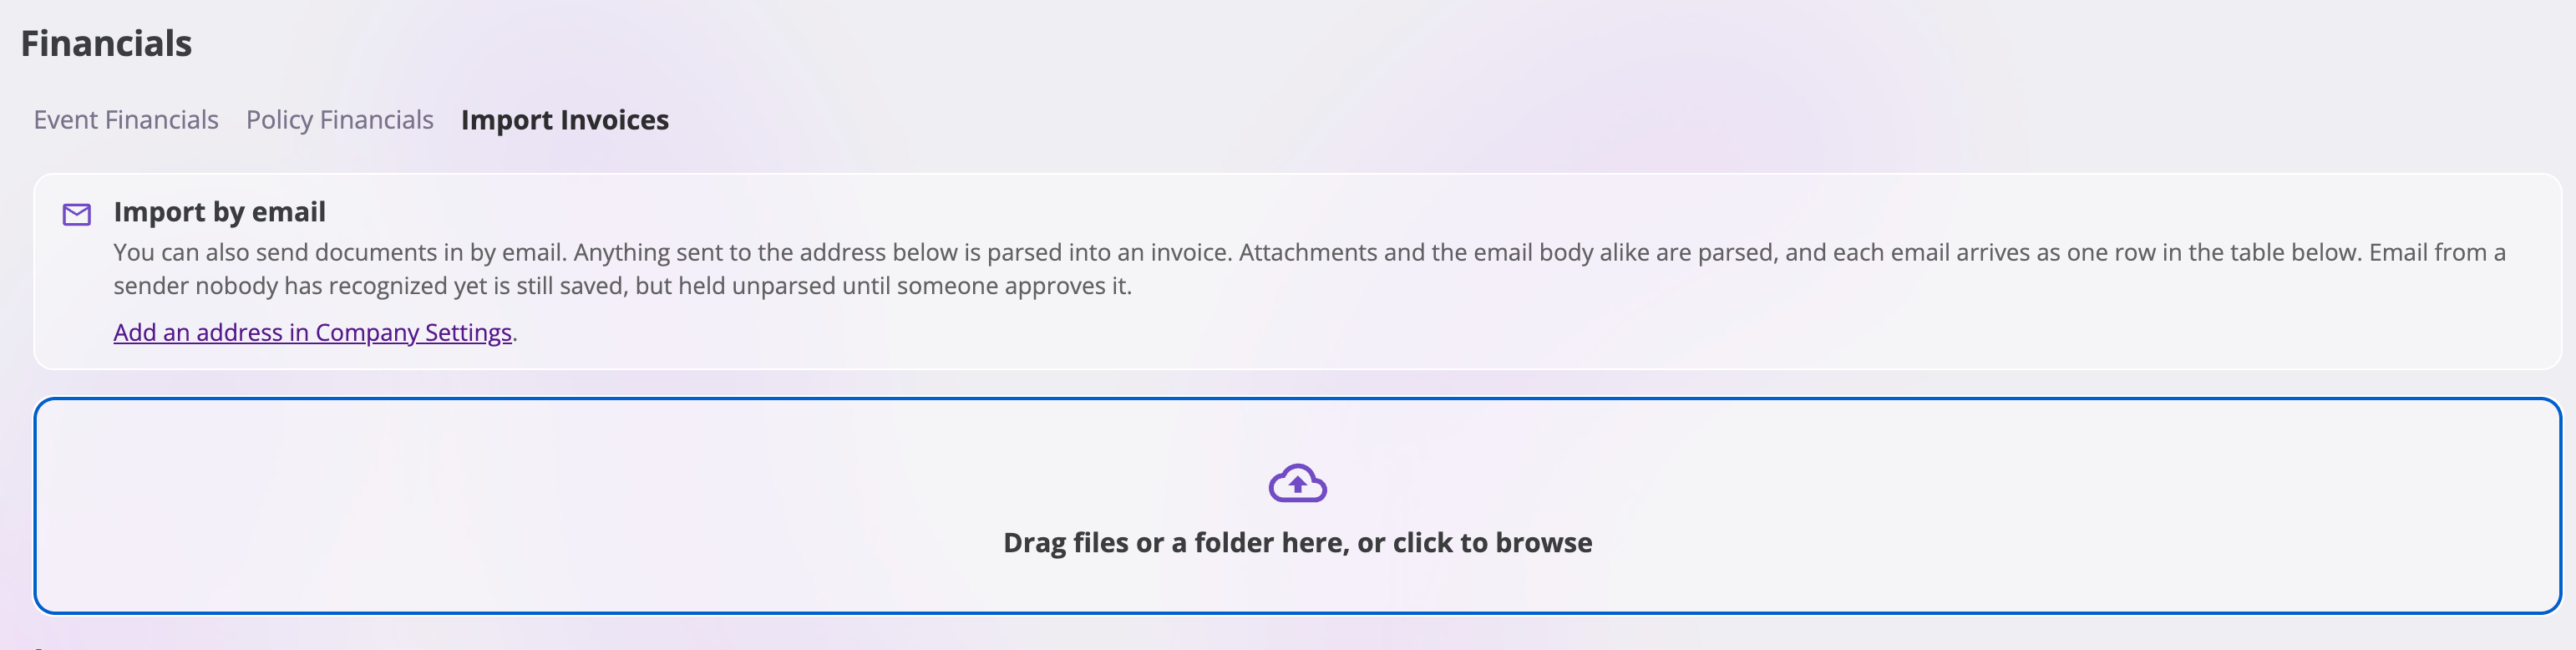
Import Invoices brings email intake and file upload into one workspace before each document appears in the Imports table below.

A newly uploaded document starts at Not run; choose its play control to Parse Invoice.
1
Find the row
Your files appear in the Imports table as soon as they’ve uploaded.
2
Choose Parse Invoice
The play button on the row. The status changes to Starting…, then
Running.
3
Wait for it
The table refreshes itself while a parse is live — there’s no need to
reload. Choose the Running marker to watch the stages: Extracting 1/2,
then Parsing 2/2.
4
Open the result
When the status reads Succeeded, the Parsed Result column holds a
Transaction link to the new draft.
Tracking the Parse
Whether you emailed the invoice or uploaded it, find its progress in the Imports table on Financials → Import Invoices. Each email and upload has its own row, so you can track either flow in the same place. An emailed invoice from a recognized sender is already under way when its row appears — there is nothing to click. An uploaded invoice starts after you choose Parse Invoice above. In either case, the table refreshes itself while a parse is live, so there is no need to reload.
After a successful parse, the row reads Succeeded and its Transaction link opens the new draft invoice.
What the statuses mean
The Imports table shows Files, Source (an upload, or the sender’s
address), Uploaded, Status, and Parsed Result. Choose the file
summary on a row to preview the document without leaving the page. The clock
icon opens the row’s run history, where a failed run shows its error. Rows you
no longer care about can be hidden and brought back with Show hidden.
Reviewing the Draft
The Transaction link opens the draft with the document on the left and the extracted fields on the right, so you can read one against the other. A banner at the top says where you stand:This is a draft transaction — it isn’t posted yet, so it holds no payments and shows in no balances or reports. Edit its details, then Finalize to post it (its number is kept).
What gets extracted
Two things are deliberately left for you: the Payee is never guessed — the
vendor’s name is in the memo instead — and the Event is never assigned,
because the document doesn’t say which claim it belongs to. Set the Event on the
draft before finalizing if the invoice belongs to one.
Correcting what it read
The draft opens read-only; choose Edit to change anything. This is your one chance at some of it — the Type and the line items can only be changed while the invoice is a draft, never after it’s posted. Changing the Type re-types the existing line items onto the new type’s line item types, keeping their amounts, so check them before saving. Save Draft keeps your changes without posting.Where the parse tells you it’s unsure
There are no confidence scores and no highlighted fields. Instead, when something didn’t add up, the parse writes a note into the Memo — or into a line’s memo — in square brackets, and still succeeds. Read the memo on every draft.
You can also choose Run Bill Review on the draft to check it against
your billing standards — see
Bill Review. If your company has any
standards written, a review runs on a parsed invoice automatically as soon as
it’s created.
Finalizing
When the draft is right, choose Finalize. The confirmation is explicit:This draft will be posted: its charges (and any parsed payments) are recorded, and it starts appearing in balances and reports. This can’t be undone, but the posted invoice can be voided.Until you finalize, the draft shows in invoice listings with a Draft status and a muted, italic amount, and is left out of Owed totals.
When a Parse Fails
A failed run creates no draft. Open the row’s run history to read why. The common causes are all fixable:
To try again, use Re-run from Start or Re-run from Extract in the run
history.
What You’ll See Under Different Conditions
Verify the result: the import row reads Succeeded with a Transaction
link; the draft shows the source document beside the extracted fields; the memo
carries no [Parse check: …] note, or you’ve resolved the one it carries; the
line items match the document’s total.
Once finalized, the invoice behaves like any other — see
The Invoice Lifecycle and
Import Invoices.