
Start in the Right Scope
Choose the starting point that matches the work:
If Add New opens a menu, select the Invoice Type you want to use. The Type
remains selectable on the New Invoice page until you create the record.
Enter the Invoice
1
Confirm the type and event
Confirm Type first. It controls the available Line Item Types. If you
started company-wide, select Event (optional) or leave it empty to
create an unlinked invoice.
2
Choose Owed or Paid
Keep Status as Owed when the amount has not been settled. Choose
Paid only when the money has already moved; a Paid Date then
becomes required.
3
Add the payee and dates
Select the Payee when known. Set Invoice Date to the date the
amount should be recognized. Add an optional Due Date for when payment
is expected.
4
Describe the invoice
Enter a concise Memo that will help someone identify the transaction
from a listing or export.
5
Build the line-item breakdown
Select Add line item for each component. Choose a Line Item Type, keep
the amount positive, and use the Income or Expense side to show
direction. Add a line description when the type alone is not specific
enough.
6
Attach supporting files
Drag files into the attachment pane or select Upload File(s). Confirm
that each staged file appears before creating the invoice.
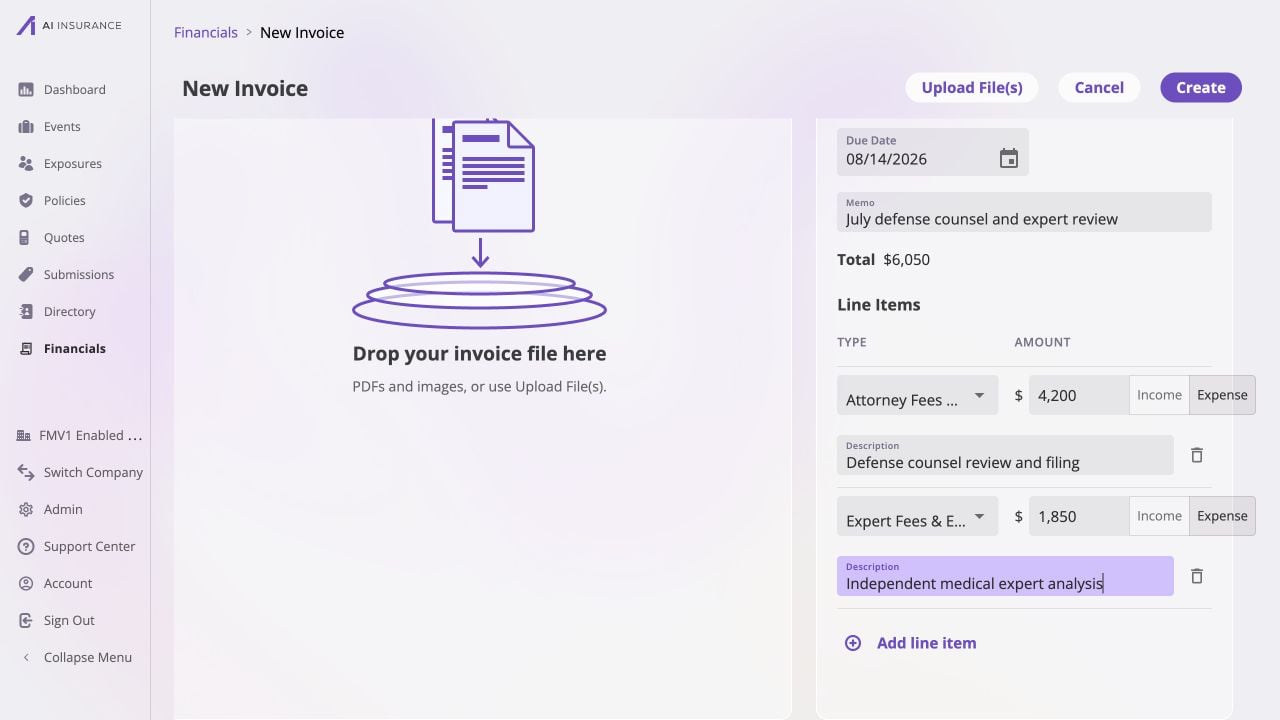
Review the memo, total, and each expense line before creating the invoice. This example is ready to create but has no attachment staged.
Review and Create
Before selecting Create, check:- the event is correct, or intentionally blank;
- Invoice Date is present, and — unless the invoice is linked to a policy, where a future date records a scheduled installment — is not in the future;
- every line has a type, a positive amount, and the intended direction;
- the displayed Total is the expected net of all lines; and
- a Paid invoice has a Paid Date and at least one non-zero line.
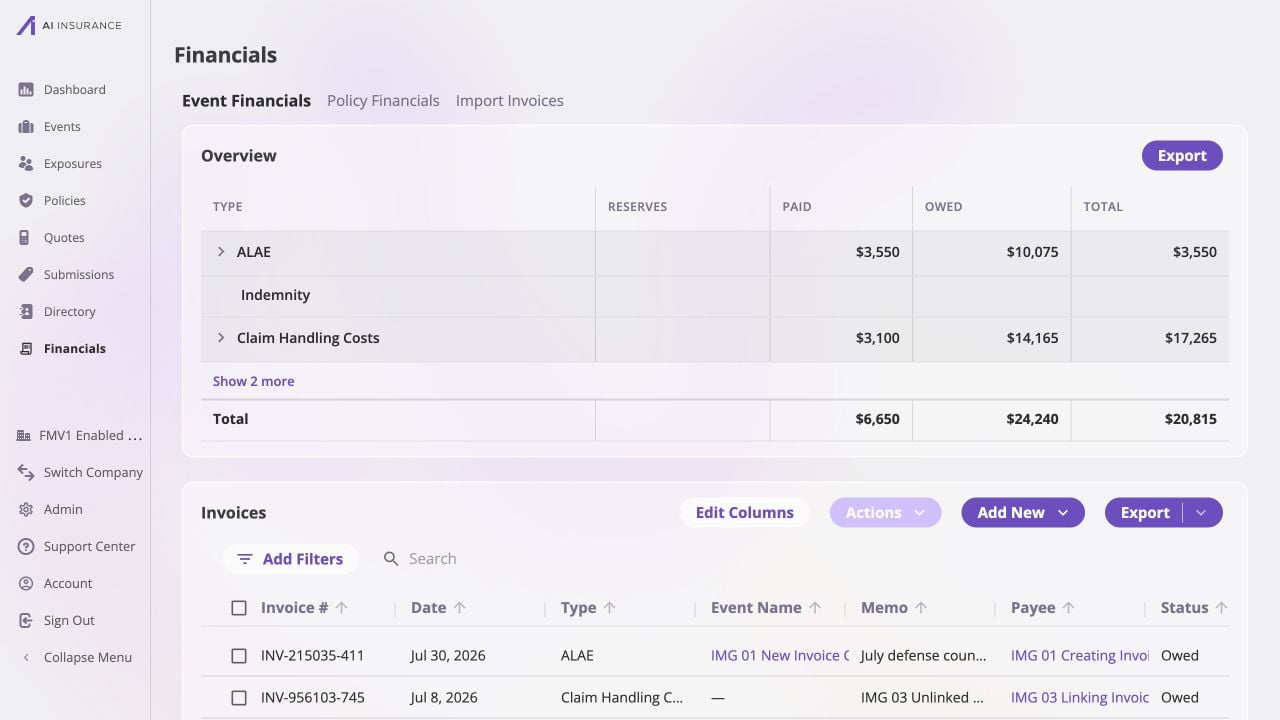
After creation, the invoice appears in Event Financials with its assigned number, linked event, payee, and Owed status, confirming that it was recorded in the intended scope.