
Any role that can view API keys sees this tab — every standard role except
Client Member. Creating and revoking keys needs the Create an API
key and Revoke an API key permissions, which of the standard roles only
Admin holds. See Roles & permissions.
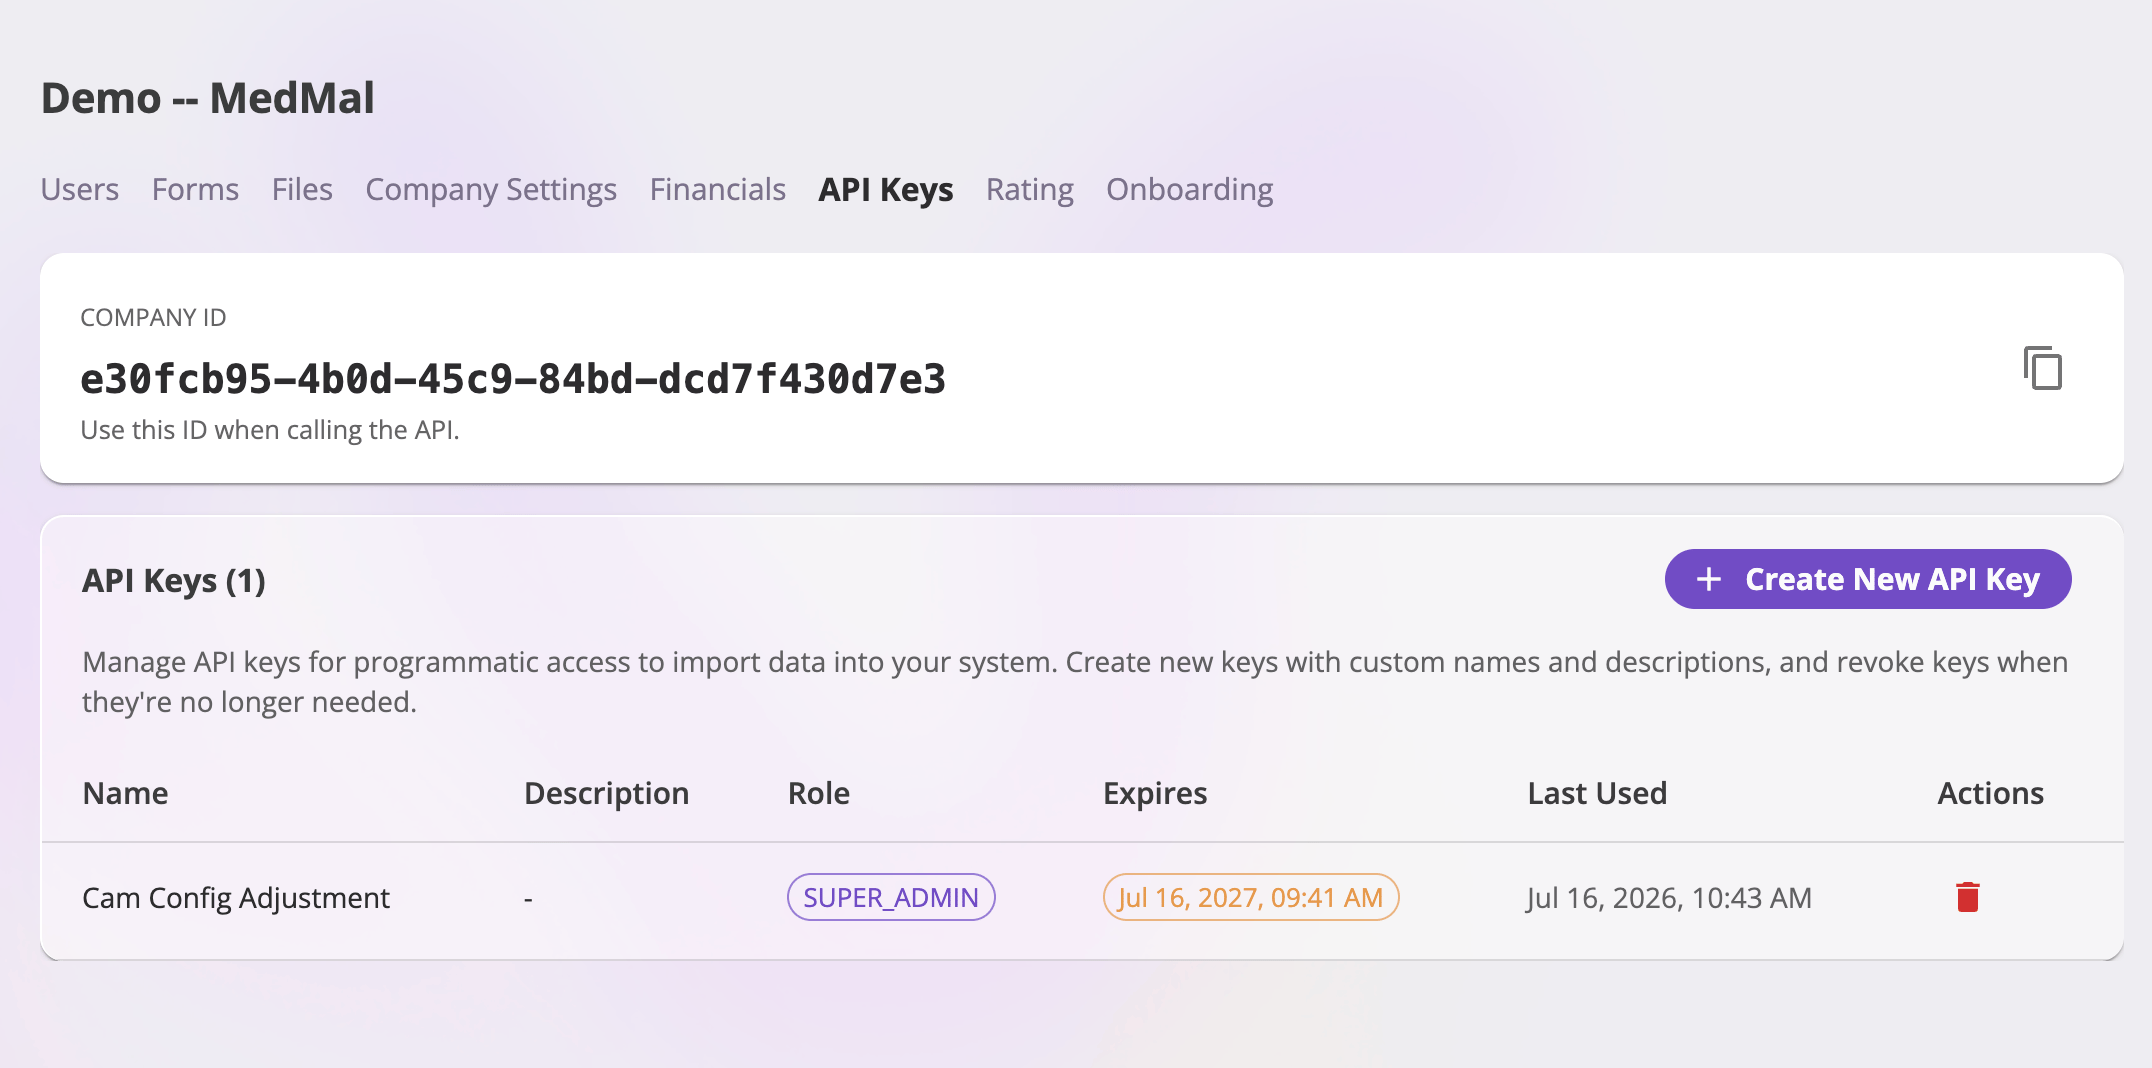
The API Keys tab: your Company ID at the top, then the key list.
Your Company ID
The card at the top of the page shows your Company ID, with a copy button. Most API endpoints include the company ID in their URL, so you’ll need it alongside any key — see Authentication for how the two fit together in a request.The key list
Each key row shows:Keys have roles
A key’s access is scoped by a role — one of your company’s roles, the same list users are assigned from. A key with the Viewer role can only read and export data; a key with Admin can do everything its user counterpart could. Give each integration the least powerful role that covers what it does — a read-only reporting integration should get Viewer, not Admin.Custom roles work for keys too. If no standard role fits an integration,
create one with exactly the
permissions it needs and assign that role to the key.
Create a key
1
Select Create New API Key
The button sits at the top right of the API Keys card.
2
Configure the key
Give it a Name (e.g. “External Dashboard Integration”), pick its
Role, optionally set an Expiration Date (the field defaults to one
year from today; clear it for a key that never expires), and optionally
add a Description.
3
Copy the key
The new key is shown once, in the confirmation dialog, with a copy
button. Store it somewhere secure (a secrets manager, not a shared doc) —
after you close the dialog it can never be displayed again. The dialog
briefly holds the Done button so you don’t dismiss it before copying.
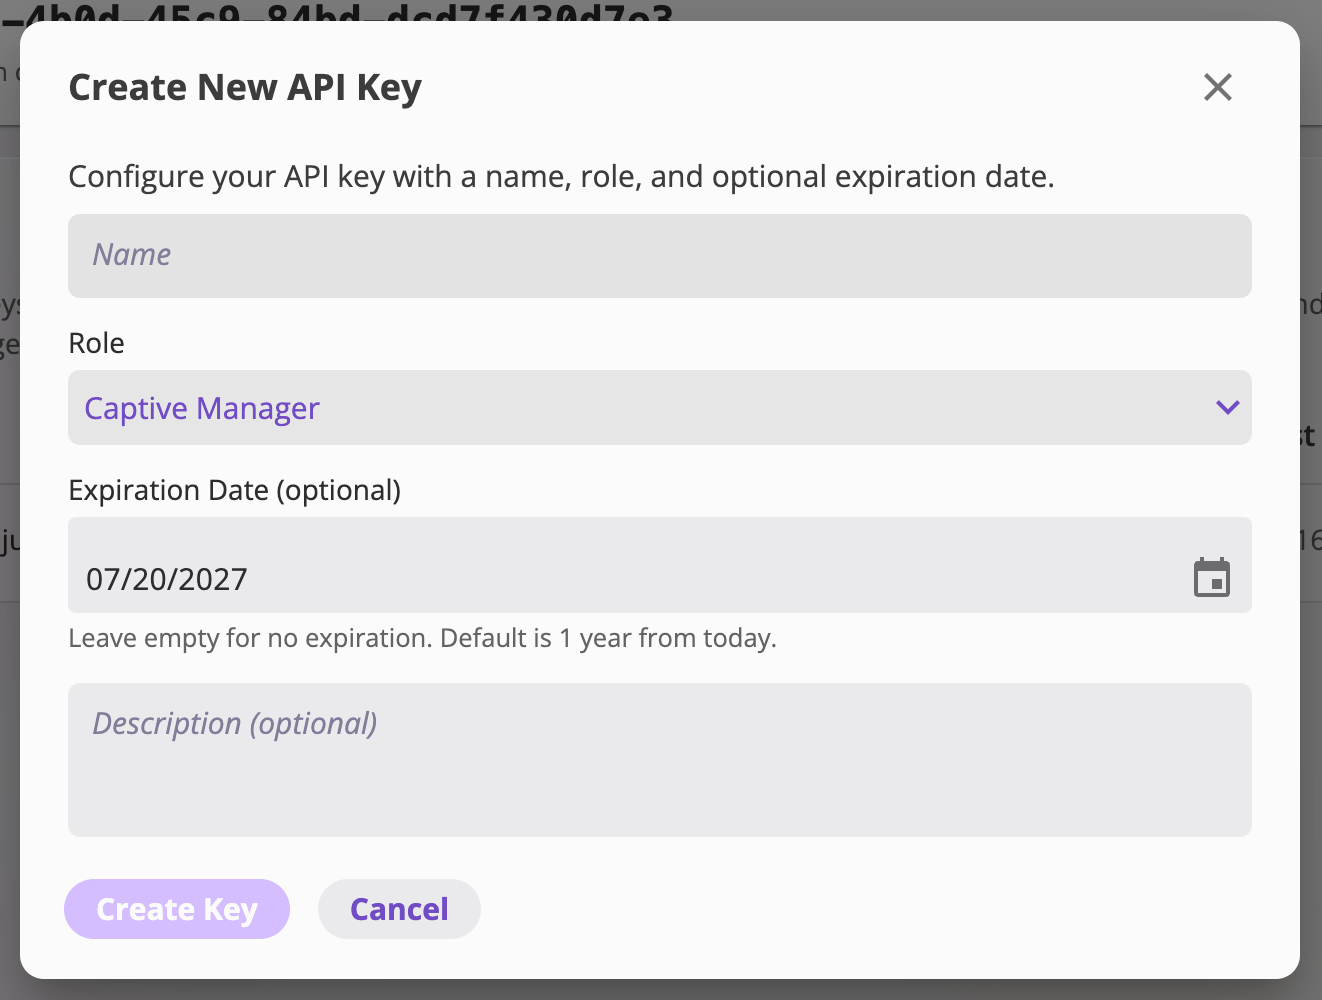
Configure the key's name, role, and expiration.
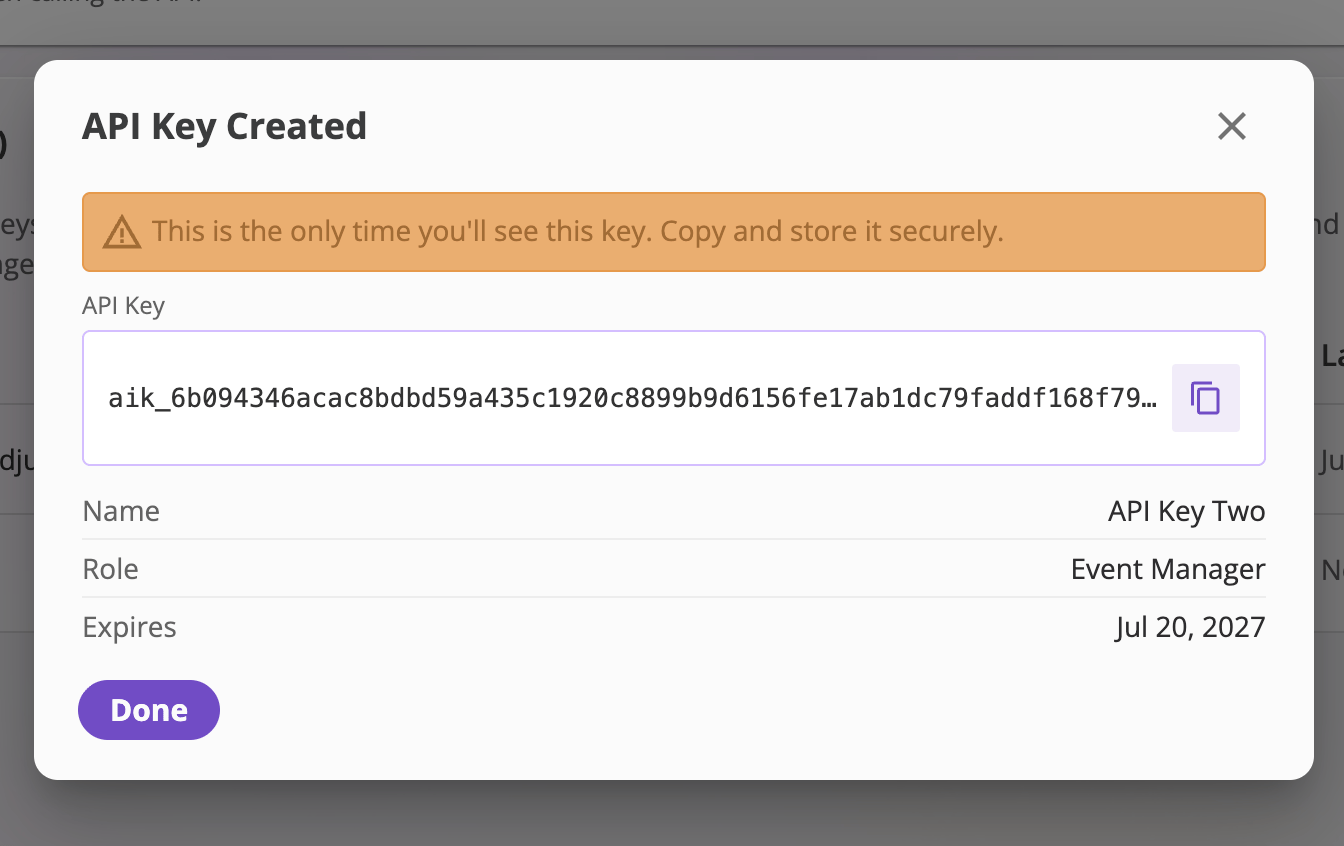
The key is displayed exactly once — copy it before closing.
Use a key
Requests authenticate by sending the key in theAuthorization header — the
raw key, with no prefix. The full request format, examples, and pitfalls are
in Authentication; the endpoint catalog is in
the API reference.