
Starting a quote
You can enter the wizard from several places:Finding your way around the wizard
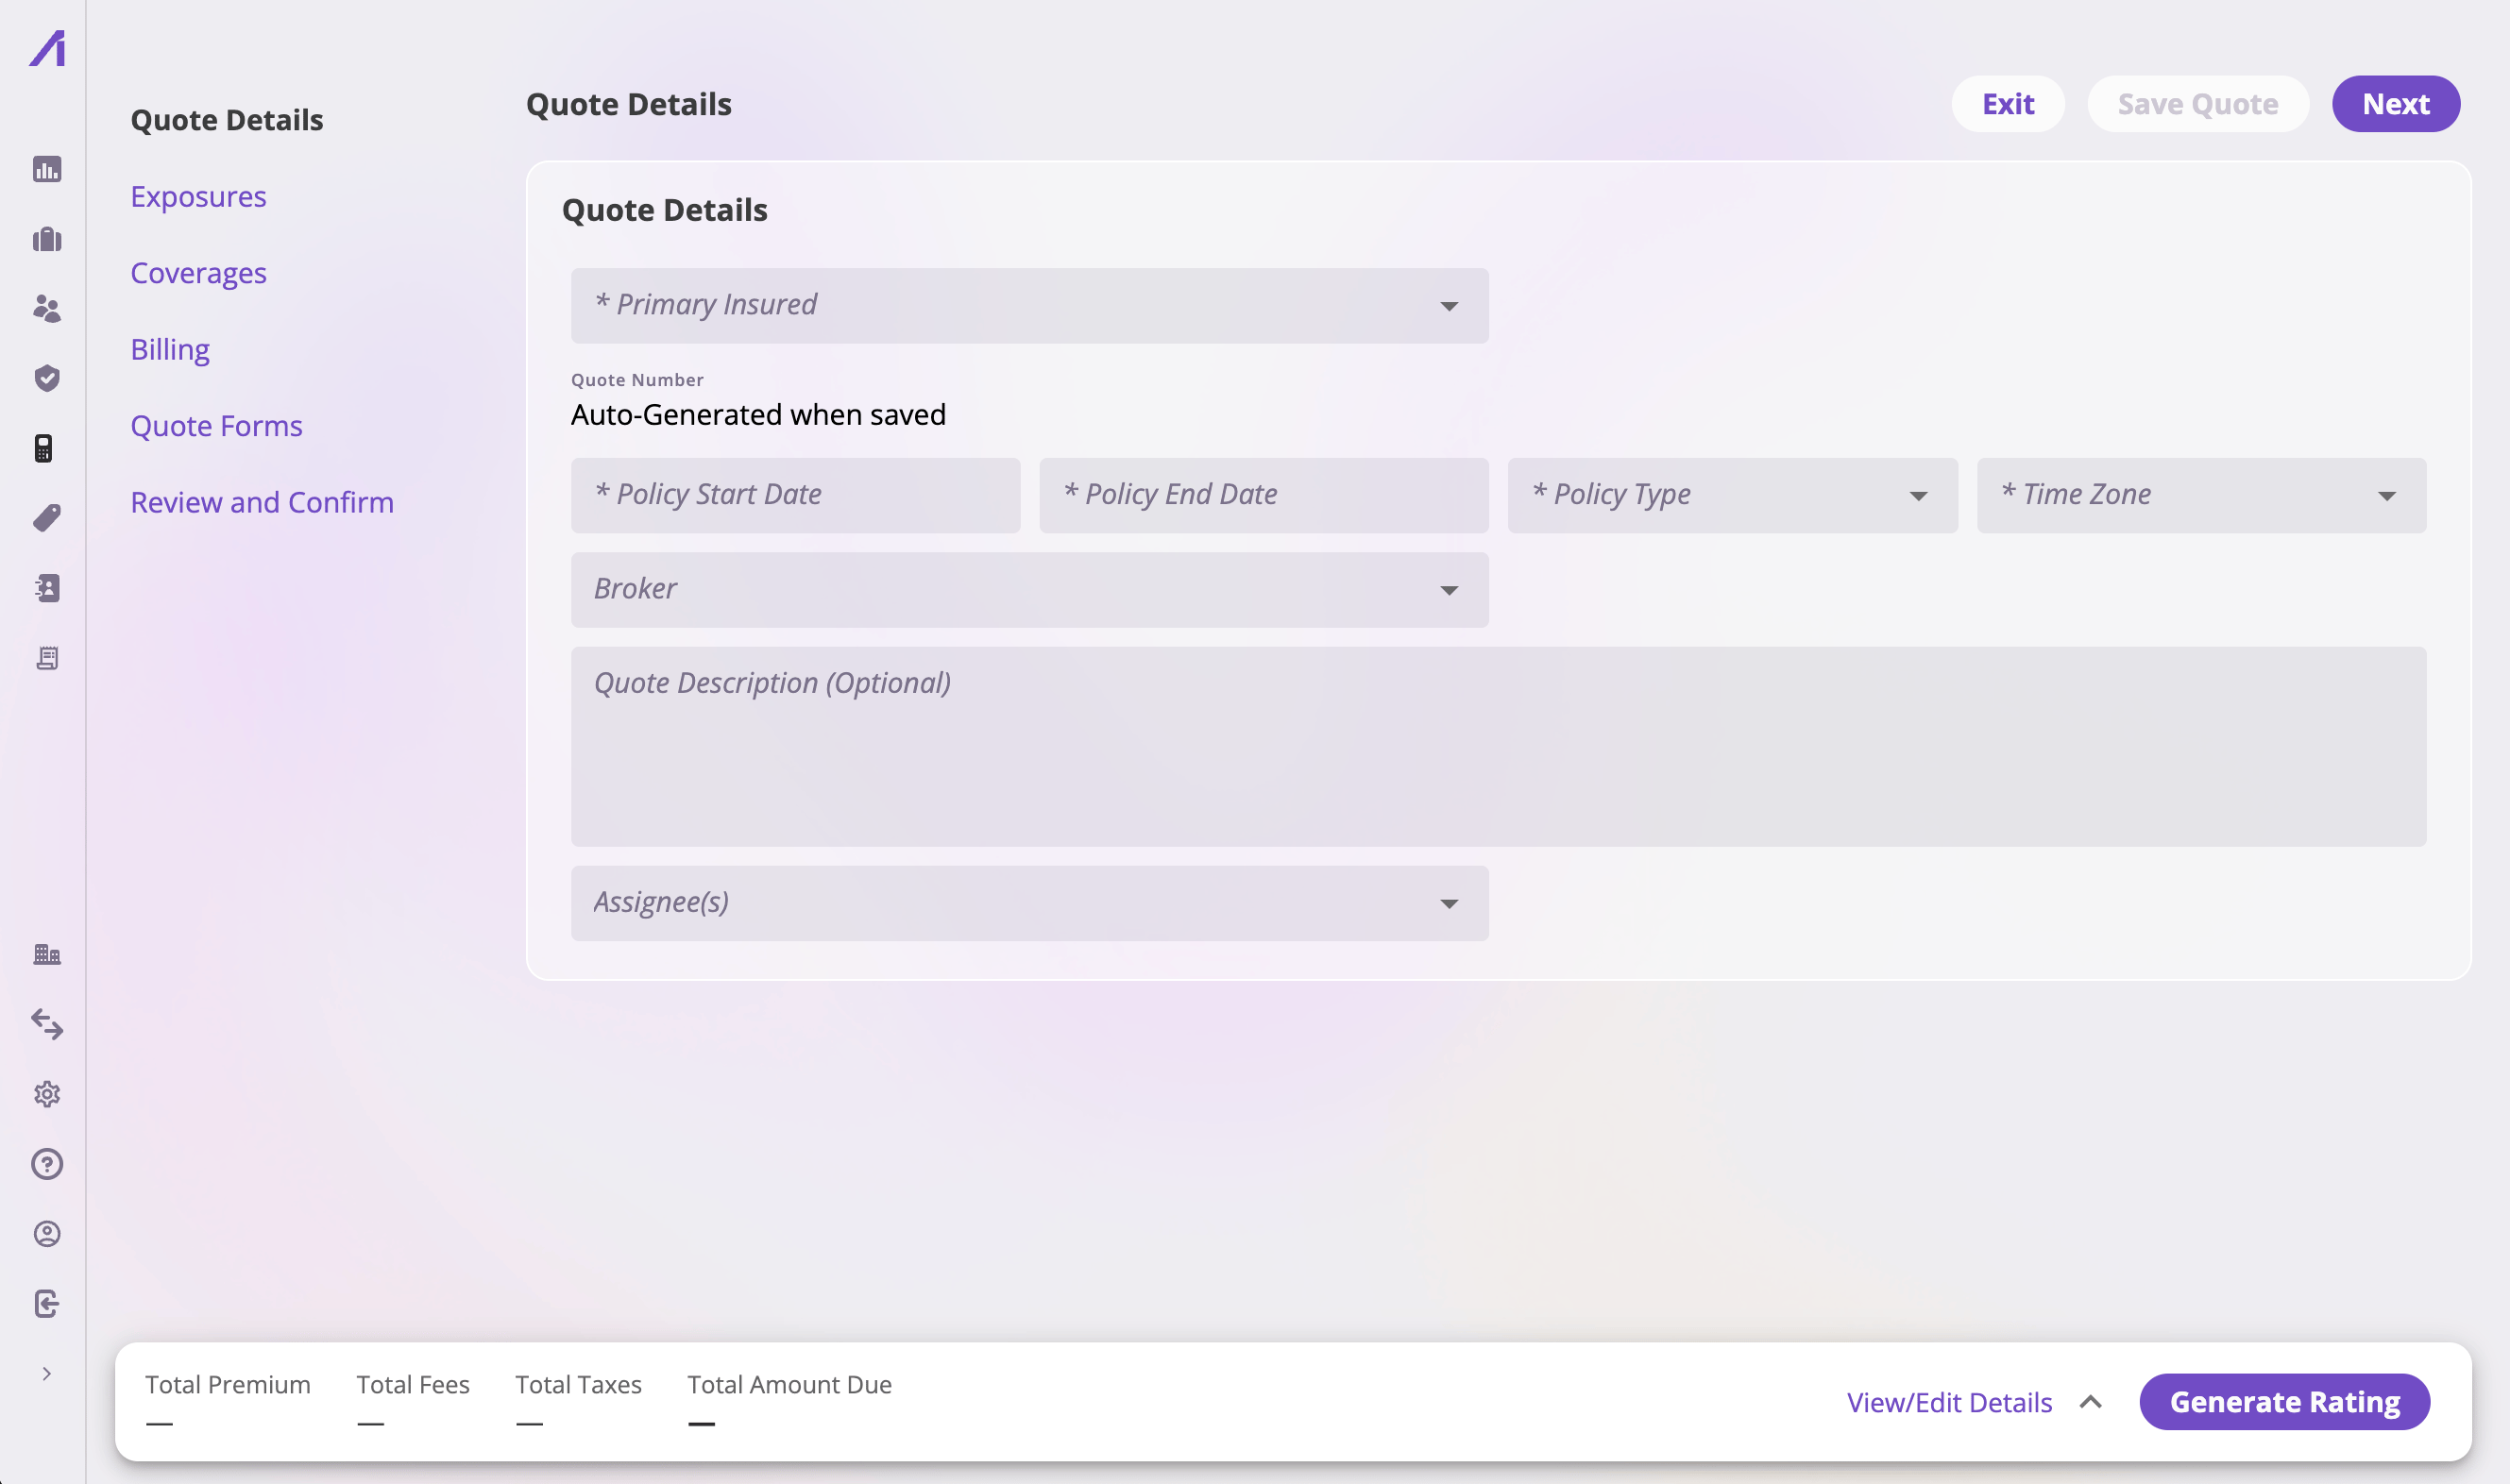
The quote wizard — steps on the left, the current step's fields in the middle, wizard controls at the top right, and the floating underwriter workbench along the bottom.
- The sidebar lists the flow’s steps in order. Click any step to jump straight to it — you’re not forced to move linearly.
- The header buttons:
- The floating workbench bar along the bottom shows live premium totals and hosts rating — see Rating & the underwriter workbench.
Saving
The wizard is draft-based: nothing exists on the server until the first Save Quote. That first save creates the quote — and, when you started from scratch, its parent submission too, with the shared insured details copied onto both. After it, the quote appears on the Quotes list with status In Progress, and you can exit and resume any time. If a save fails validation, the messages appear verbatim in a notification so you can fix the offending fields and save again.The exact fields on each step are defined by your company’s configuration —
two companies can see quite different cards on the same steps. What follows
describes the steps themselves and the controls that are always there. See
How your app is configured.
Step 1 — Quote Details
The first step collects the basics: the insured, effective dates, and whatever identifying fields your configuration places here. On an endorsement the same step appears as Endorsement Details.Step 2 — Exposures
The Exposures step is where the risks being insured go — buildings, vehicles, locations, physicians, whatever your lines of business insure. You can add exposures two ways:- Manually — fill in the exposure cards on the page: pick existing exposures from your book or create new ones inline.
- In bulk, from files — select Import Exposures on the exposures card.
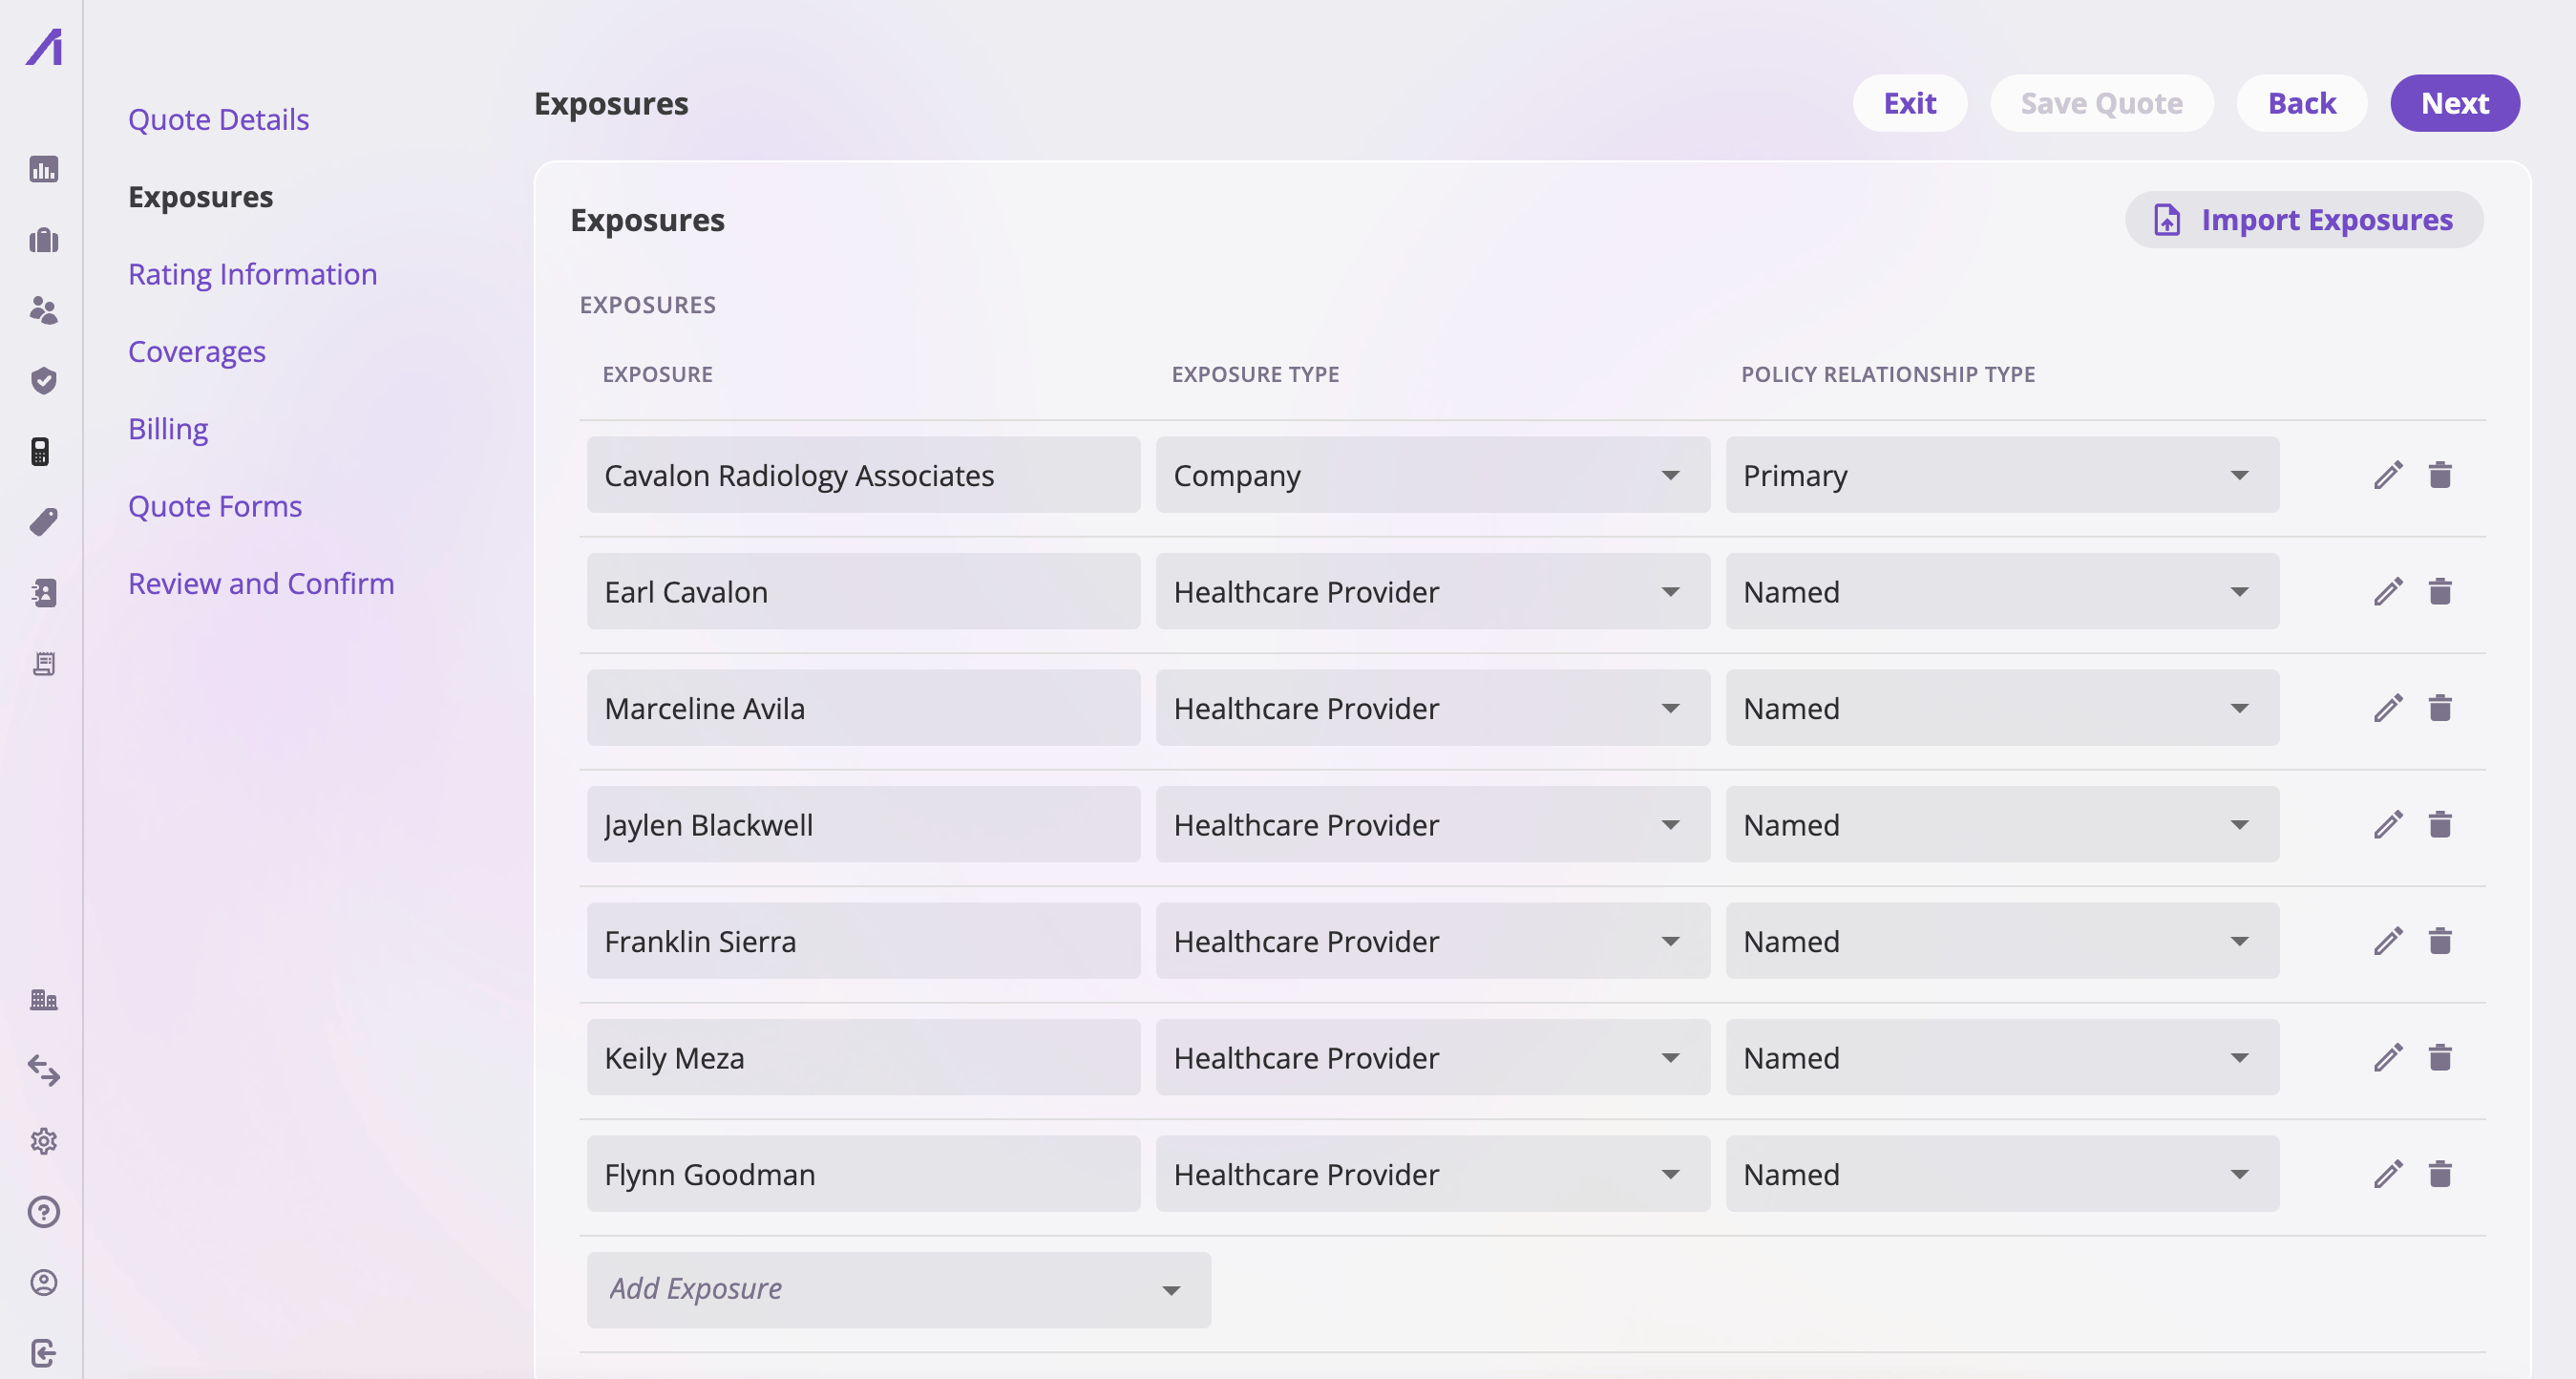
The Exposures step — exposure cards plus the Import Exposures action.
Bulk import from a spreadsheet or schedule
Import Exposures opens a drop dialog: drop an exposure schedule — an SOV, a spreadsheet (.xlsx or CSV), or a PDF — and the AI reads it and creates one exposure per row/record. You can drop several batches without closing the dialog; each shows its upload progress and confirmation.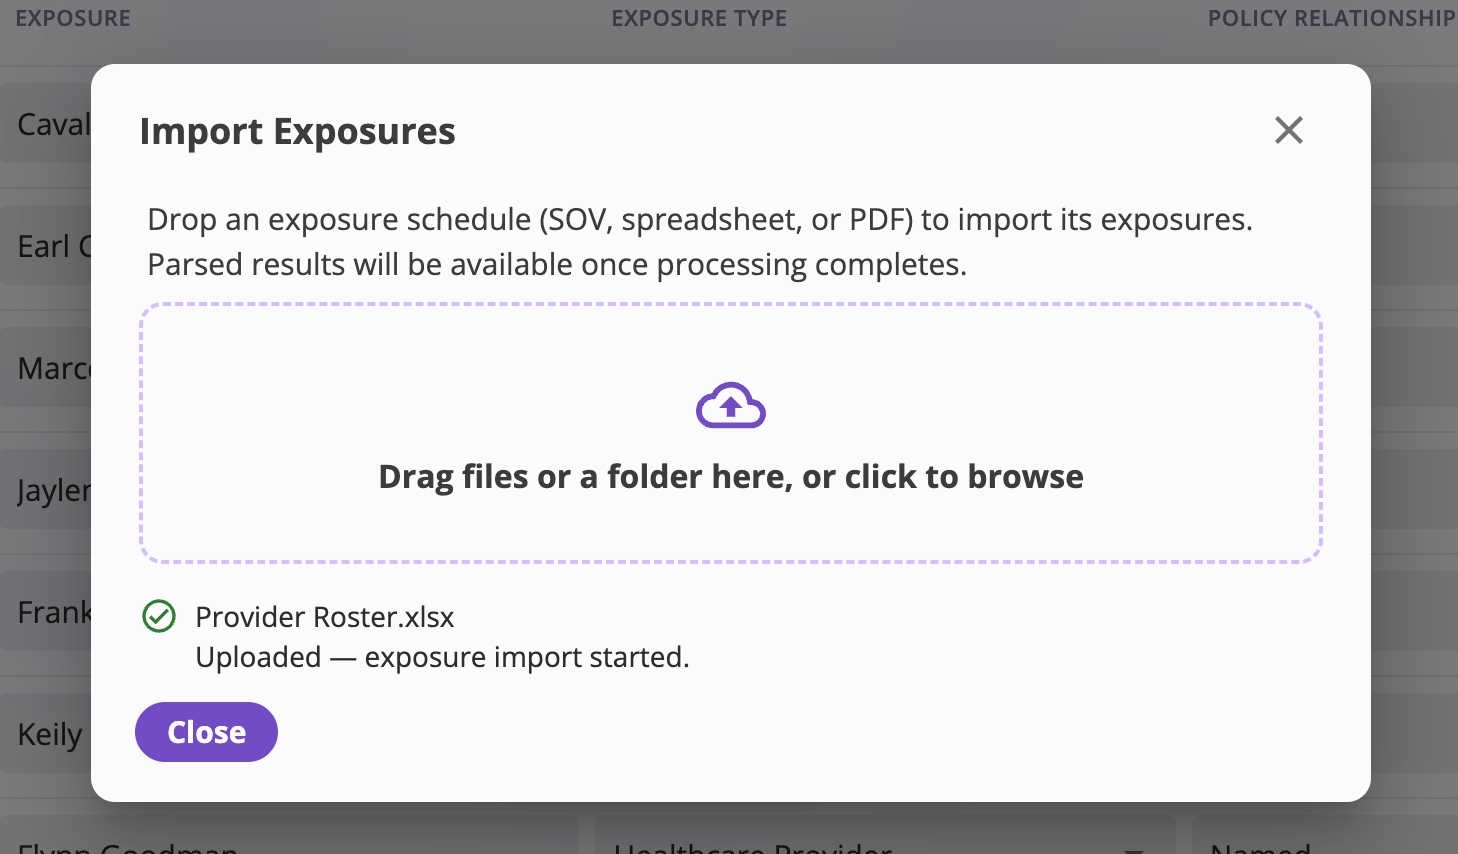
Drop an SOV, spreadsheet, or PDF and the import starts immediately — no type prompt needed here.
- Importing exposures… while the parse runs.
- Adding N exposures to this quote… then Added N exposures once they’re attached to the quote automatically. The message also tells you when some exposures were already on the quote, when any couldn’t be attached automatically (they’re still created, in the Exposures list), and when some rows failed to import (“3 rows failed”).
- On failure, the error is shown, including how many exposures were created before the failure.
You can’t leave the Exposures step forward (Next) until the quote has at
least one exposure — if your company’s configuration puts exposures on
quotes at all.
Step 3 — Rating Information
This step gathers the inputs your rating requires that don’t belong to a specific exposure — class codes, territory answers, modifiers. It only appears when your configuration puts cards on it; companies whose rating needs nothing extra skip straight from Exposures to Coverages.Rating & the underwriter workbench
Rating isn’t a step — it’s the underwriter workbench, a floating bar that travels with you along the bottom of every quote-authoring step, so you can rate and re-rate from anywhere in the wizard. The collapsed bar shows the four policy-level totals — Total Premium, Total Fees, Total Taxes, and Total Amount Due — plus:- Generate Rating — runs your company’s rater against the quote’s current data and fills the totals. After the first run the button reads Regenerate Rating. Rating failures appear inline on the bar with the error message. Rating fills the quote you have open; the figures are stored when the quote is saved. Regenerating replaces the rated figures with the new run’s output, so a re-rate that prices nothing leaves the totals empty rather than keeping the previous ones.
- View/Edit Details (or the expand arrow) — opens the full workbench.
- Editable policy-level cards — the rating inputs your configuration puts on the workbench (credits, debits, overrides). Adjust them and select Generate Rating to see the effect on premium immediately.
- Embedded-exposure tables — your configuration controls which exposure rows and fields appear. The default workbench uses a compact, read-only table for existing quote exposures and their rated figures. Tenant configuration can expose selected per-exposure inputs inline through the table’s row configuration. The workbench does not use exposure tabs or a selector, and it is not a full exposure editor: add or remove exposures on the Exposures step.
- Rater — when your company has more than one rating workflow registered, pick which one to run. Generate Rating stays disabled until a rater is selected (the selection is remembered with the quote).
Step 4 — Coverages
The Coverages step defines what the policy will cover: coverage lines, limits, deductibles, and endorsement-style options, as configured for your company. Values that rating produced (premium per coverage, for example) show up here once you’ve generated a rating.Step 5 — Billing
The Billing step shows the money side of the quote, driven by your configuration and generated rating. When policy invoicing is enabled and your role can update financials, use the Invoice generation settings to generate an invoice schedule, compare it with Invoice Target, and adjust the planned invoices — or build them by hand — before binding. Generating again discards the invoice changes made in this transaction, so it asks first. The plan is saved with the quote and applied when the policy transaction binds. If your role is read-only, the same step shows the invoice target and planned invoices without editing controls. See Billing & getting paid.Step 6 — Quote Forms
The Forms step assembles the quote’s document set.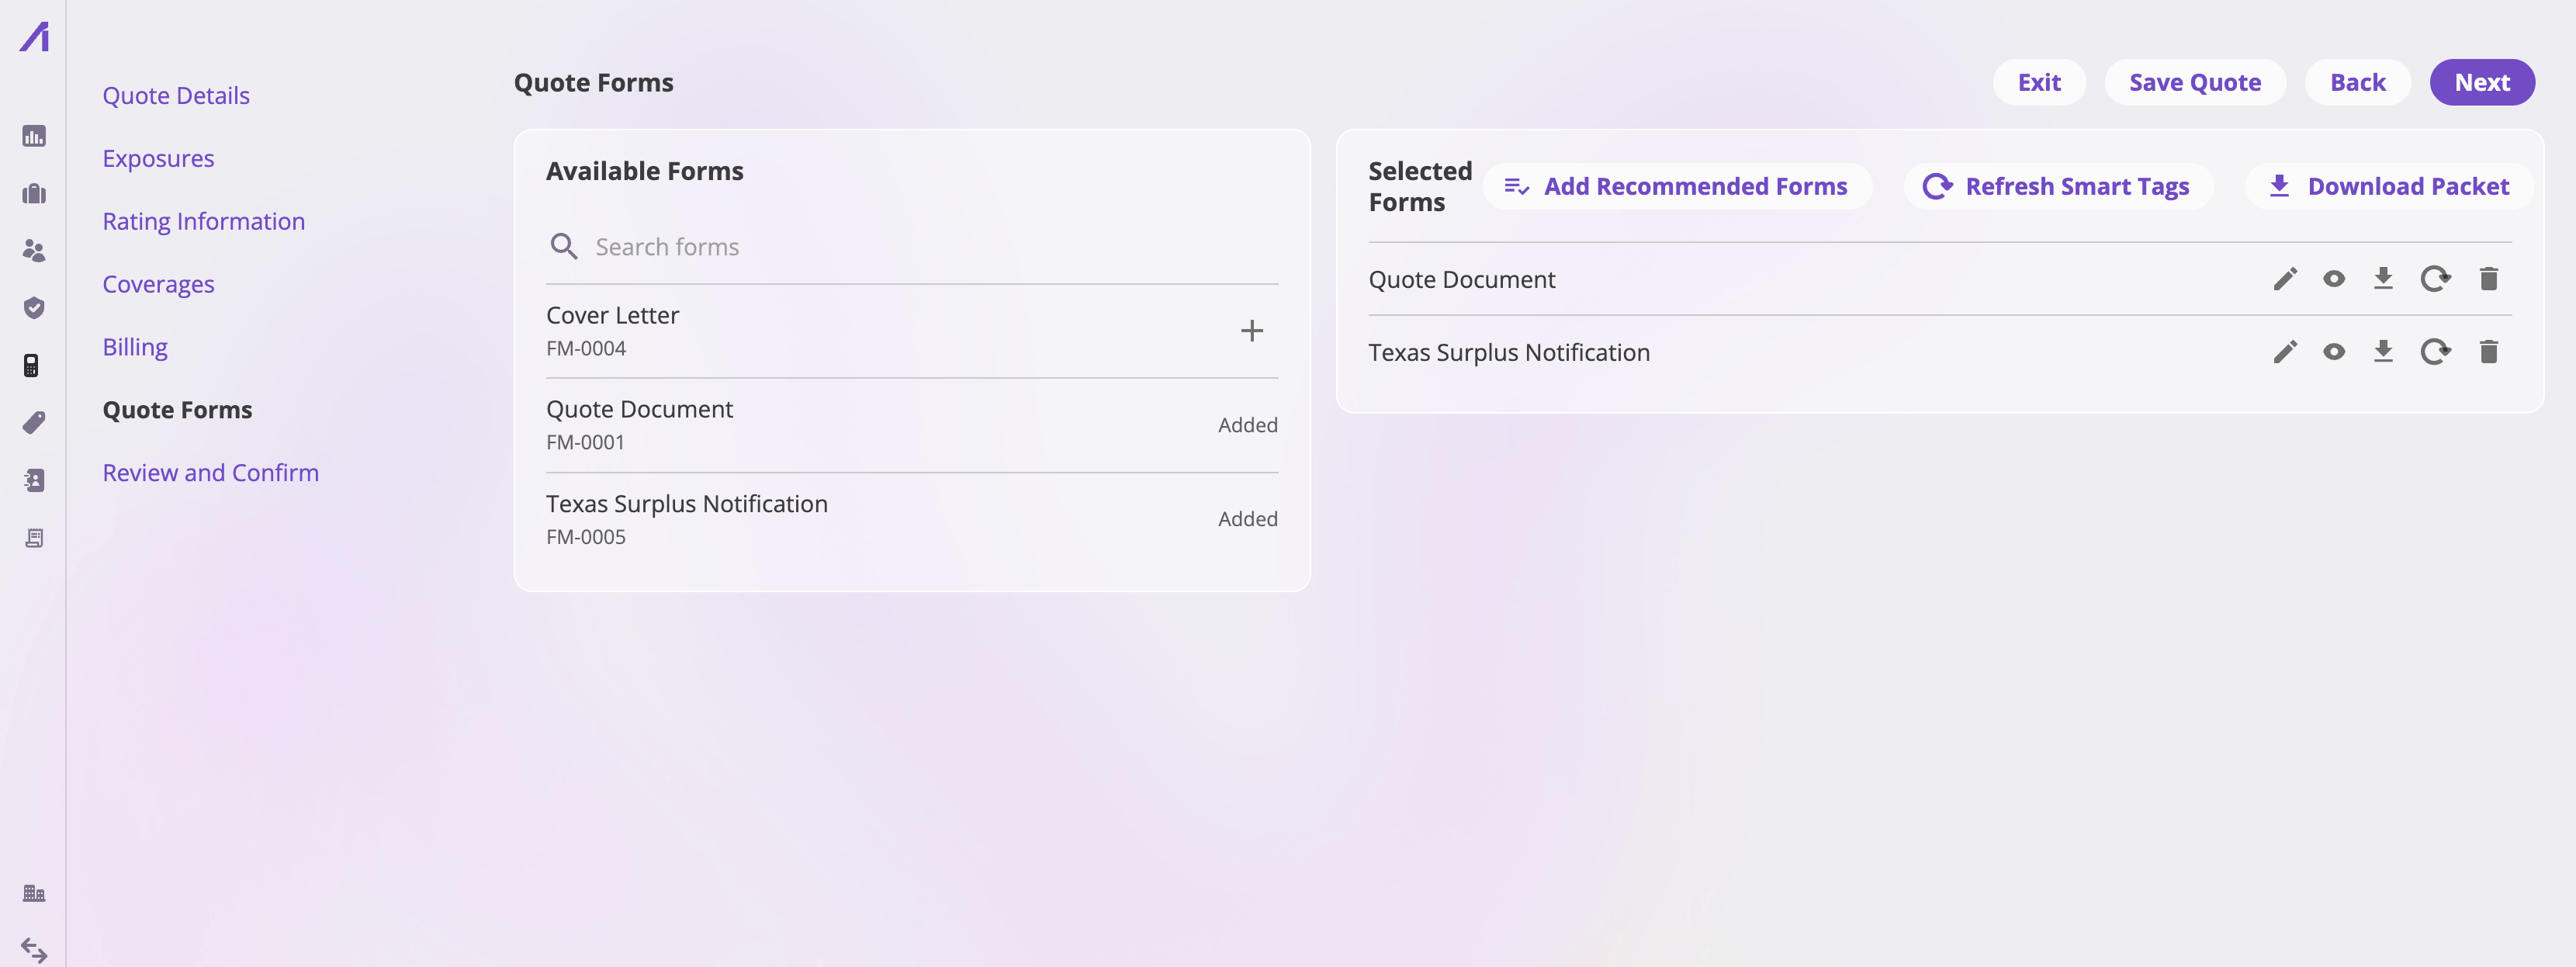
The Forms step — the template picker on the left, the quote's selected forms on the right.
- The picker (left) lists your company’s quote form templates with a search box. Selecting a template generates the form with its smart tags filled from the quote’s current data and adds it to the list. A template already on the quote disappears from the picker, so you can’t add it twice.
- Recommended forms are added for you: the first time the Forms step loads on a new quote, your company’s form rules run against the quote’s answers and stage every matching form automatically. (If you complete a quote without ever visiting the Forms step, the same rules run at save.) Removing a recommended form is respected — it won’t creep back on the next save.
And the list header:
Step 7 — Review and complete
The last step, Review and Confirm, shows the quote for a final read-through.- If required fields are still missing, the finish button is disabled and a View Missing Fields button lists exactly which fields need values, so you can jump back and fill them.
- The finishing control is a split button:
- Complete Quote — saves any outstanding edits and marks the quote complete (status Quote Complete). Completing records the quote’s current form set in an immutable Quote packet on its Forms tab — the set exactly as it went out. The packet, not the working documents, is frozen: a later edit or smart-tag refresh of a working document never changes it. You land on the quote’s detail page, ready to send the packet to the broker or move to binding.
- Bind Quote — saves and jumps straight into the bind flow without the intermediate stop.
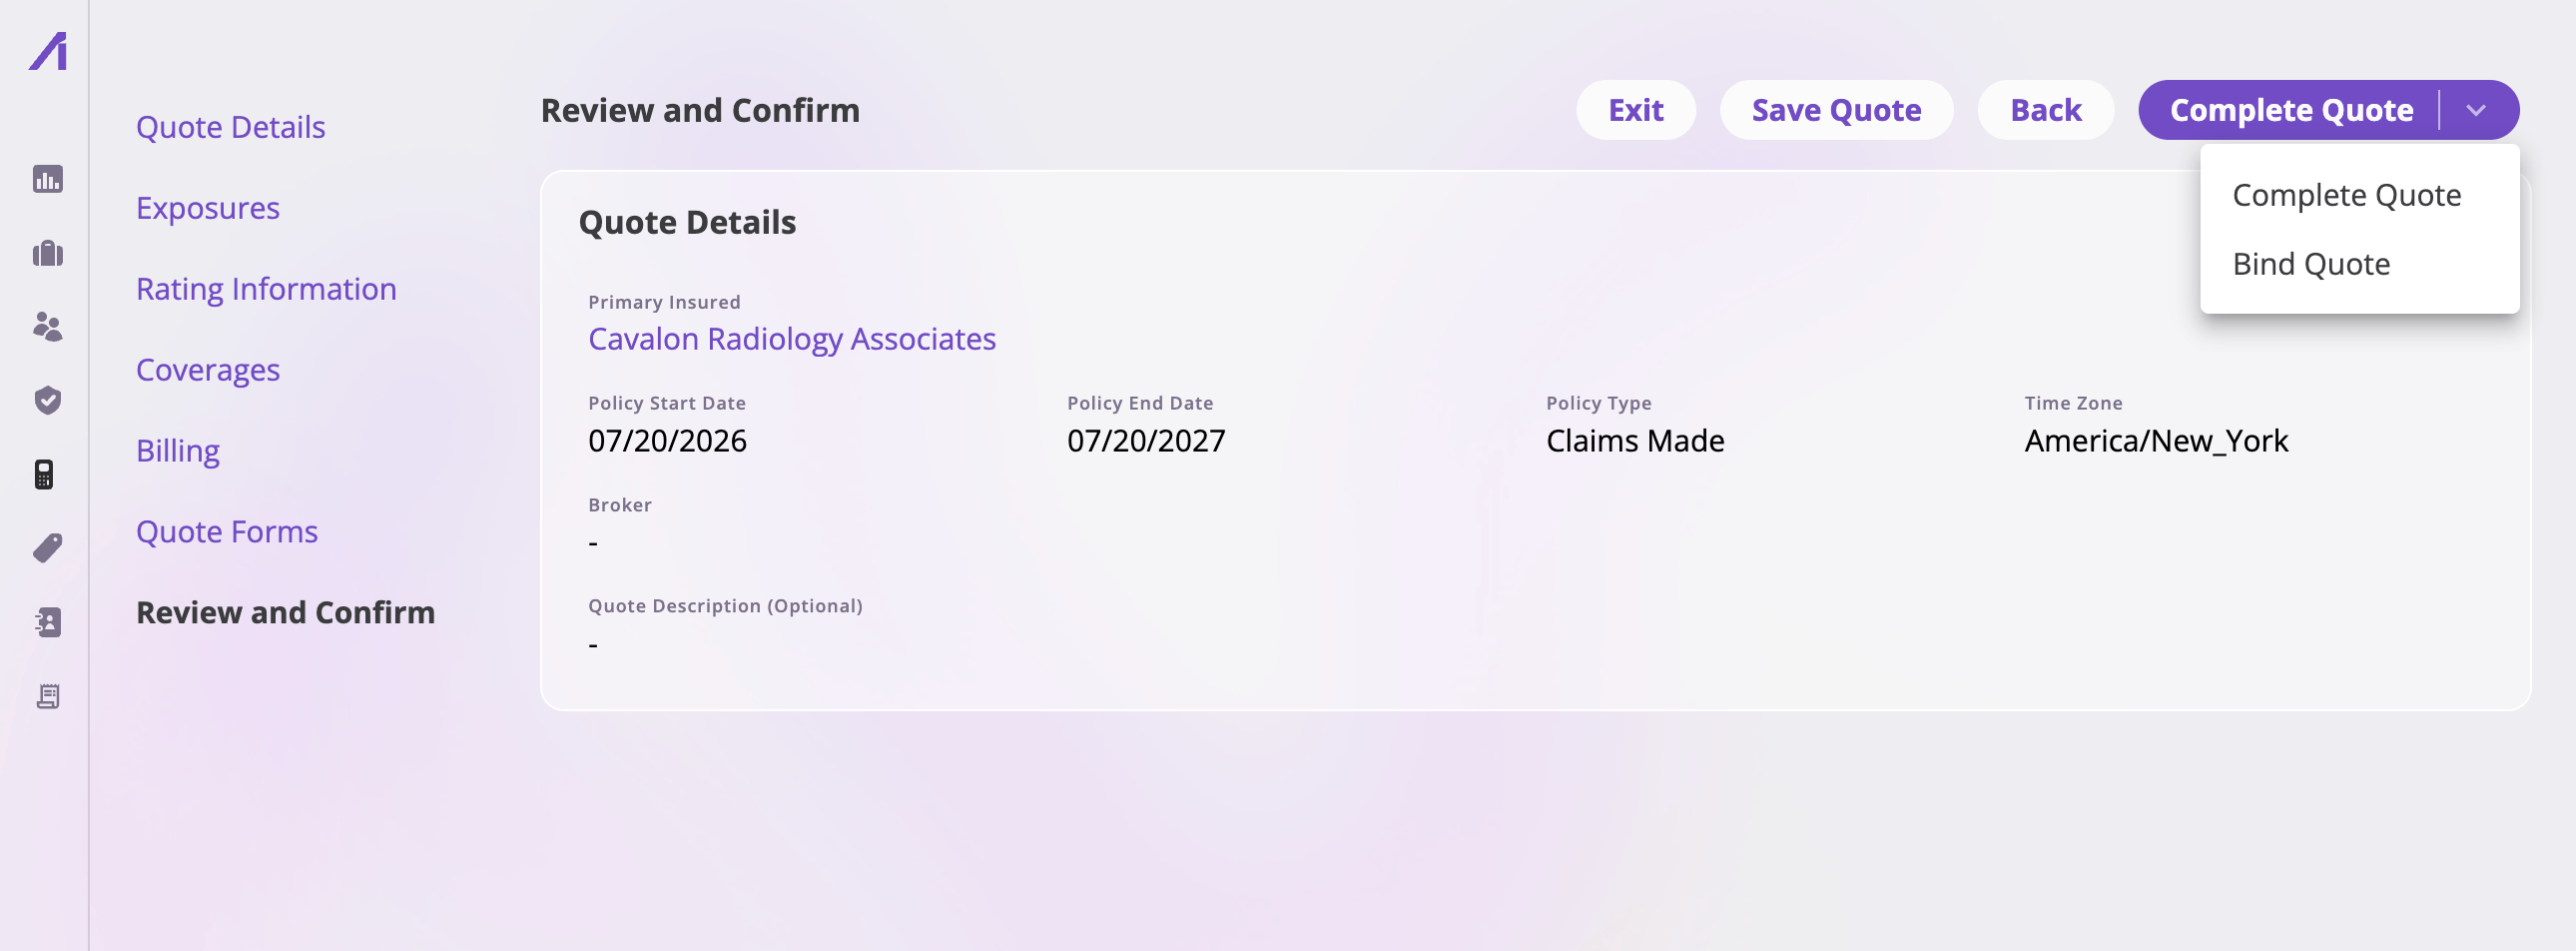
Review and Confirm — the Complete Quote split button offers Complete Quote or Bind Quote.
Entering the bind flow is not a commitment — if you exit it without binding,
the quote stays as it was. Only an actual bind changes the quote’s status to
Bound to Policy.
Quote statuses
A quote moves through these statuses (shown as a tag next to the quote number everywhere the quote appears):After the wizard: the quote detail page
Exiting the wizard (or completing the quote) lands on the quote’s detail page: the quote number and status up top, the quote’s data below, and tabs for Exposures, Forms, and Notes (see the Quotes feature reference). The header adapts to the quote’s status:- Continue Editing — on an In Progress quote, straight back into the wizard.
- Bind Quote — a standout button on a Quote Complete new-business quote (also available in the Actions menu). This is where binding picks up.
- Back to Submission / Go to Policy — jump to the quote’s submission, or (once bound) its policy.
- Actions — the status-appropriate set of Bind Quote, Copy Quote, Cancel Quote, and Delete Quote (Cancel appears on completed quotes; Delete on anything not bound).
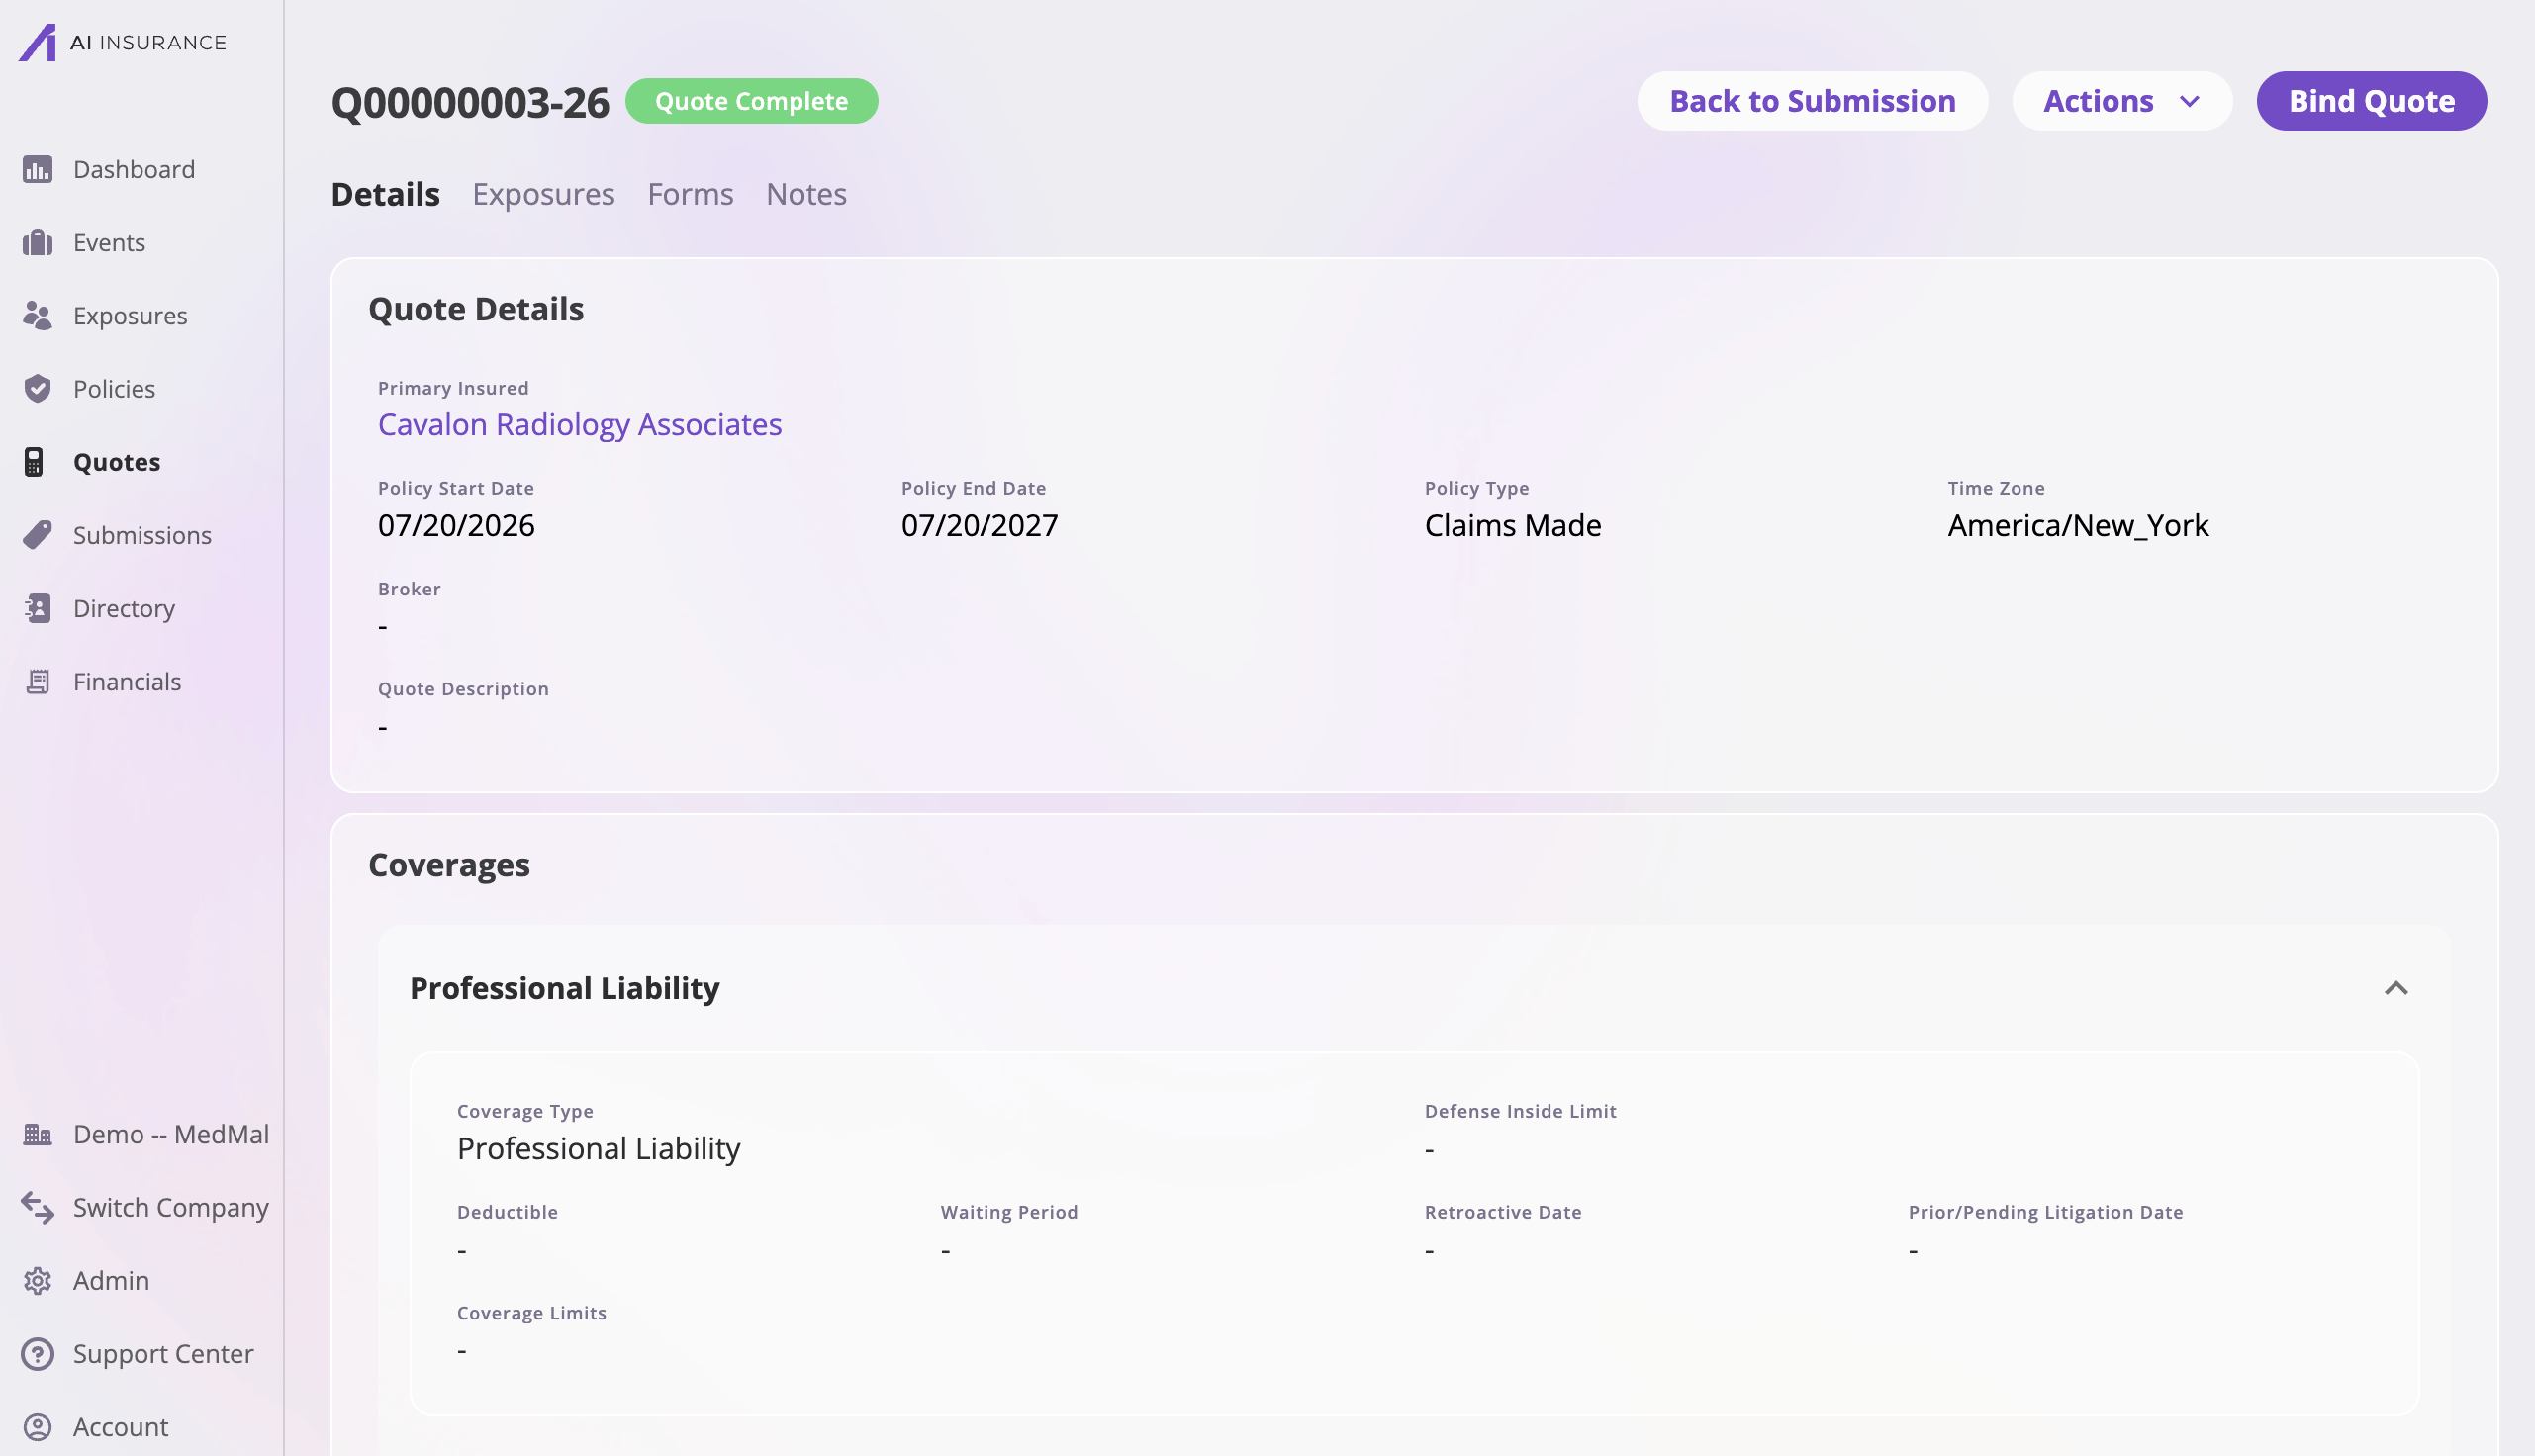
A completed quote — Bind Quote is the callout, with the rest under Actions.