
Any role that can view roles sees this tab — every standard role except
Client Member. Creating, editing, and deleting roles needs the Manage
roles permission, which only the Admin role holds. Other roles see the
message “You can view this role but not change it. Only an Admin can edit
roles.”
How roles work
- Roles belong to your company. Each company has its own set of roles. Changing a role here changes it for this company only, and if you belong to several companies you hold a separate role in each.
- Standard roles are copies of a template. Every company starts with the same eight standard roles, each copied from a template AI Insurance maintains. A standard role you haven’t touched stays In sync with its template and picks up new permissions automatically.
- Custom roles are yours. Create one from scratch or by copying another role, or edit a standard role — the moment you do, it becomes Customized and stops changing on its own. See Keep up with template changes.
- Admin is locked. It always holds every permission, can’t be edited or deleted, and is the only role that can manage roles. See The Admin role.
The Roles tab
The table lists every role in your company: the eight standard roles first, then your custom roles alphabetically.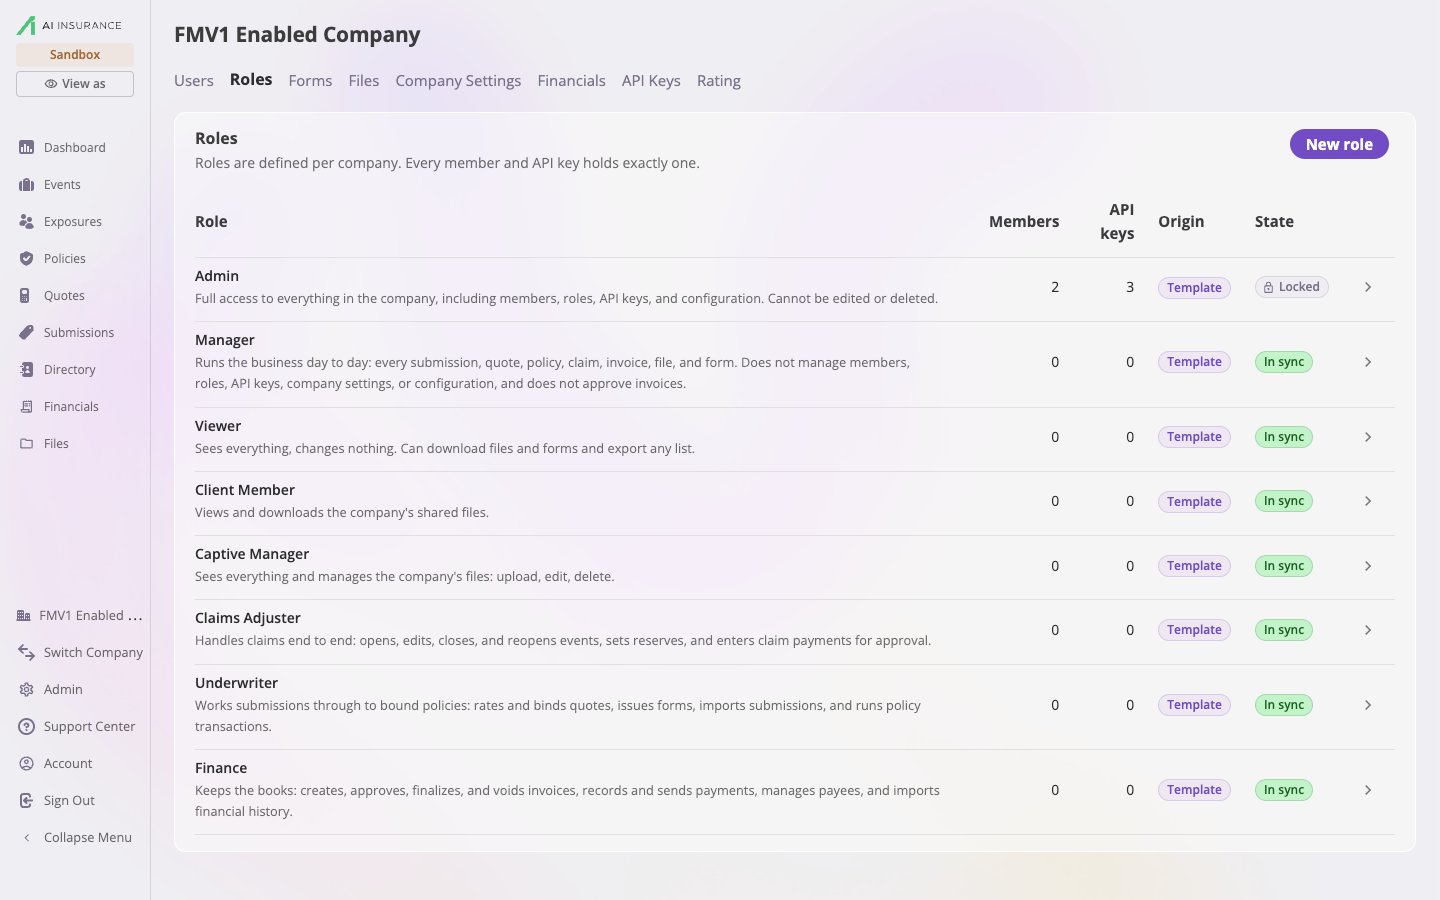
The Roles tab: every role in your company with its origin and state.
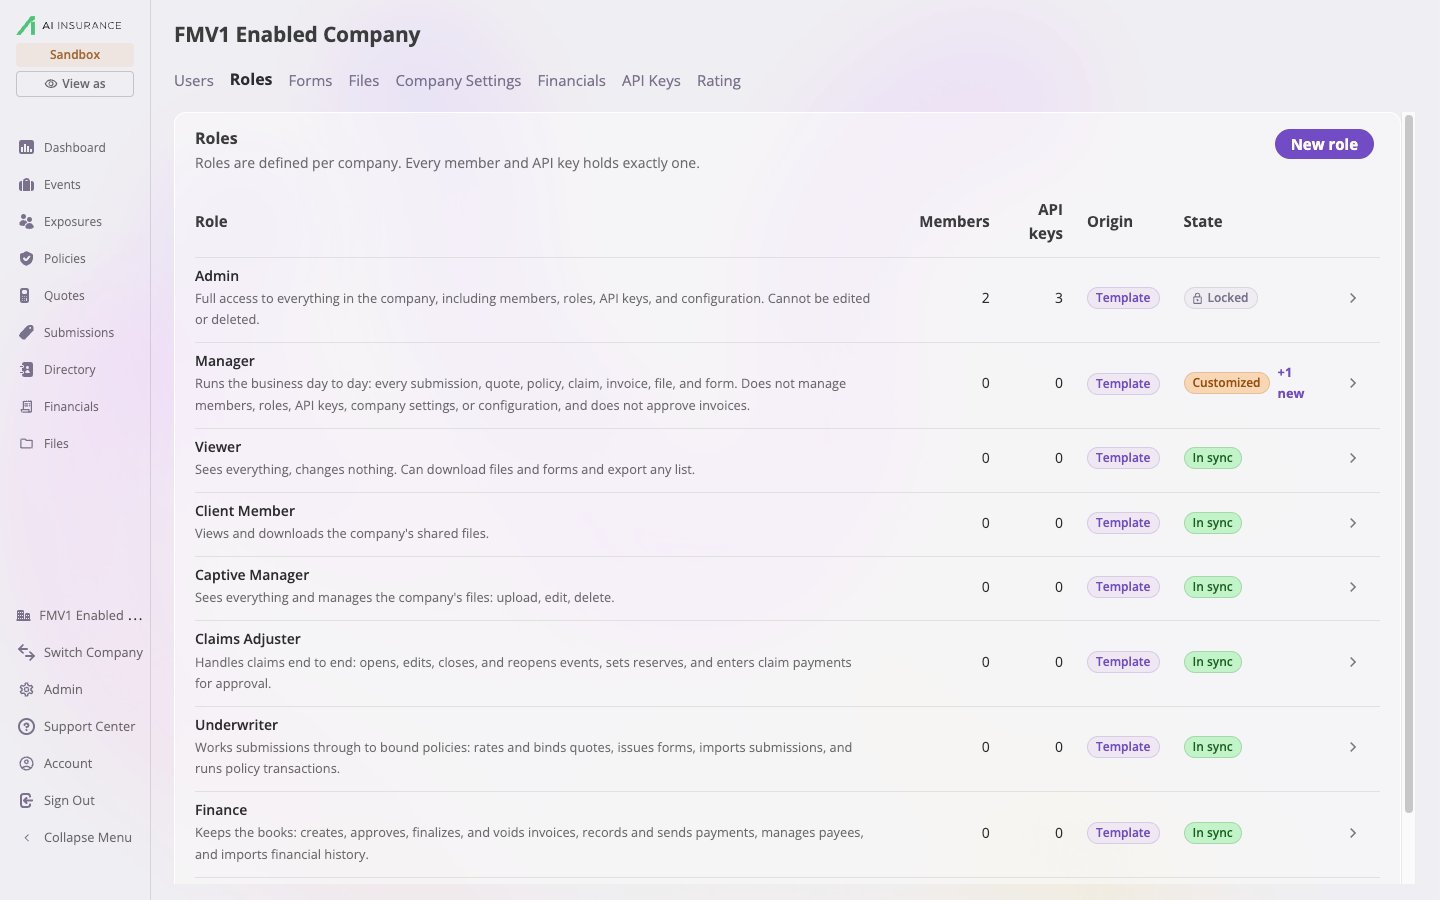
A customized Manager role with one new template permission waiting for review.
The standard roles
Captive Manager, Claims Adjuster, Underwriter, and Finance all build on
Viewer: they can see everything and change only their own area. Open any role
to see its exact permission list.
Create a role
1
Select New role
The New role button sits at the top right of the Roles card.
2
Name it and pick its starting permissions
Enter a Role name and an optional Description — both appear in the
role picker when you invite users, so describe who the role is for.Starting permissions decides what the role begins with: None —
start empty, or a copy of any existing role’s permissions, standard or
custom. Copying Admin is allowed and gives you an ordinary, editable
role with every permission ticked.
3
Select Create role
The role is created as a Custom role and opens in the editor, where you
can adjust its permissions before anyone is assigned to it.
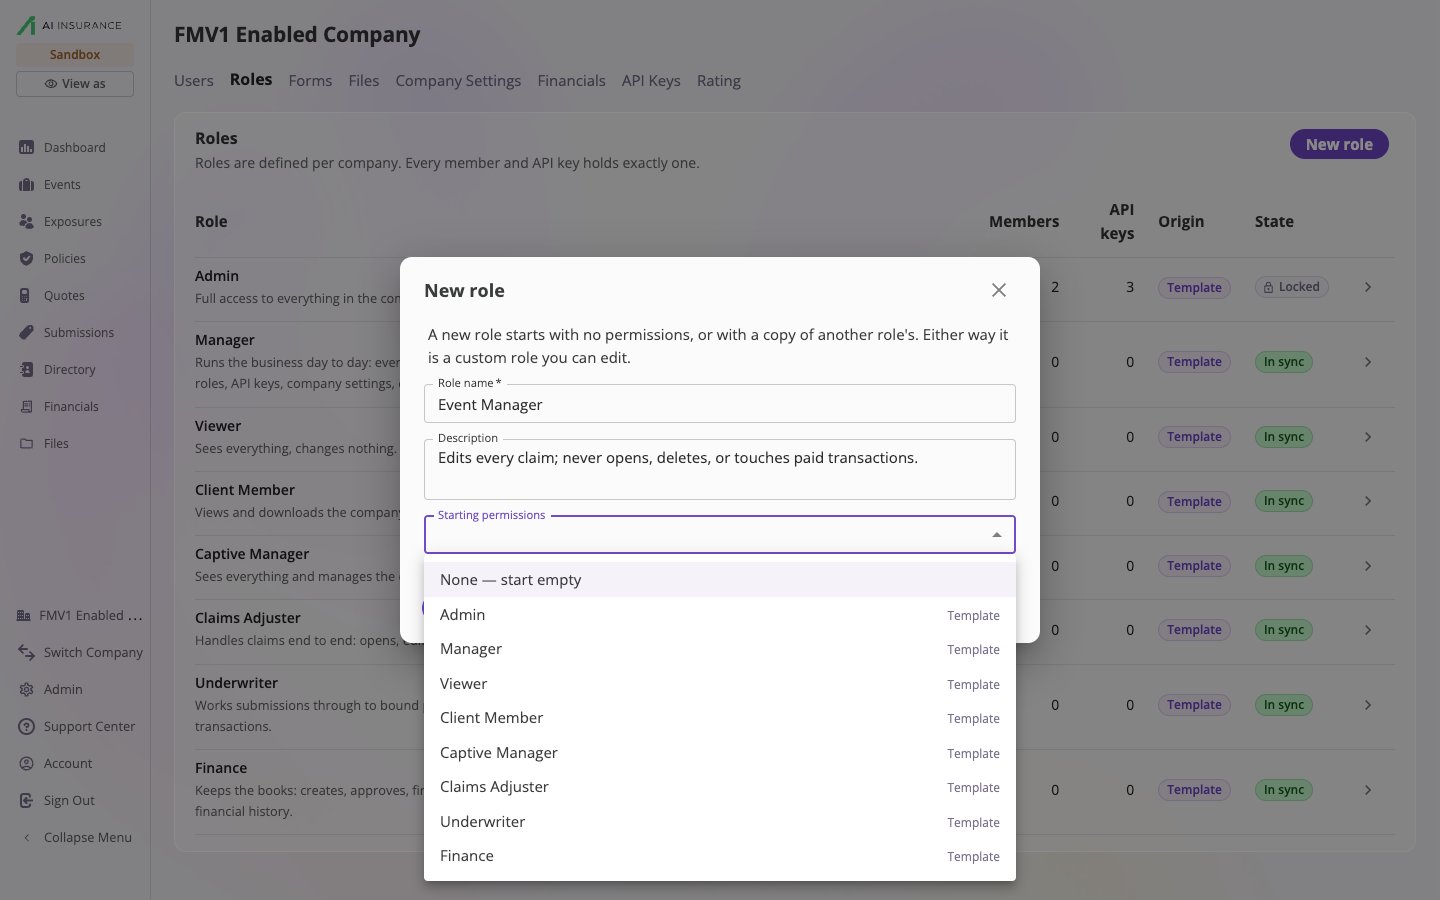
The New role dialog: name, description, and which role's permissions to start from.
Edit a role
Opening a role shows its origin and state, a count of the members and API keys holding it, and three areas: Details, the permission checklist, and Members. The Edit details, Delete role, and Save buttons appear only for roles that can manage roles, and never on Admin.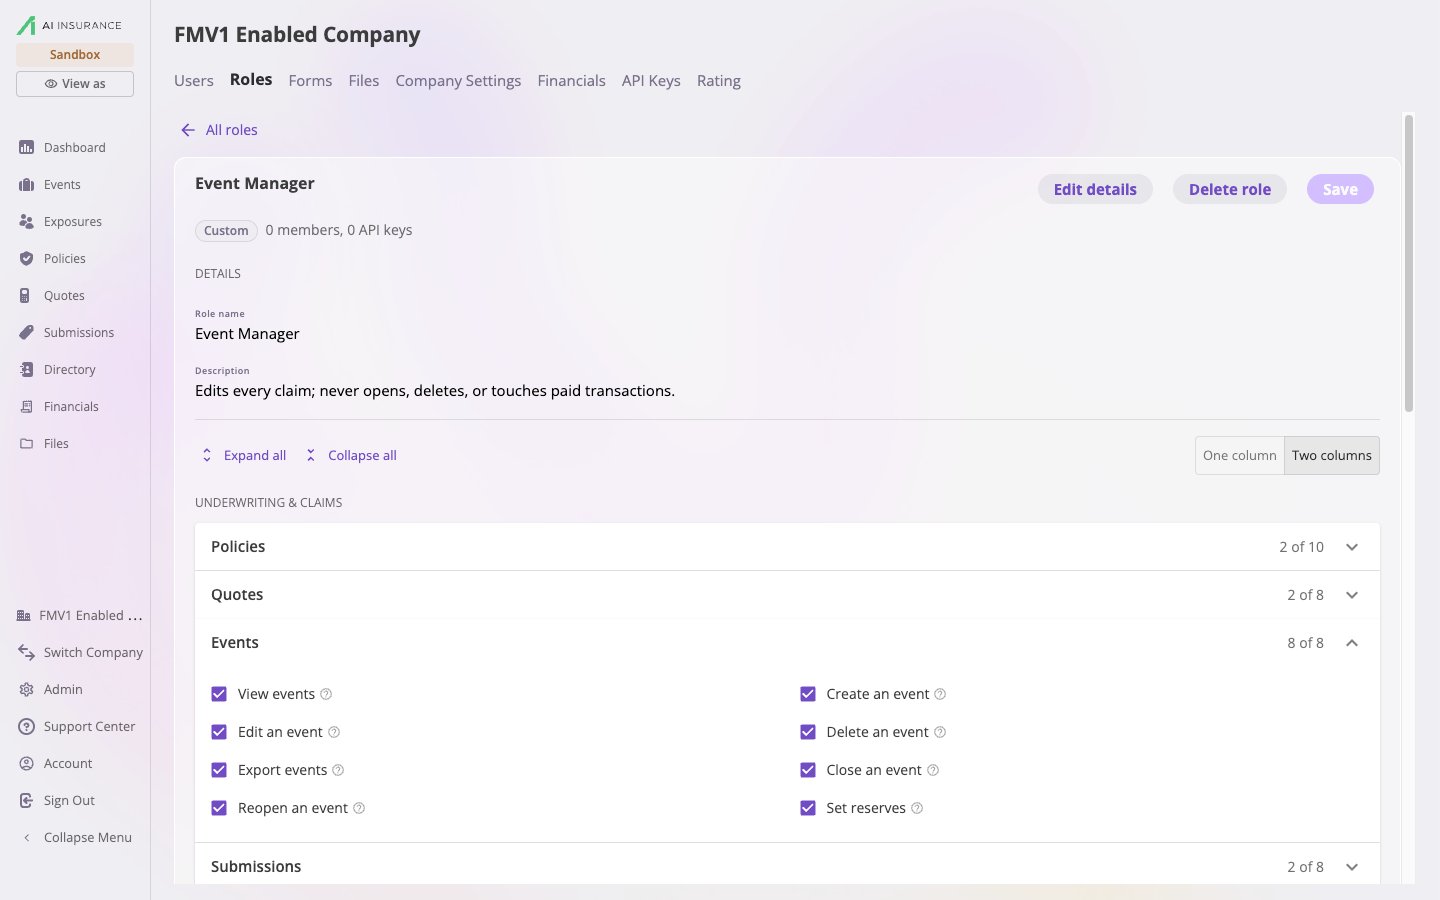
The role editor: details on top, then the permission checklist grouped by section, with the Events group expanded.
Details
The Role name and Description are plain text until you select Edit details, which turns them into fields. Renaming a role doesn’t touch its permissions. While editing details the same button reads Cancel and reverts only the name and description.Permissions
Permissions are grouped into five sections — Underwriting & Claims, Financials, Documents, Collaboration, and Administration — and within each section by the kind of record they act on: Policies, Quotes, Events, Invoices, Files, Members, and so on. Each group’s header shows how many of its permissions the role holds, for example 4 of 9.- Tick or untick a permission to change the draft. Every permission has a ? button that explains what it covers.
- Expand all / Collapse all open or close every group; the One column / Two columns toggle changes the layout. Neither is saved with the role.
- Select Save to apply your changes — the message “Role saved” confirms it. Changes you haven’t saved are discarded when you leave the page.
Restricted fields
If your company’s field configuration marks some fields as restricted, an extra block appears at the bottom of the relevant group under the heading Restricted fields — from this company’s configuration. Each restricted group is a permission like any other, for example Edit claim dates, and the fields it covers are listed beneath it as chips: a closed padlock while the role lacks the permission, an open one once it’s ticked. A role without a restricted-field permission can still see those fields — it just can’t change them. This is how you make a handful of fields read-only for most of your team while a few people keep editing them.Editing a standard role for the first time
The first time you change a standard role that is still In sync — a rename counts — you’re asked to confirm:“<Role> still follows the <Template> template and receives new permissions automatically. Once you edit it, it becomes a customized role: new template permissions arrive as a notice for you to accept or dismiss instead. You only see this once.”
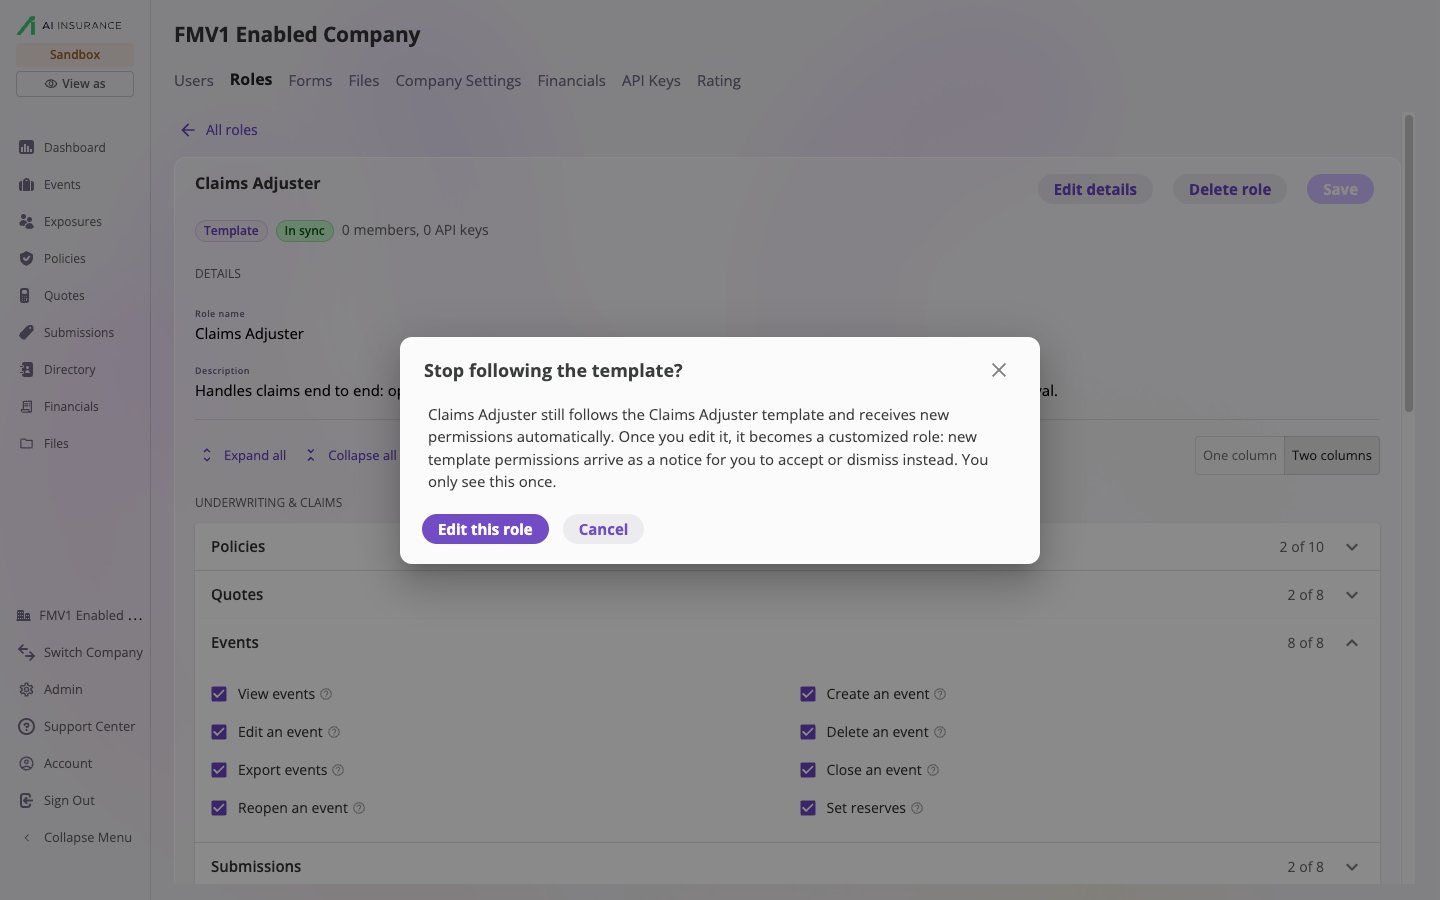
The one-time confirmation when you first edit a standard role.
Keep up with template changes
AI Insurance occasionally adds permissions to the templates, usually because a new feature shipped with a permission of its own. What happens next depends on the role’s state:- In sync roles receive the new permissions automatically. Nothing to do.
- Customized roles don’t change on their own. Instead the Roles table shows +N new beside the role, and opening it shows a notice: “N new permissions available. The <Template> template gained these since <Role> was last synced,” followed by the list. Select Accept all to grant them or Dismiss to leave the role as it is. To take only some, select Accept all, untick the ones you don’t want, and Save.
- Custom roles that were never based on a template get no notices; you grant new permissions by hand if you want them.
- Admin always holds every permission, including new ones.
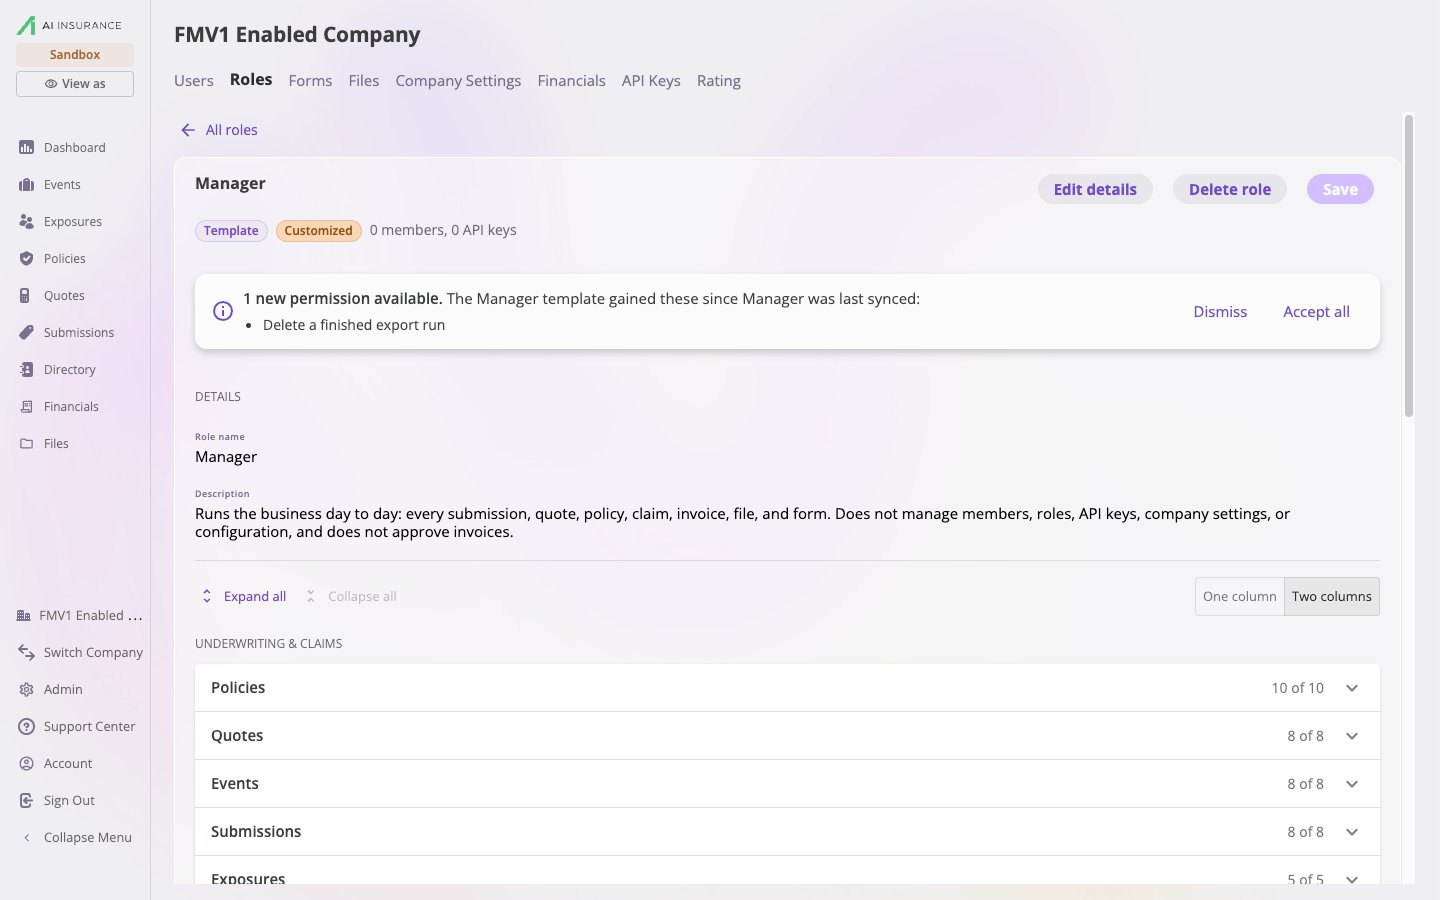
A customized role's notice listing the permissions its template gained, with Dismiss and Accept all.
Move members between roles
The Members section at the bottom of a role lists everyone who holds it, with their name and email. To move someone onto this role, pick them from the Add members dropdown — each option shows the person and the role they hold now. The change applies immediately and you’ll see “<name> now holds <Role>”. Because every member holds exactly one role, there is no “remove from role” action: you move a person by assigning them another role, here or from the Users tab. You can’t change your own role from either place.Delete a role
Select Delete role in the role editor. If nobody holds the role it is simply removed. If members or API keys hold it, the dialog asks you to pick the role they Move them to — the move and the delete happen together, so no one is ever left without a role. Deleting a role cannot be undone.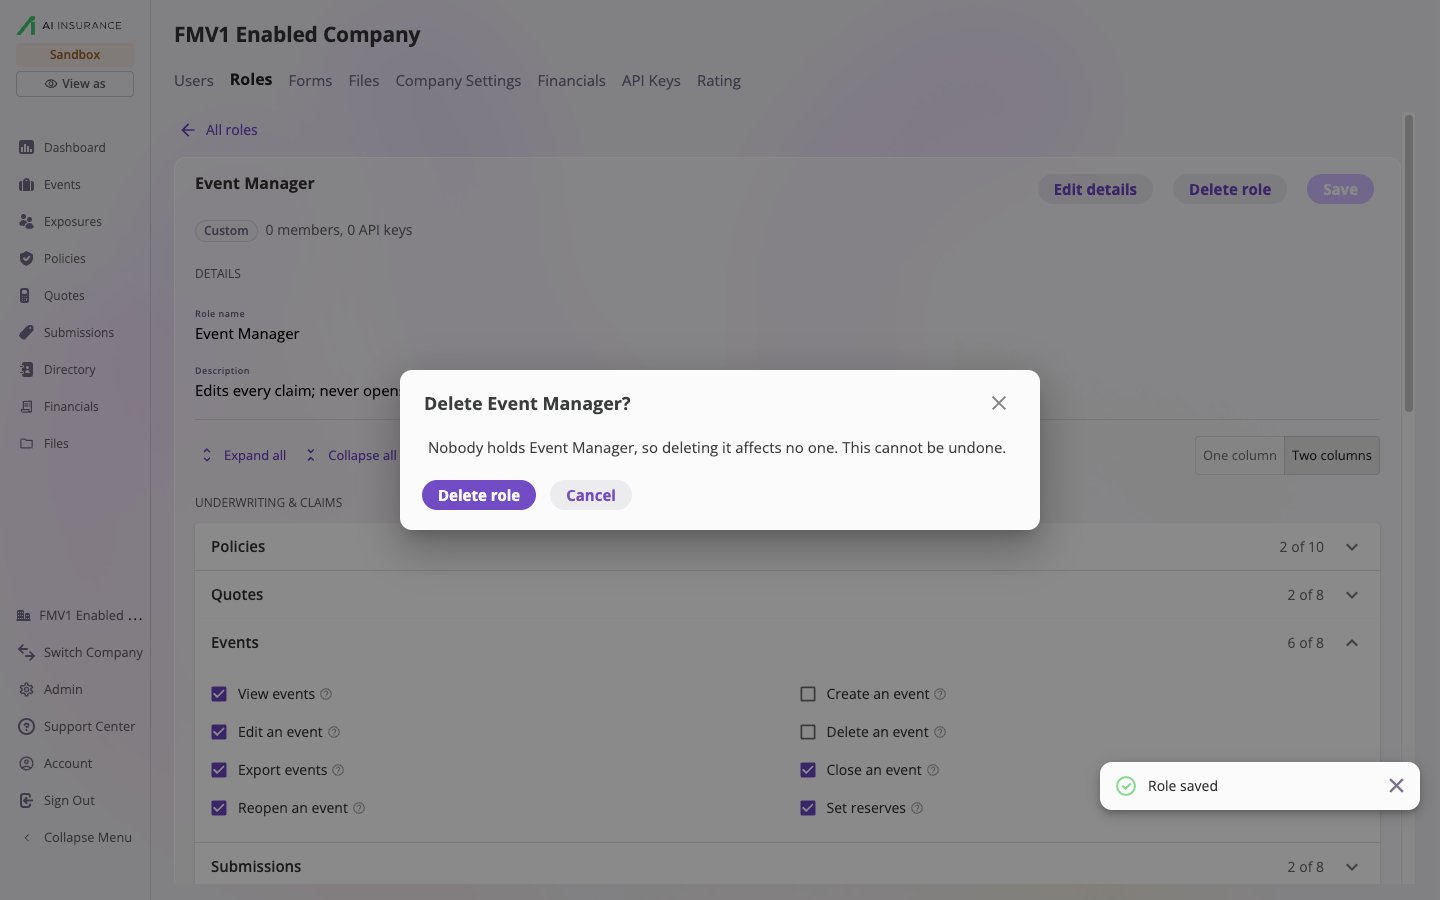
Deleting a role nobody holds; a held role asks where its members and keys move to.
The Admin role
Admin is your company’s locked role:- It always holds every permission your company can use, including permissions added later and any restricted-field permissions from your configuration.
- It cannot be edited or deleted. Opening it shows “Admin always holds every permission the company can use, so there is nothing to change here. Build a narrower role instead.”
- It is the only role that can create, edit, and delete roles. Of the standard roles it is also the only one that can invite users, change their roles, and remove them, though a custom role can be given those permissions.
- You can’t move the last Admin in your company to another role — assign another Admin first. This keeps you from locking everyone out of role and user management.