
The Forms tab is only visible to roles that can upload form templates — of
the standard roles, Admin and Manager. A custom role can be given
the Form templates permissions too; see
Roles & permissions.
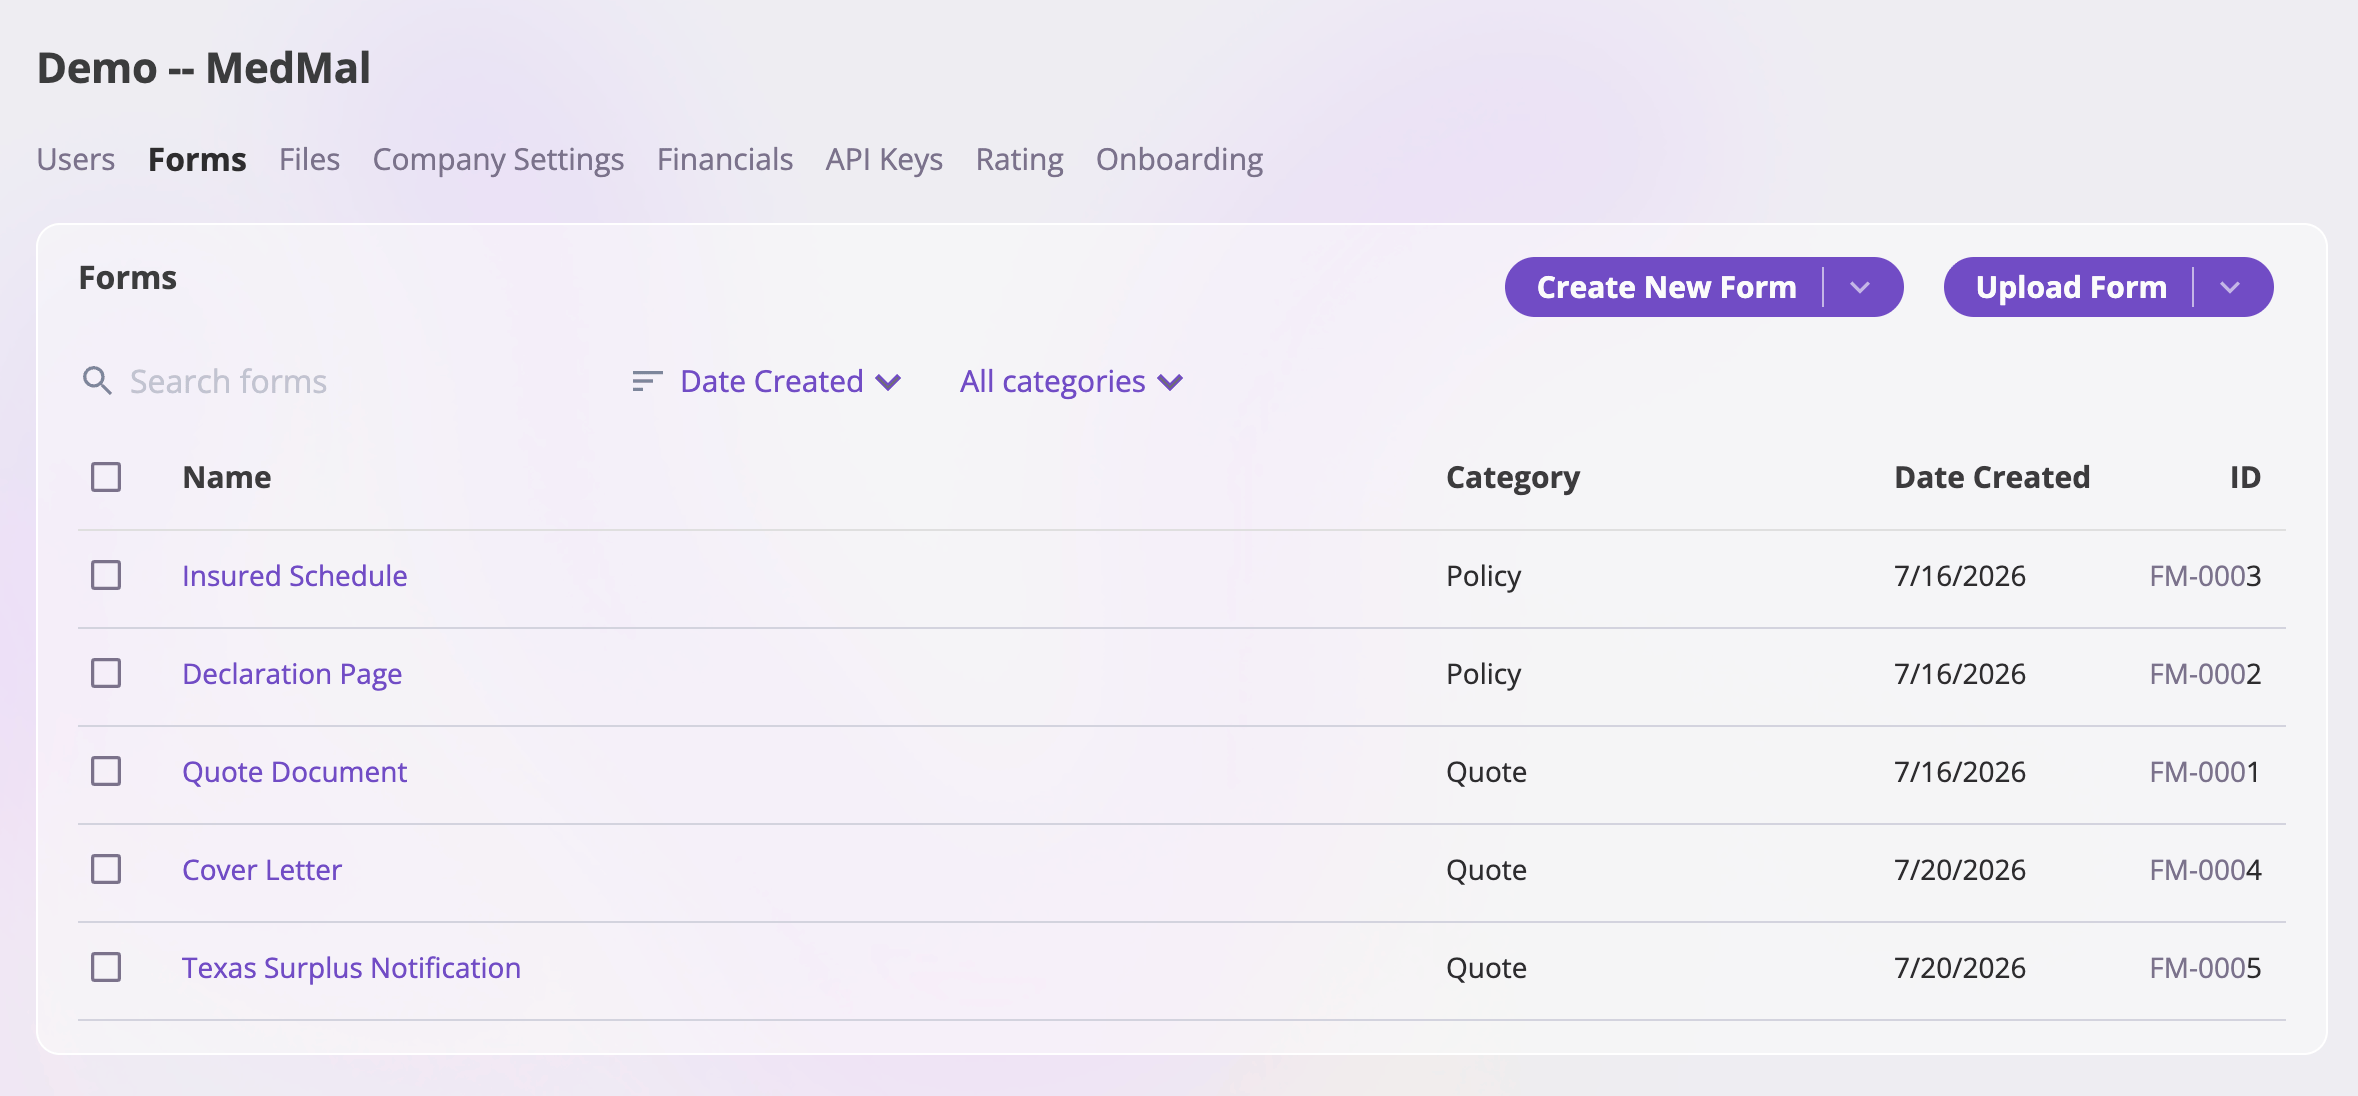
The Forms tab: your template library, with search, sort, a category filter, and split buttons to create or upload per category.
Form categories
Every template belongs to a category, chosen when you create or upload it. The category decides where the form can be generated and which entity’s data its smart tags draw from:
Quote and Policy templates are also the ones auto-added
forms rules can reference. A template whose
category shows as Unknown has no data scope: it can’t be generated against
an entity and the editor offers no smart tags — assign it a real category in
the editor.
The template list
The list shows every template with its Name, Category, Date Created, and ID — theFM-XXXX form number assigned automatically in
sequence when the template is created. That ID is how other configuration
(like auto-added-forms rules) refers to the template.
- Search filters by name or form number as you type.
- Sort by Alphabetical or Date Created.
- The category dropdown filters to one category, or All categories.
- Selecting a template’s name opens it: an editable document opens in the document editor; a PDF template opens in a preview instead (PDFs aren’t editable — see PDF vs. editable templates).
- Checkboxes + Delete: tick one or more rows (or the header checkbox for all) and a Delete button appears at the top of the card. Deleting removes the templates from the library; forms already generated from them are not affected.
Schedule of Forms entries
Select Edit schedule entry beside a template to set:- Schedule name: the name printed by the Table of Contents smart tag. Leave it blank to use the generated form’s name.
- Edition date: a printed identifier, kept exactly as entered (for example,
11.01.2021). Leave it blank to omit the edition. - Omit from Schedule of Forms: exclude the entry from that tag. The document still belongs to the packet.
Upload a template
Upload Form is a split button: pick the category (Claim/Incident, Quote, or Policy) and a file picker opens. You can upload:- Word documents (
.docx,.doc) — including templates exported from other systems. - Rich text and OpenDocument files (
.rtf,.odt) — converted to an editable document automatically. - PDFs (
.pdf) — kept as-is, as static documents.
PDF vs. editable templates
The library holds two kinds of template, and the UI treats them differently:
Use a PDF for fixed collateral that never changes per entity (a brochure, a
state notice); use an editable template for anything that should carry the
quote’s, policy’s, or claim’s data.
Create a template from scratch
Create New Form is the same split button pattern: pick a category and a blank document opens directly in the document editor. If you exit without saving a brand-new document, it’s discarded rather than left as an empty template.The document editor
Editing a template opens the built-in document editor full-screen: a word-processor canvas with a toolbar for formatting, plus AI Insurance’s own controls along the top.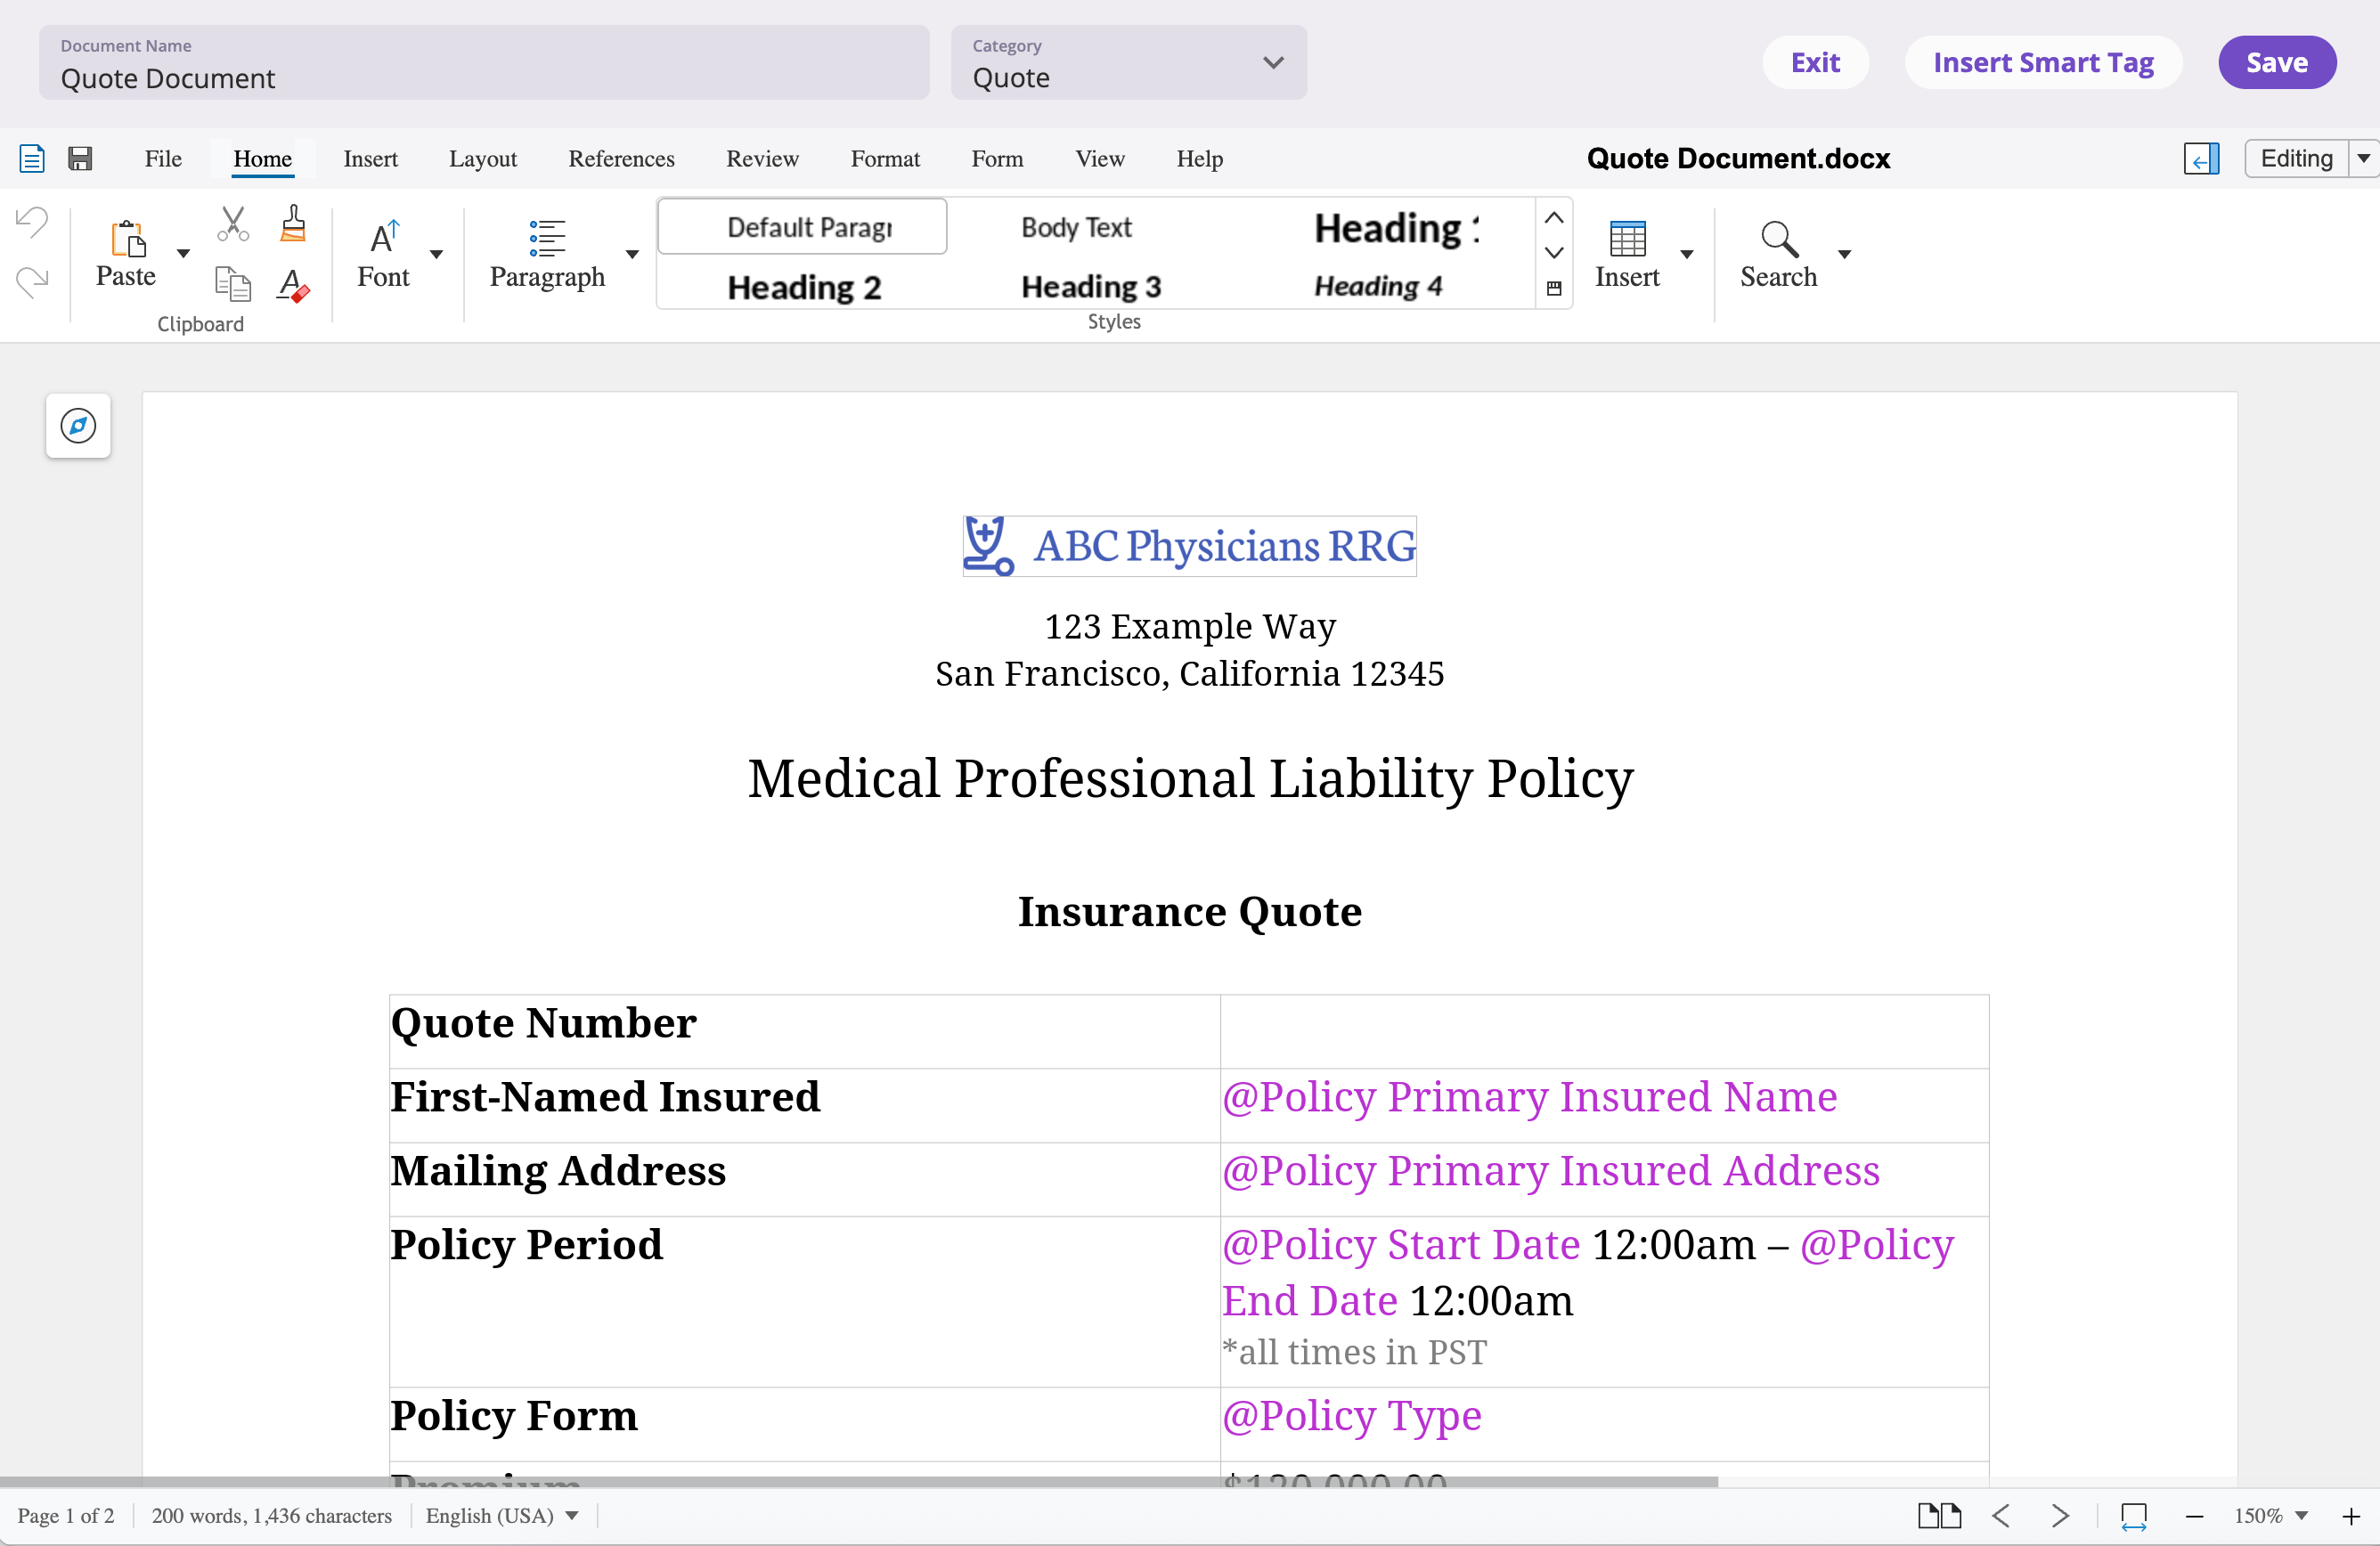
The document editor: Document Name and Category on the left; Exit, Insert Smart Tag, and Save on the right.
Saving a template creates a new saved version of it. Documents that were
already generated keep the exact version of the template they were generated
from — your edits affect future generations only, so an in-flight quote’s
paperwork never changes underneath it.
Smart tags
Smart tags are placeholders that fill with entity data when a form is generated — the insured’s name, an address, a premium, a coverage table. Which tags are available depends on the template’s category and on how your company is configured: your configured fields drive the tag list, alongside built-in tags (like the current date). Select Insert Smart Tag to open the sidebar: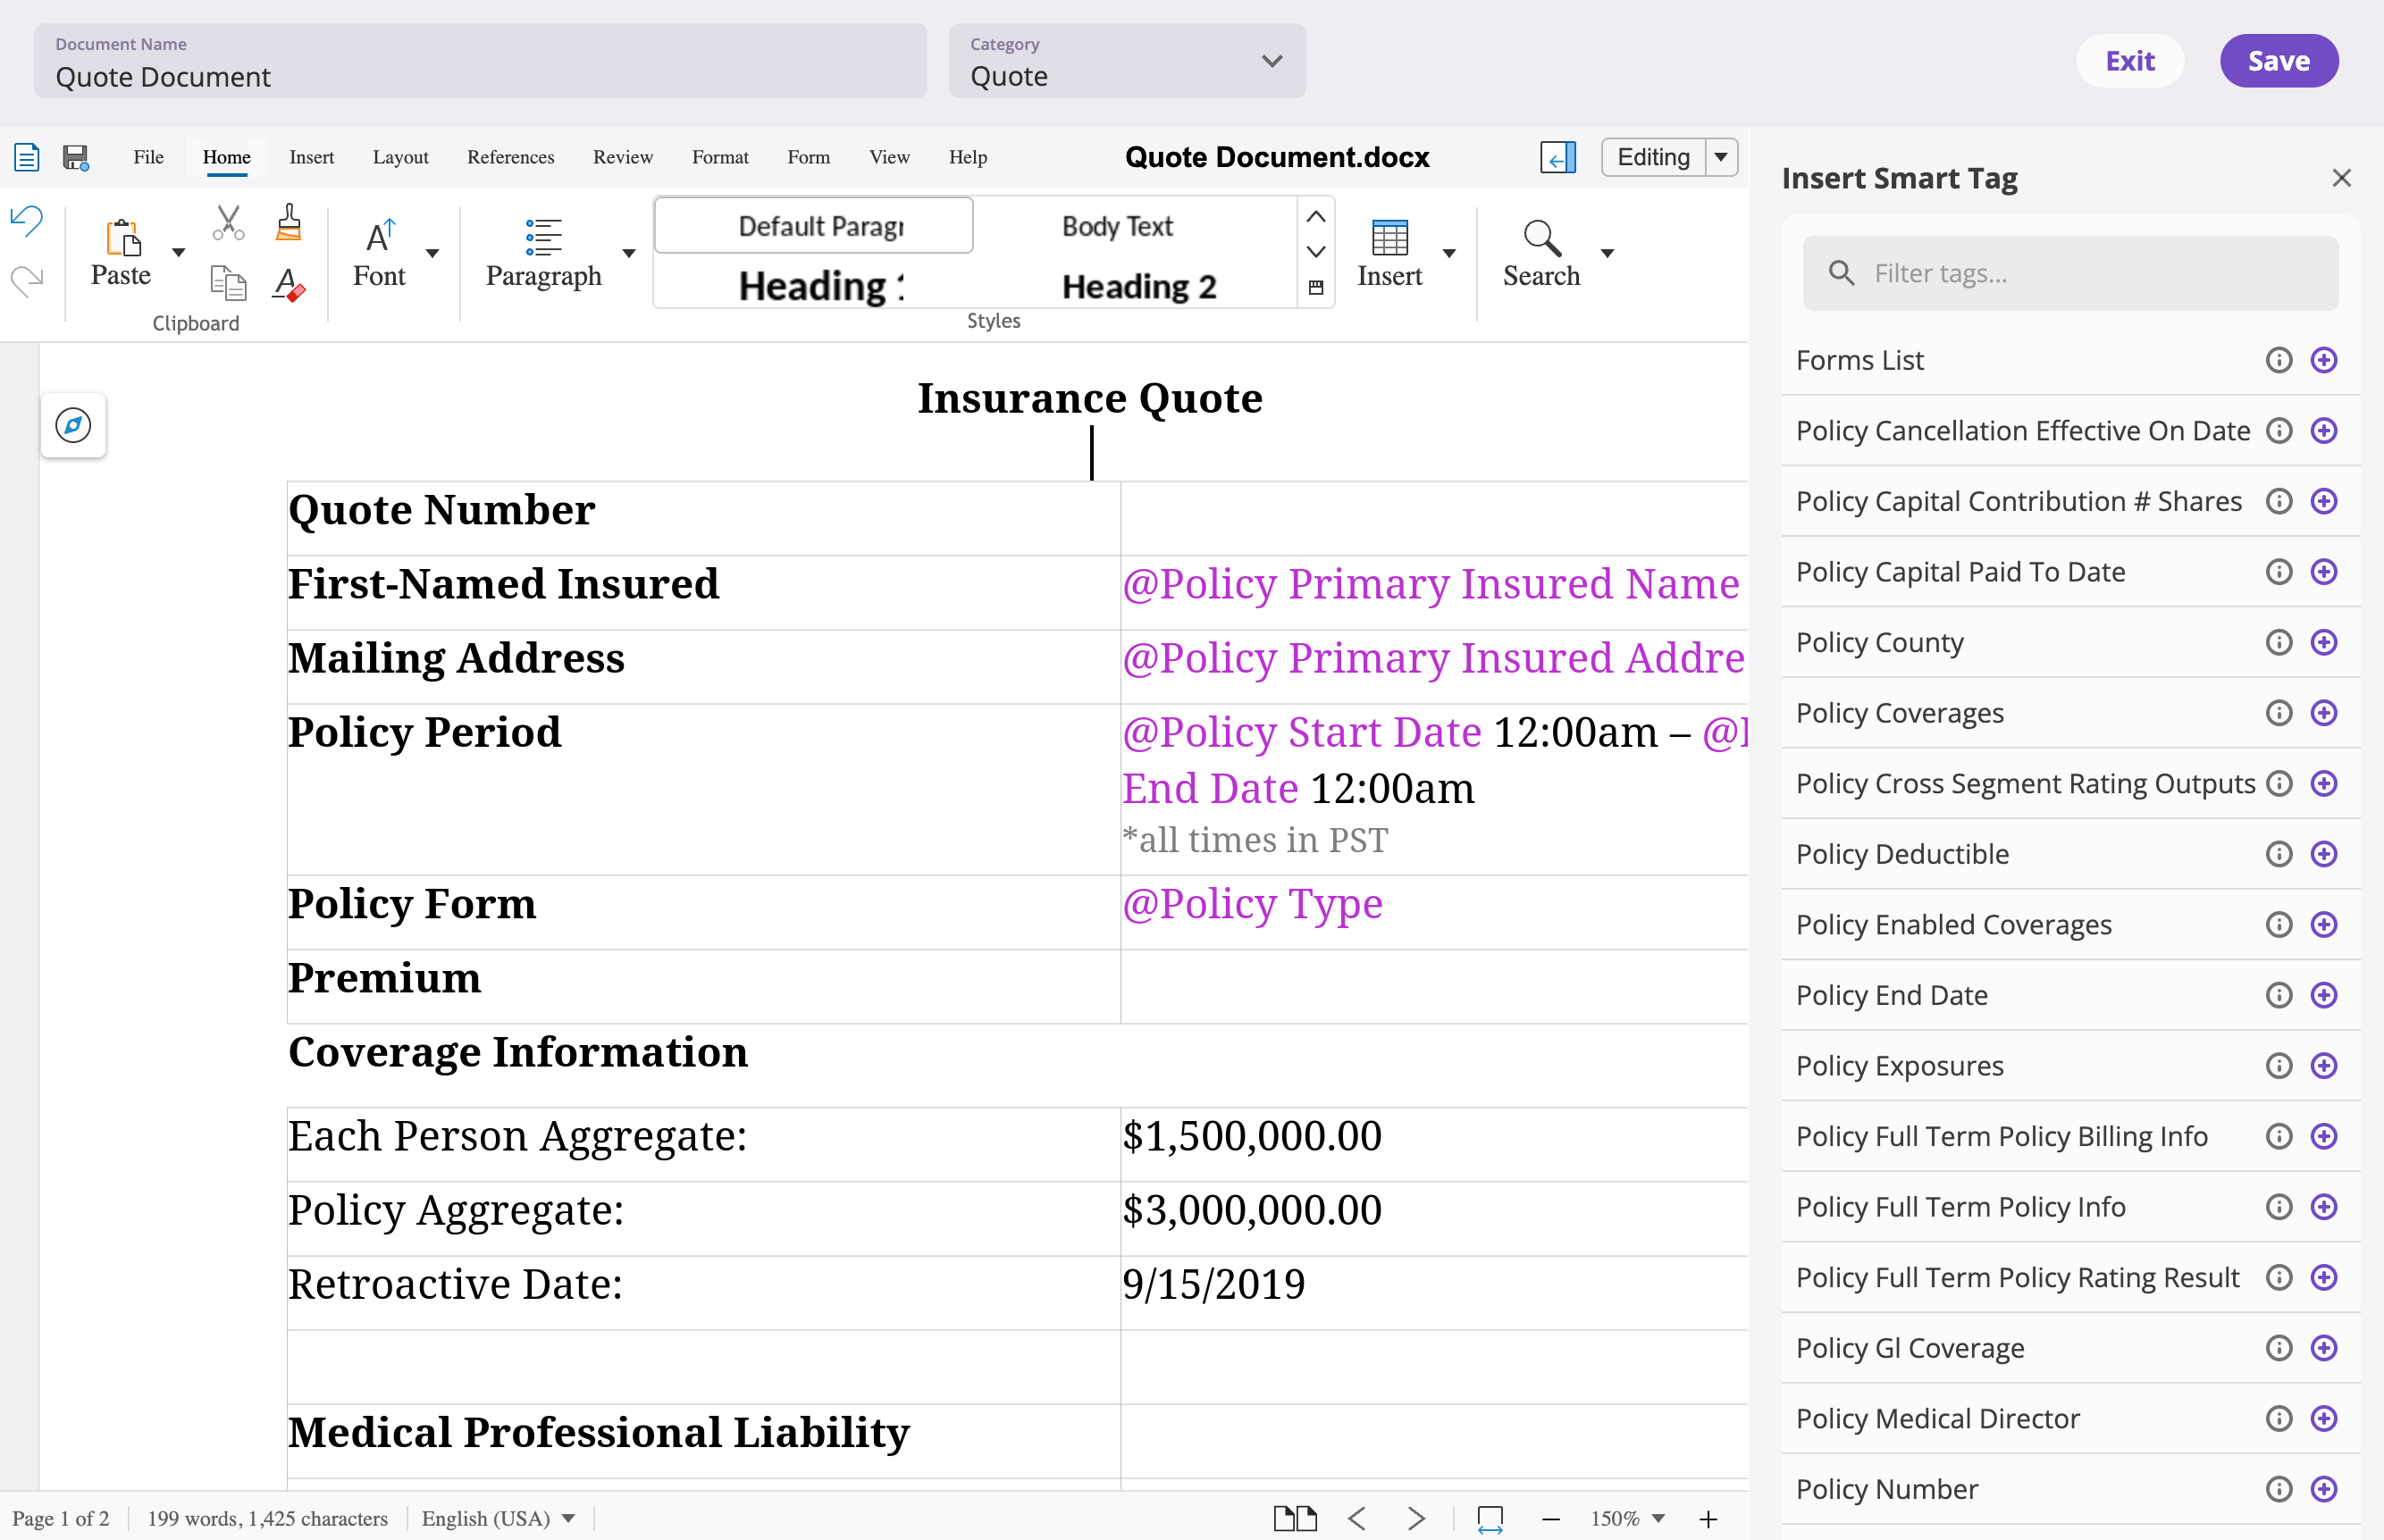
The Insert Smart Tag sidebar: filter the list, then select a tag to place it at the cursor.
- Filter tags… narrows the list by name.
- Each row shows the tag’s display name and a description of what it resolves to.
- Selecting a tag inserts it at the cursor in the document. In the
template editor there’s no entity to pull data from yet, so the tag appears
as a highlighted
@Display Nameplaceholder; when a form is generated from the template, every tag is replaced with the entity’s current value.