
The Events list
Events live under Events in the sidebar. The list shows every claim and incident with configurable columns — by default the event’s name, type (claim or incident), reference ID, status (Open/Closed), and created/updated dates — plus filters, sorting, and saved views like the app’s other list pages.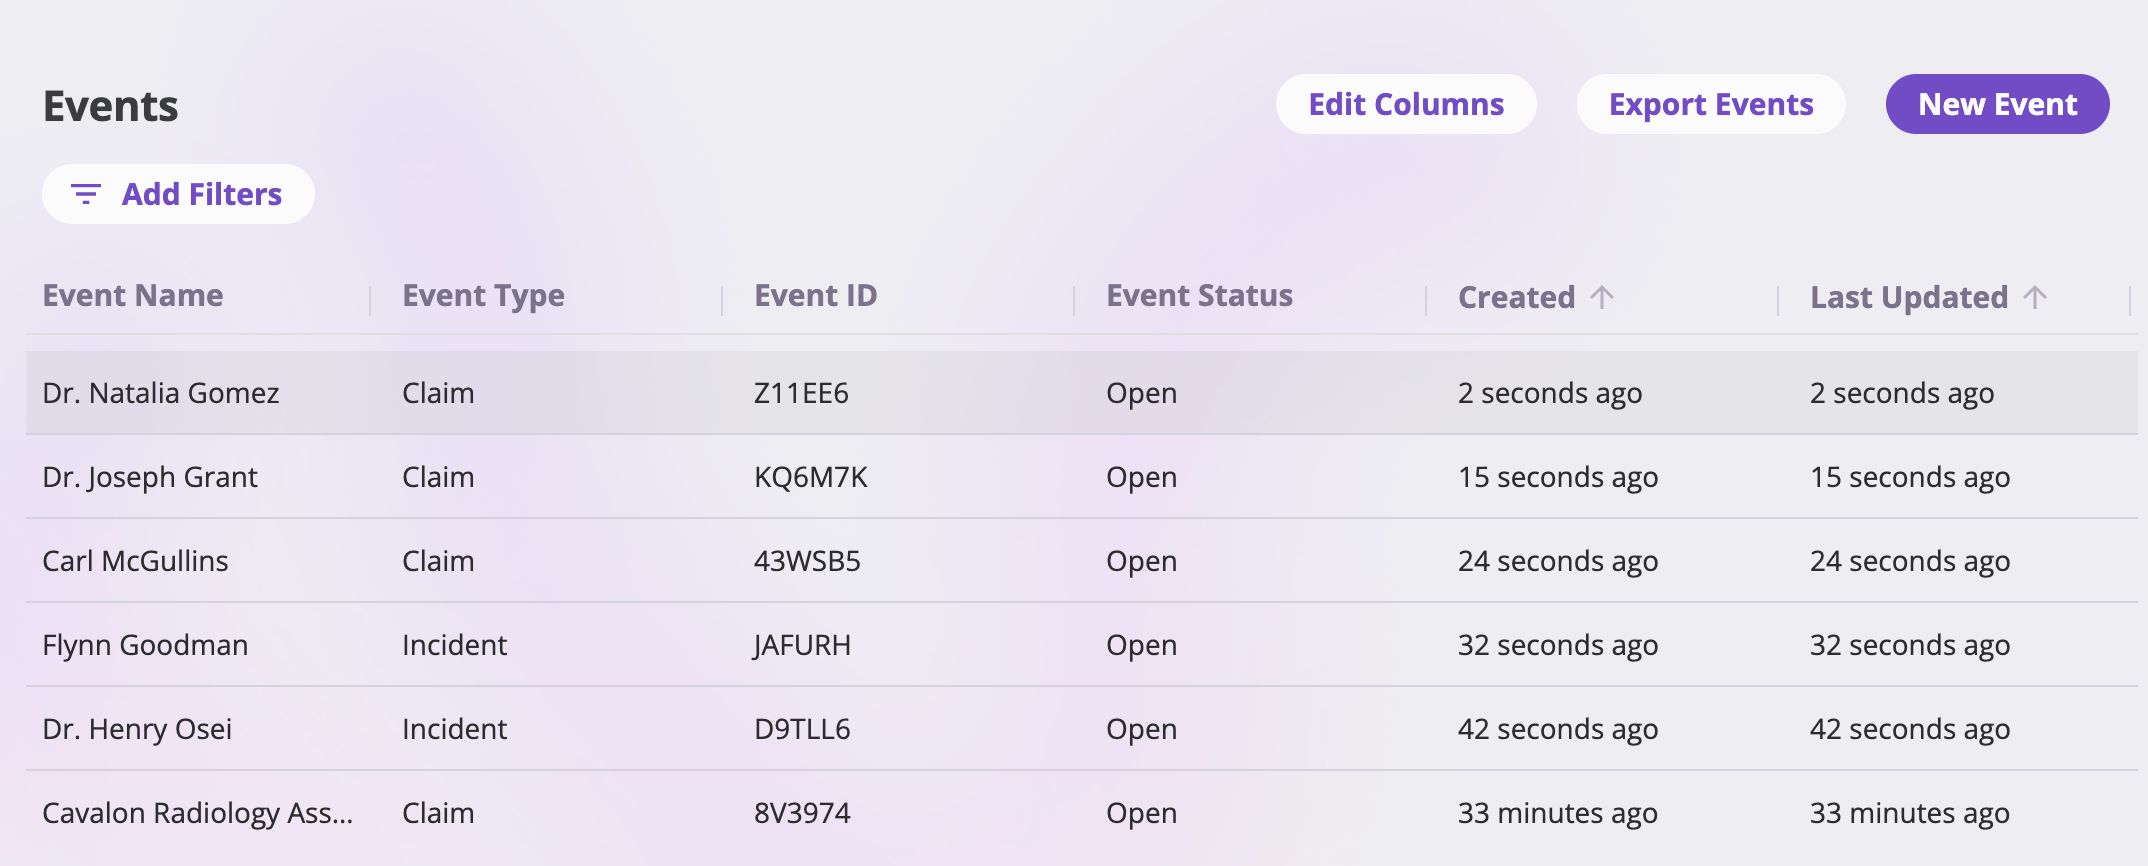
The Events list — every claim and incident, with Edit Columns, Export Events, and New Event in the toolbar.
Clicking any row opens that event’s workspace.
Creating an event
Select New Event on the Events list to open the Create New Event page. The fields on this page are defined by your company’s configuration, so what you’re asked depends on how your company is configured. Typical creation fields include:- Event type — whether this is a claim or an incident. Don’t agonize over the choice: you can convert later.
- Coverage type — which coverage the event falls under.
- A description of what happened.
- An assignee — the user who owns the event.
- The exposures involved — the insured people, vehicles, locations, or other exposures the event references.
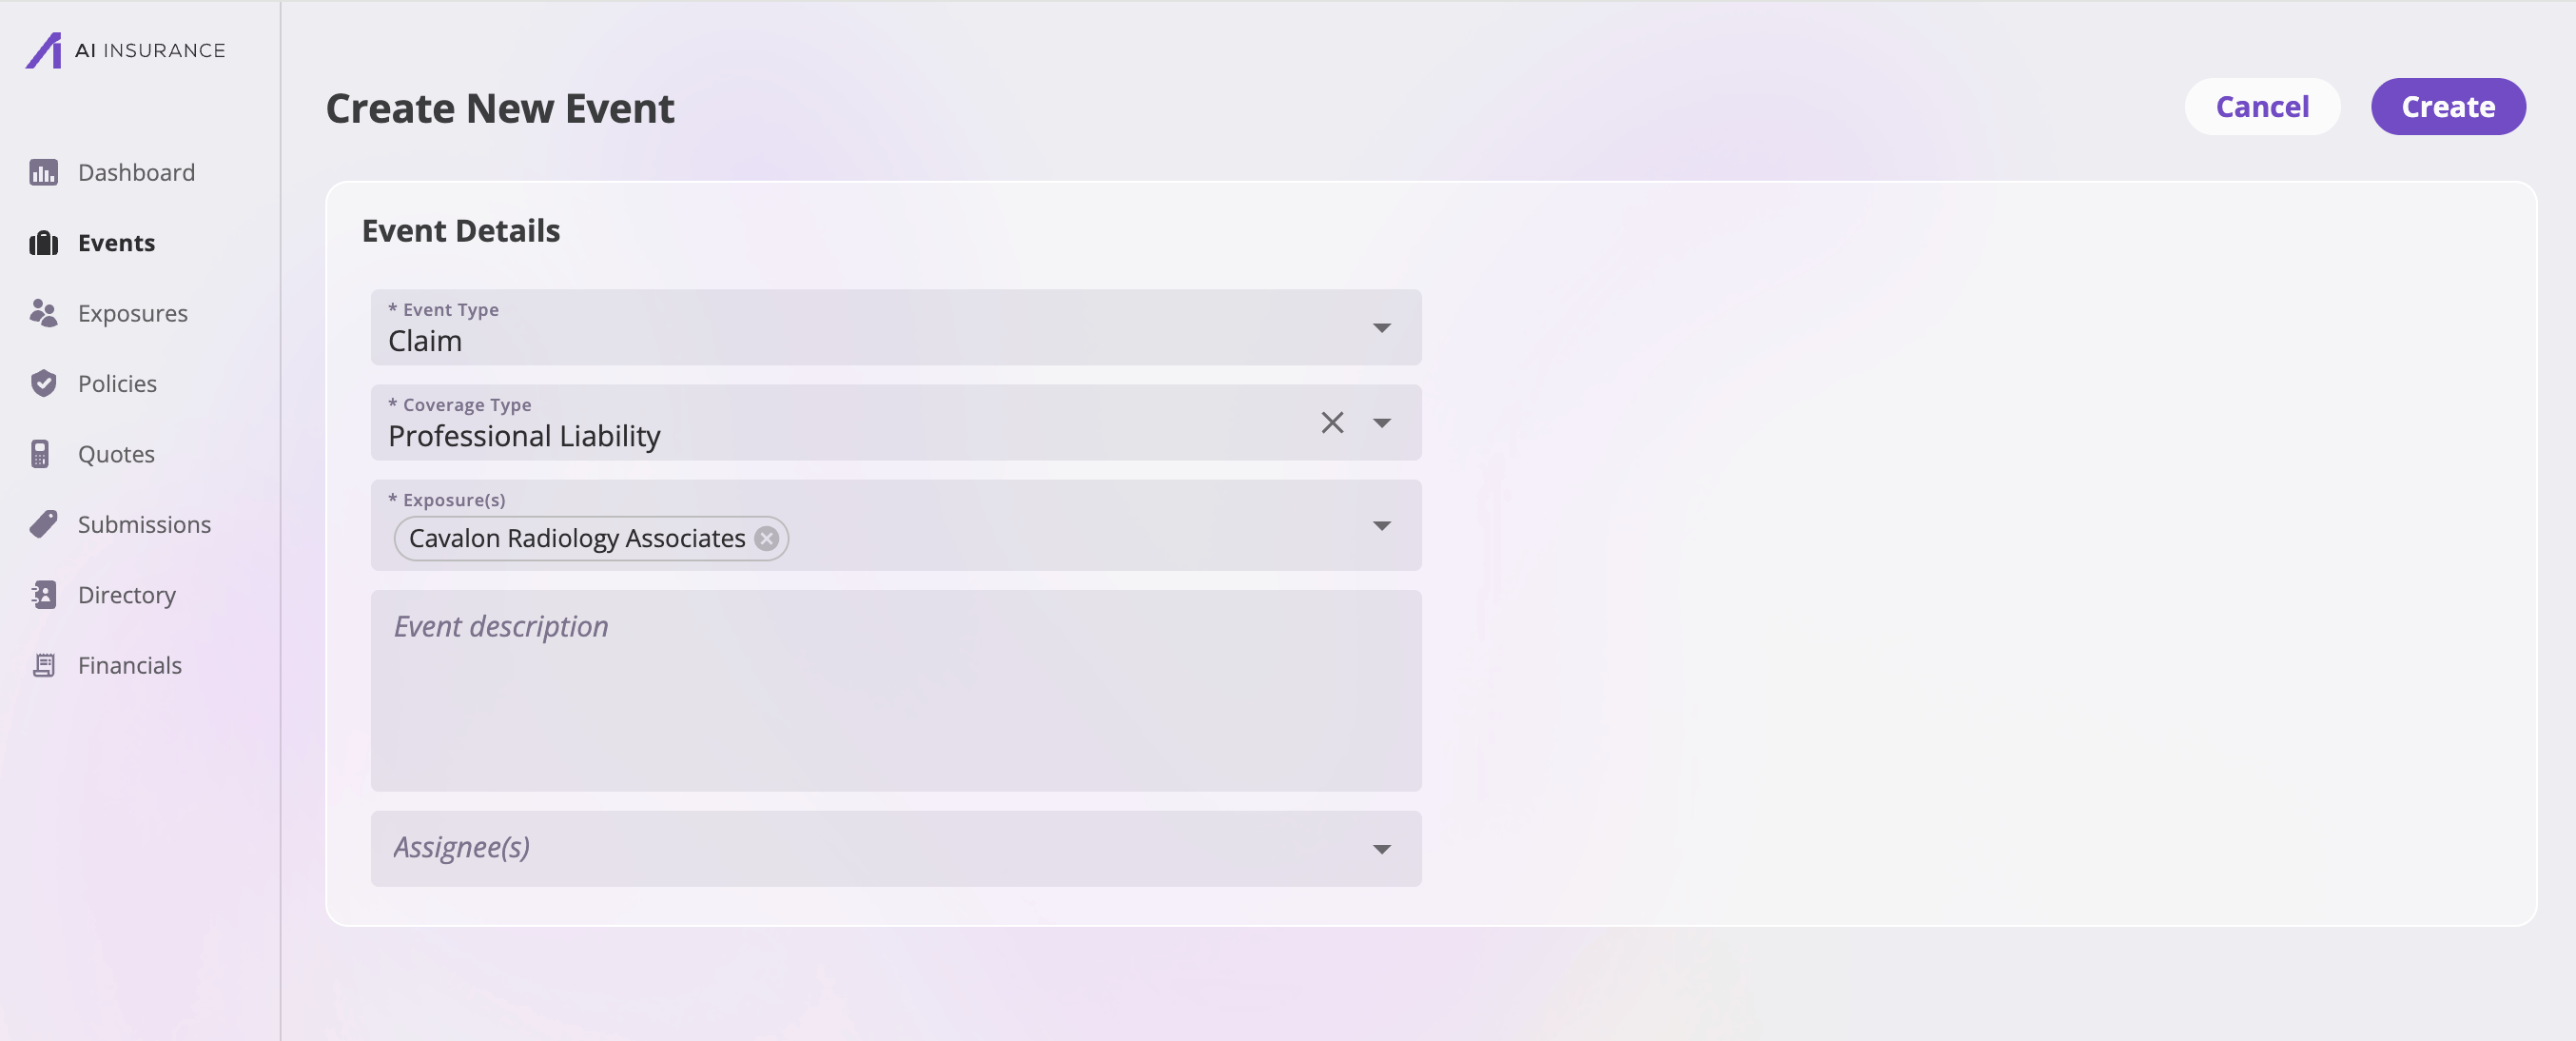
The Create New Event page — the fields shown come from your company's configuration.
- The event starts with an Open status.
- The platform generates the event’s name from the exposures and claimant involved and keeps it in step with them (you can override it later with Rename — see Event actions).
- The event gets a reference ID you can search and filter by.
Details like the claimant, the event date, the report date, the related
policy, and the loss location are typically captured on the event’s detail
tabs after creation, depending on how your company is configured.
Incident ↔ claim conversion
An event’s type isn’t fixed. Two actions in the Actions menu move an event between the types while keeping everything else — fields, files, notes, contacts, financials, tasks — intact:- Create Claim From Incident — promotes an incident (open or closed) to a claim. Use it the moment an incident turns into an actual demand.
- Revert to Incident — turns an open claim back into an incident, for when something was recorded as a claim prematurely.
The claim workspace
An event’s detail page is the claim workspace: a header with the event’s name, its Open/Closed status tag, and the Actions menu, above a set of tabs that hold everything about the event.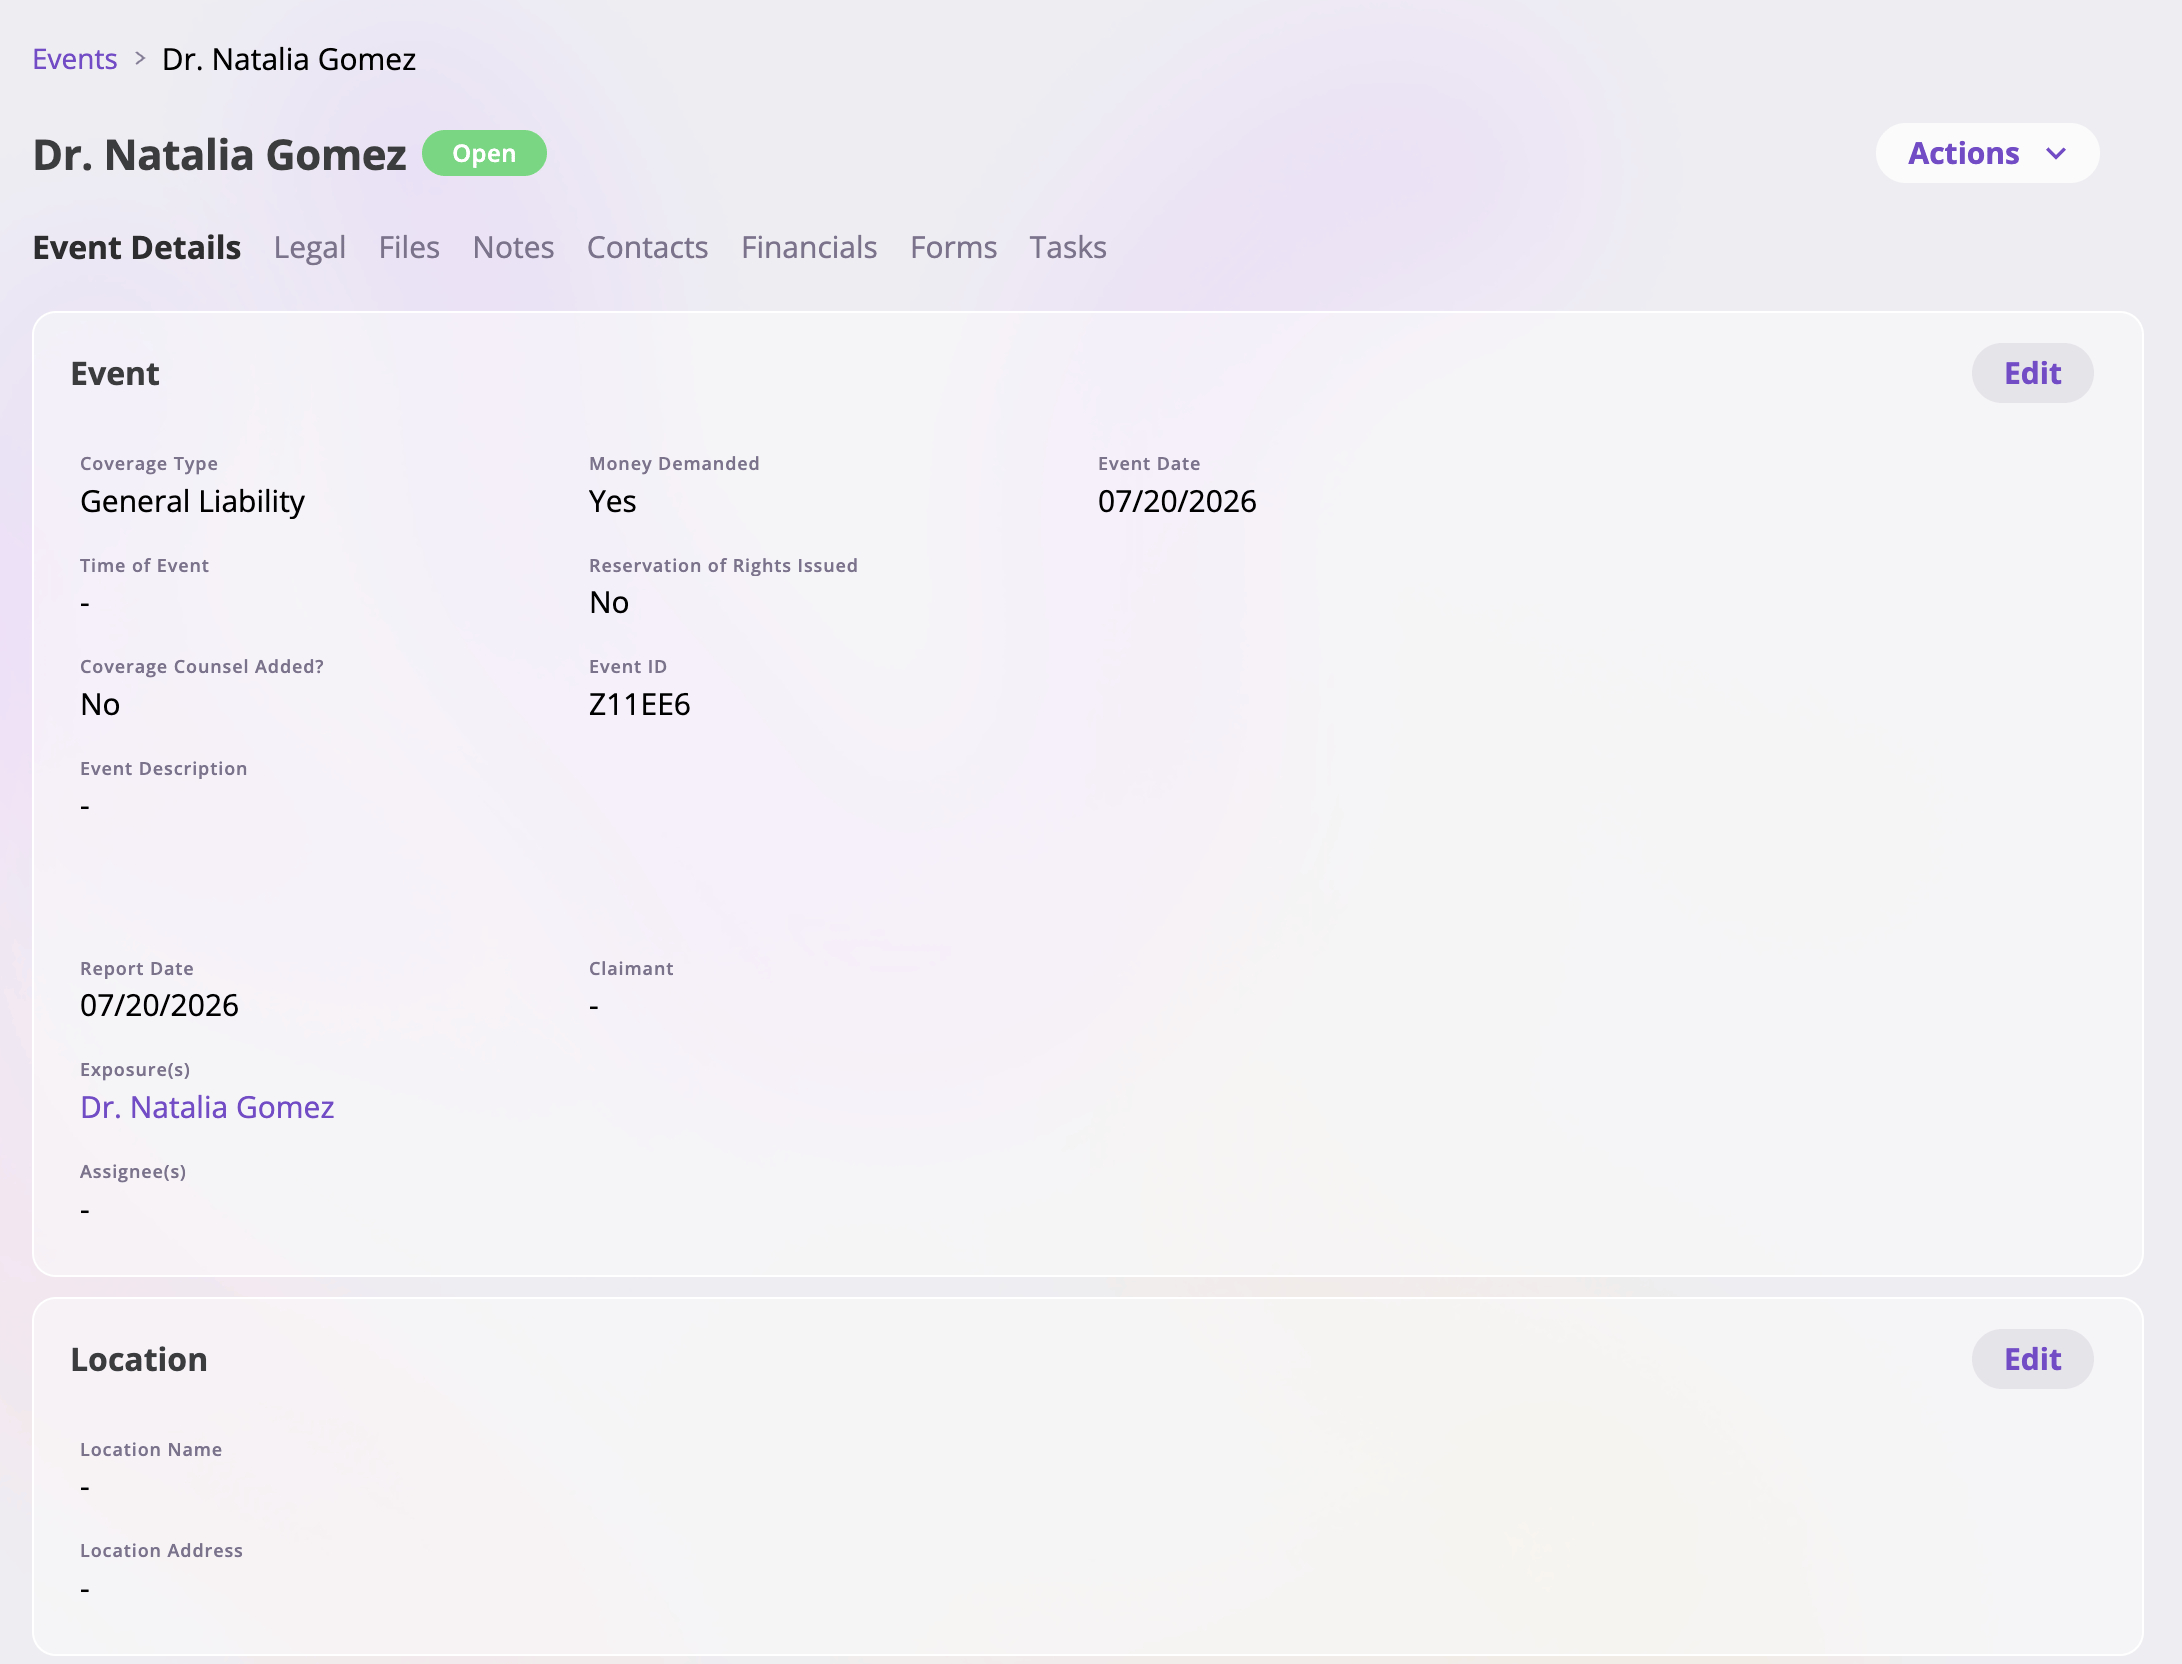
A claim's workspace — name and status in the header, the Actions menu at the top right, and the event's tabs beneath.
Which tabs you see follows your permissions — tabs your role can’t read
simply don’t appear — and the fields inside the Event Details and Legal tabs
depend on how your company is configured.
The Legal tab
The Legal tab keeps a claim’s litigation record in one place. Depending on your company’s configuration, it typically tracks:- Whether a lawsuit exists, and if so the case name and number, plaintiffs and defendants, venue, judge, and the key dates — served, filed, and trial.
- Pre-trial milestones: mediation, deposition, and pretrial conference dates, and whether arbitration is involved.
- Settlement posture: the settlement demand and settlement type.
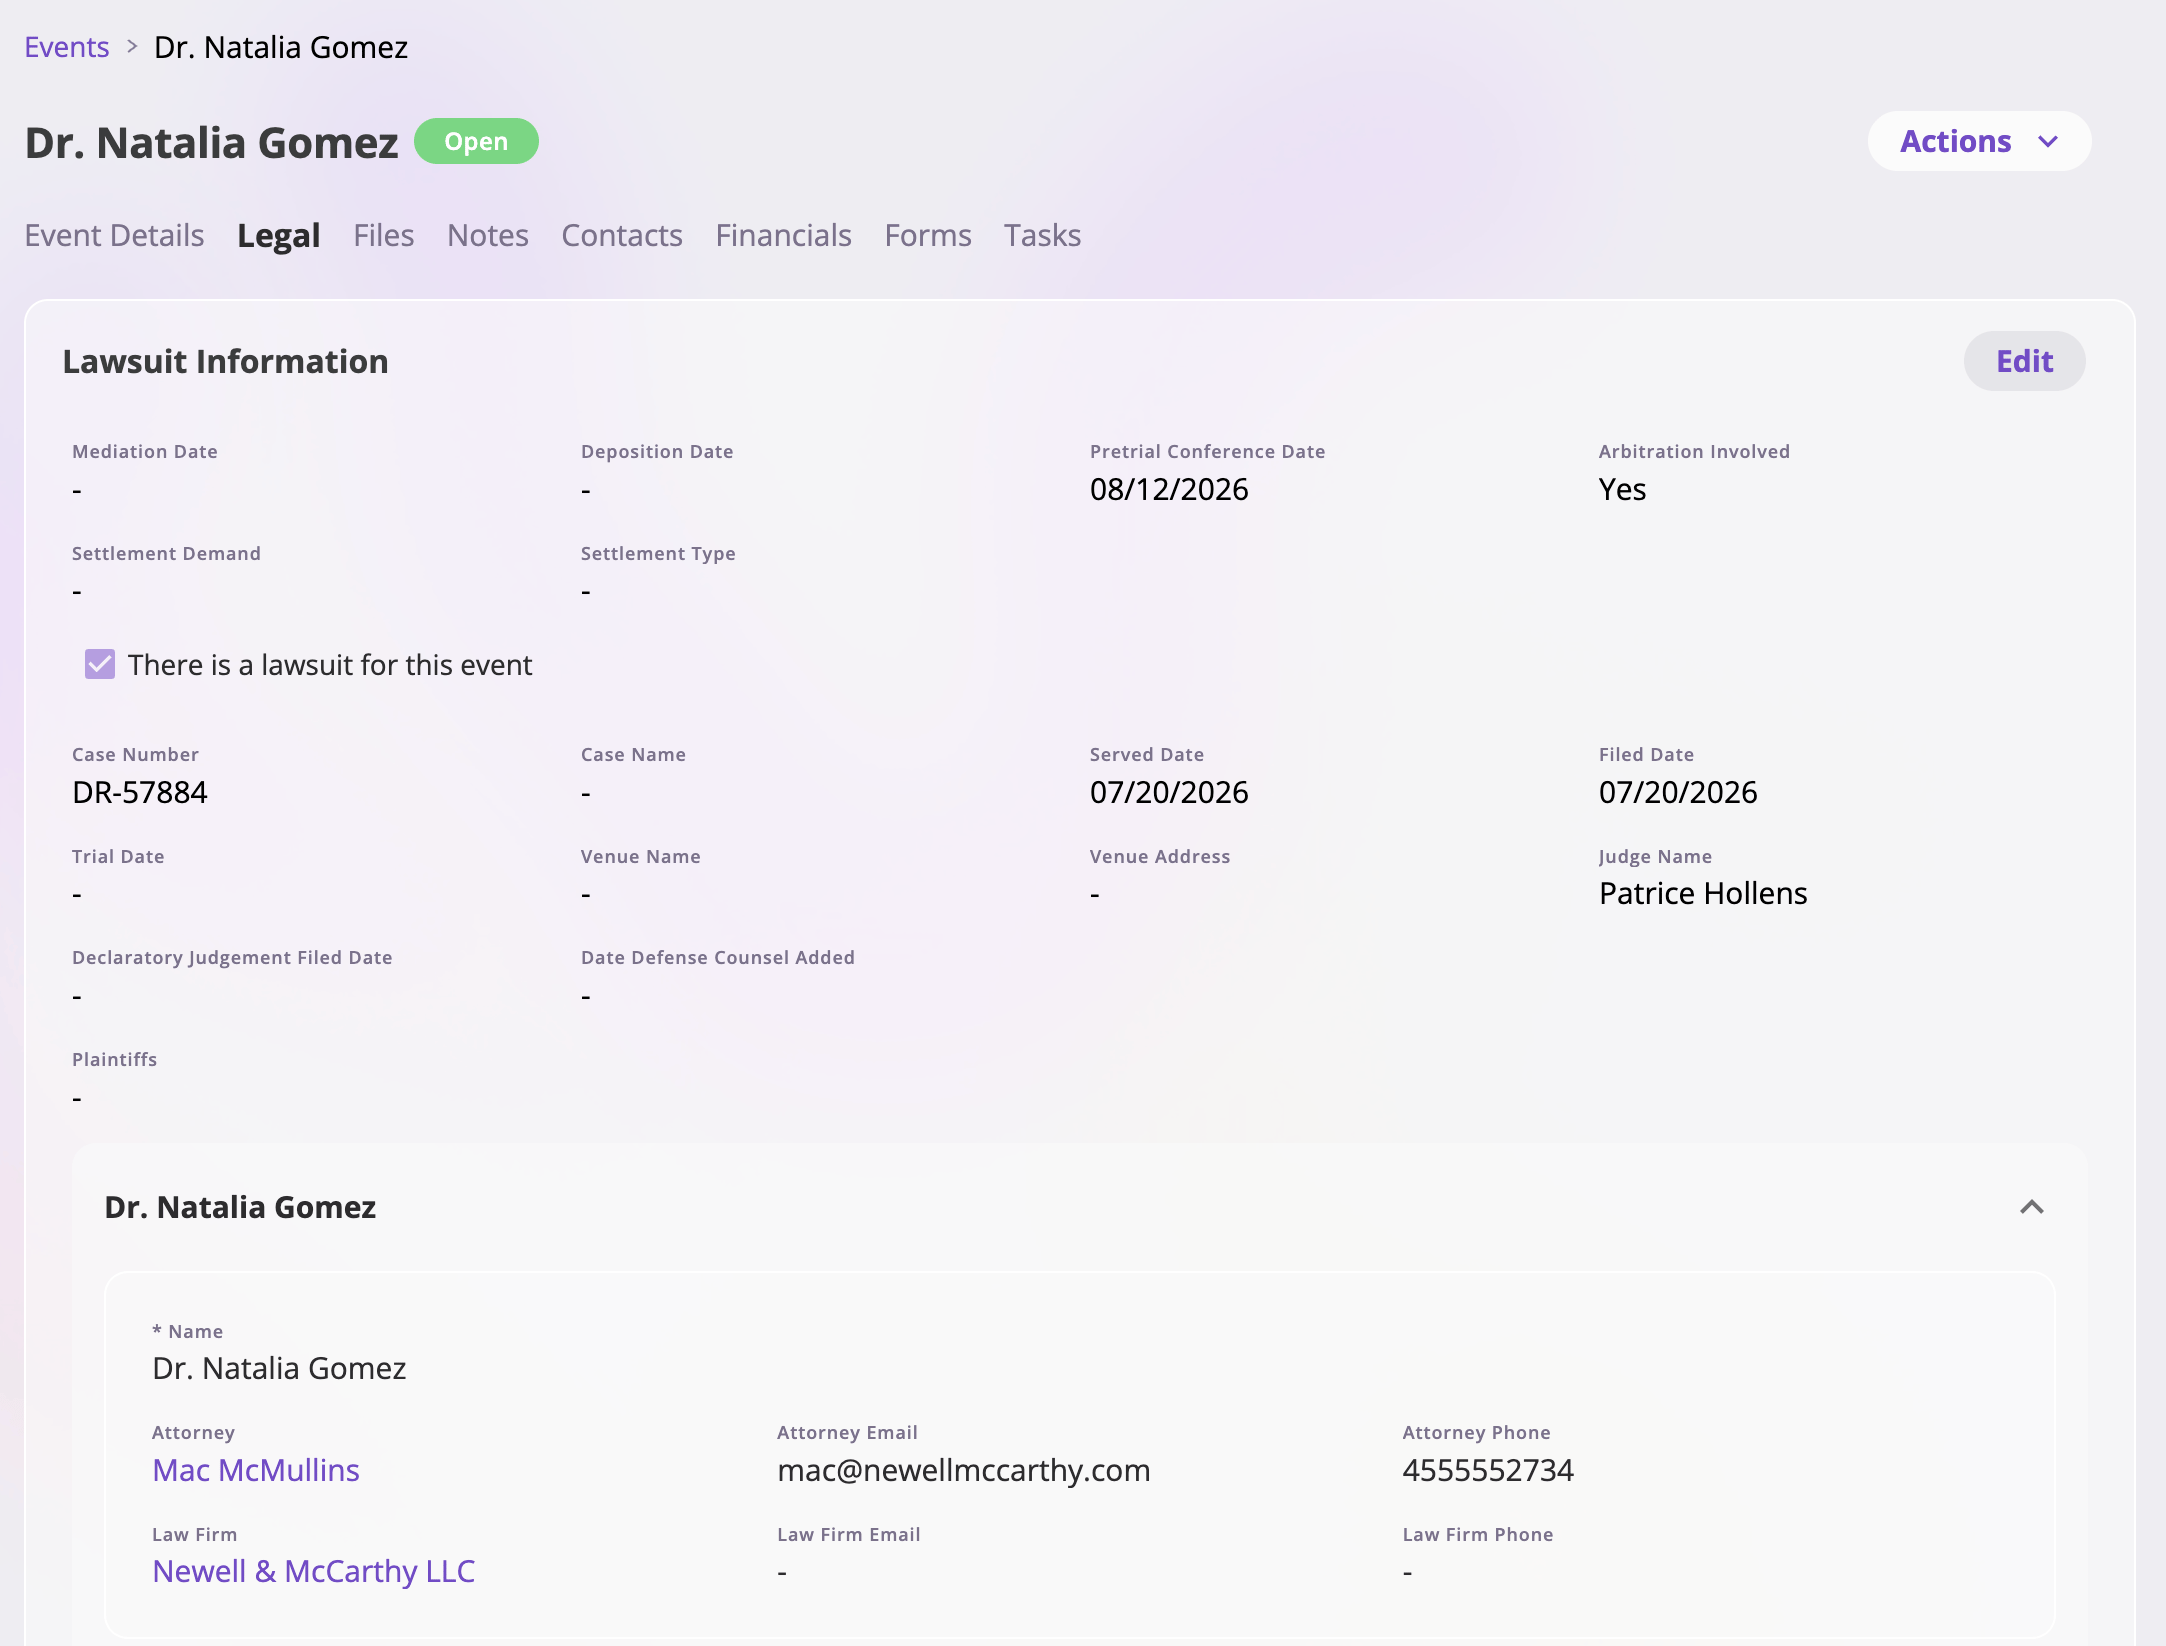
The Legal tab — lawsuit and settlement details, shown as configured for your company.
Open, close, re-open
Every event is Open or Closed, shown as a tag next to its name.1
Work the event while it's Open
An open event offers the full set of actions — converting, closing,
renaming, generating forms, creating tasks.
2
Close it when it's resolved
Actions → Close Claim (or Close Incident) asks for a Closed
Date, pre-filled with today. Closing sets the status to Closed and
records the date — it doesn’t lock anything away: every tab stays
viewable.
3
Re-open if it comes back
On a closed event the close action is replaced by Re-open Claim /
Re-open Incident, which returns the status to Open and clears the
closed date.
Reserves & claim financials at a glance
The event’s Financials tab is where the money side of the claim lives (visible with the financials permission):- The Loss & Operating Report at the top summarizes the event’s reserves, owed, paid, and total amounts per configured transaction type. Each loss-recognition row offers an update reserves action to record a new expected total for that type.
- The Transactions sub-tab lists the event’s invoices — with filters, search, export, and an Add New action to record a new transaction pre-linked to this event.
- The Reserve Updates sub-tab lists the history of reserve changes.
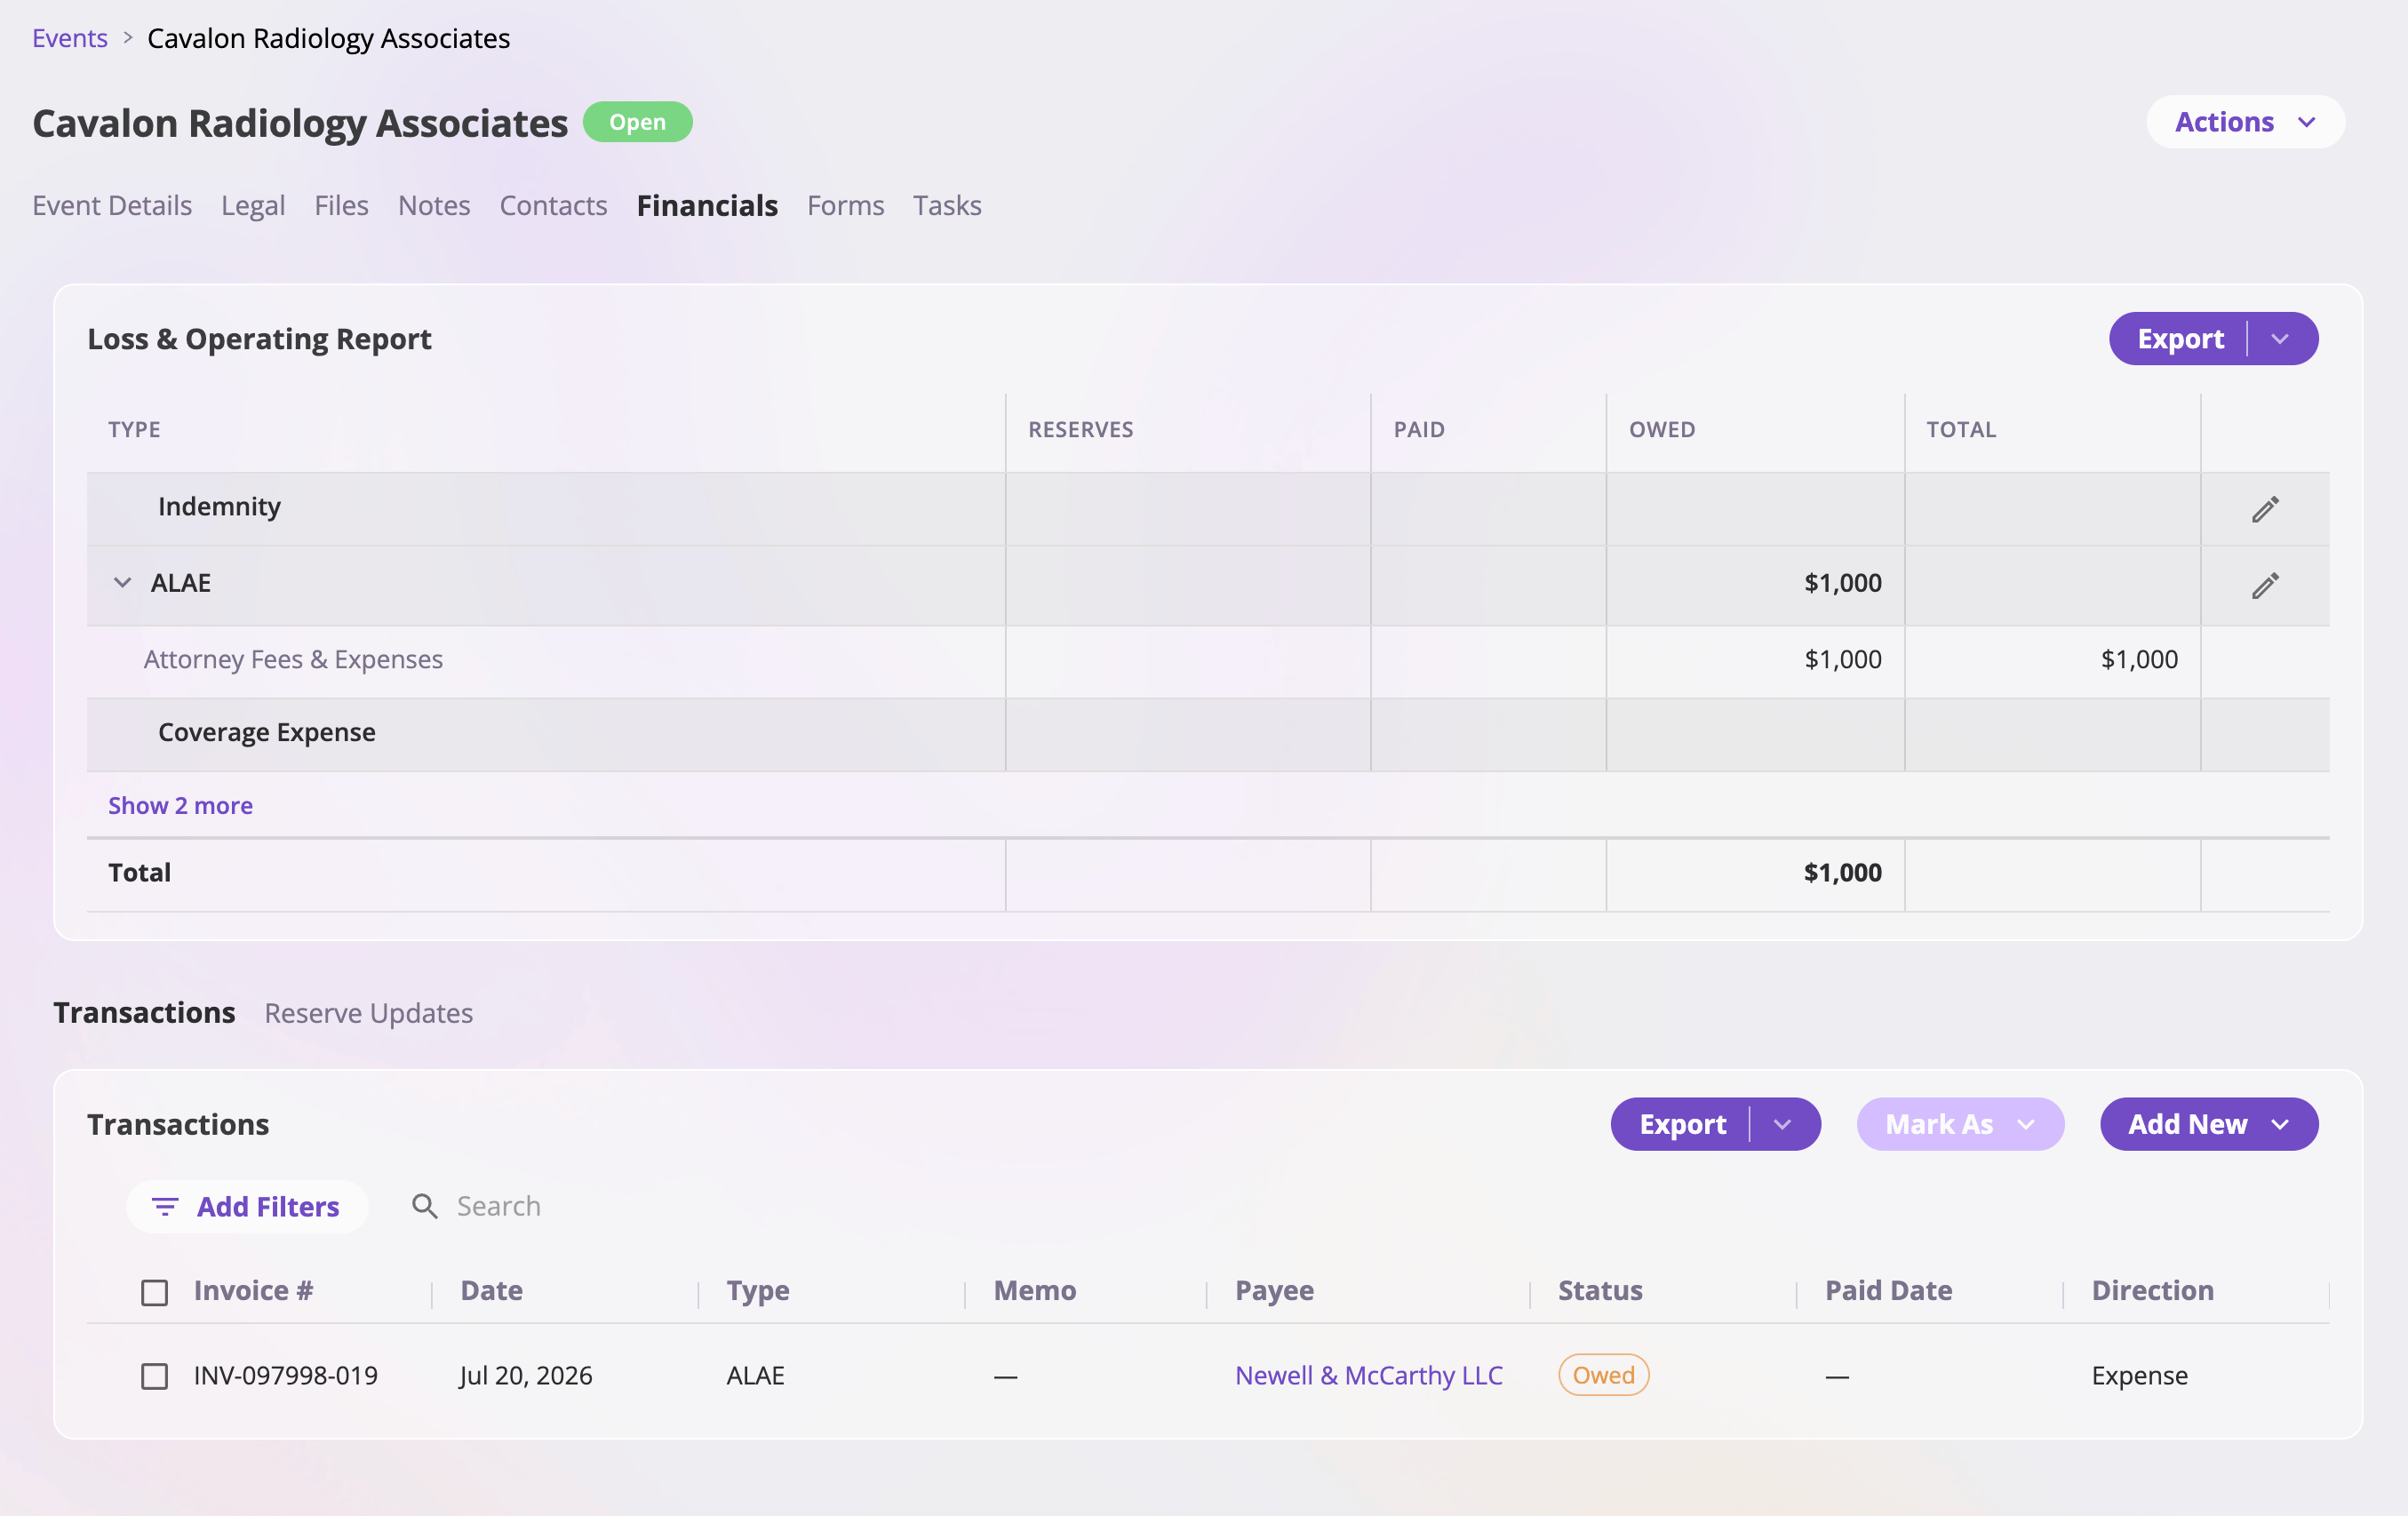
A claim's Financials tab — the Loss & Operating Report above the Transactions and Reserve Updates sub-tabs.