
Create a submission manually
Open Submissions in the sidebar and select Create Submission at the top right of the list.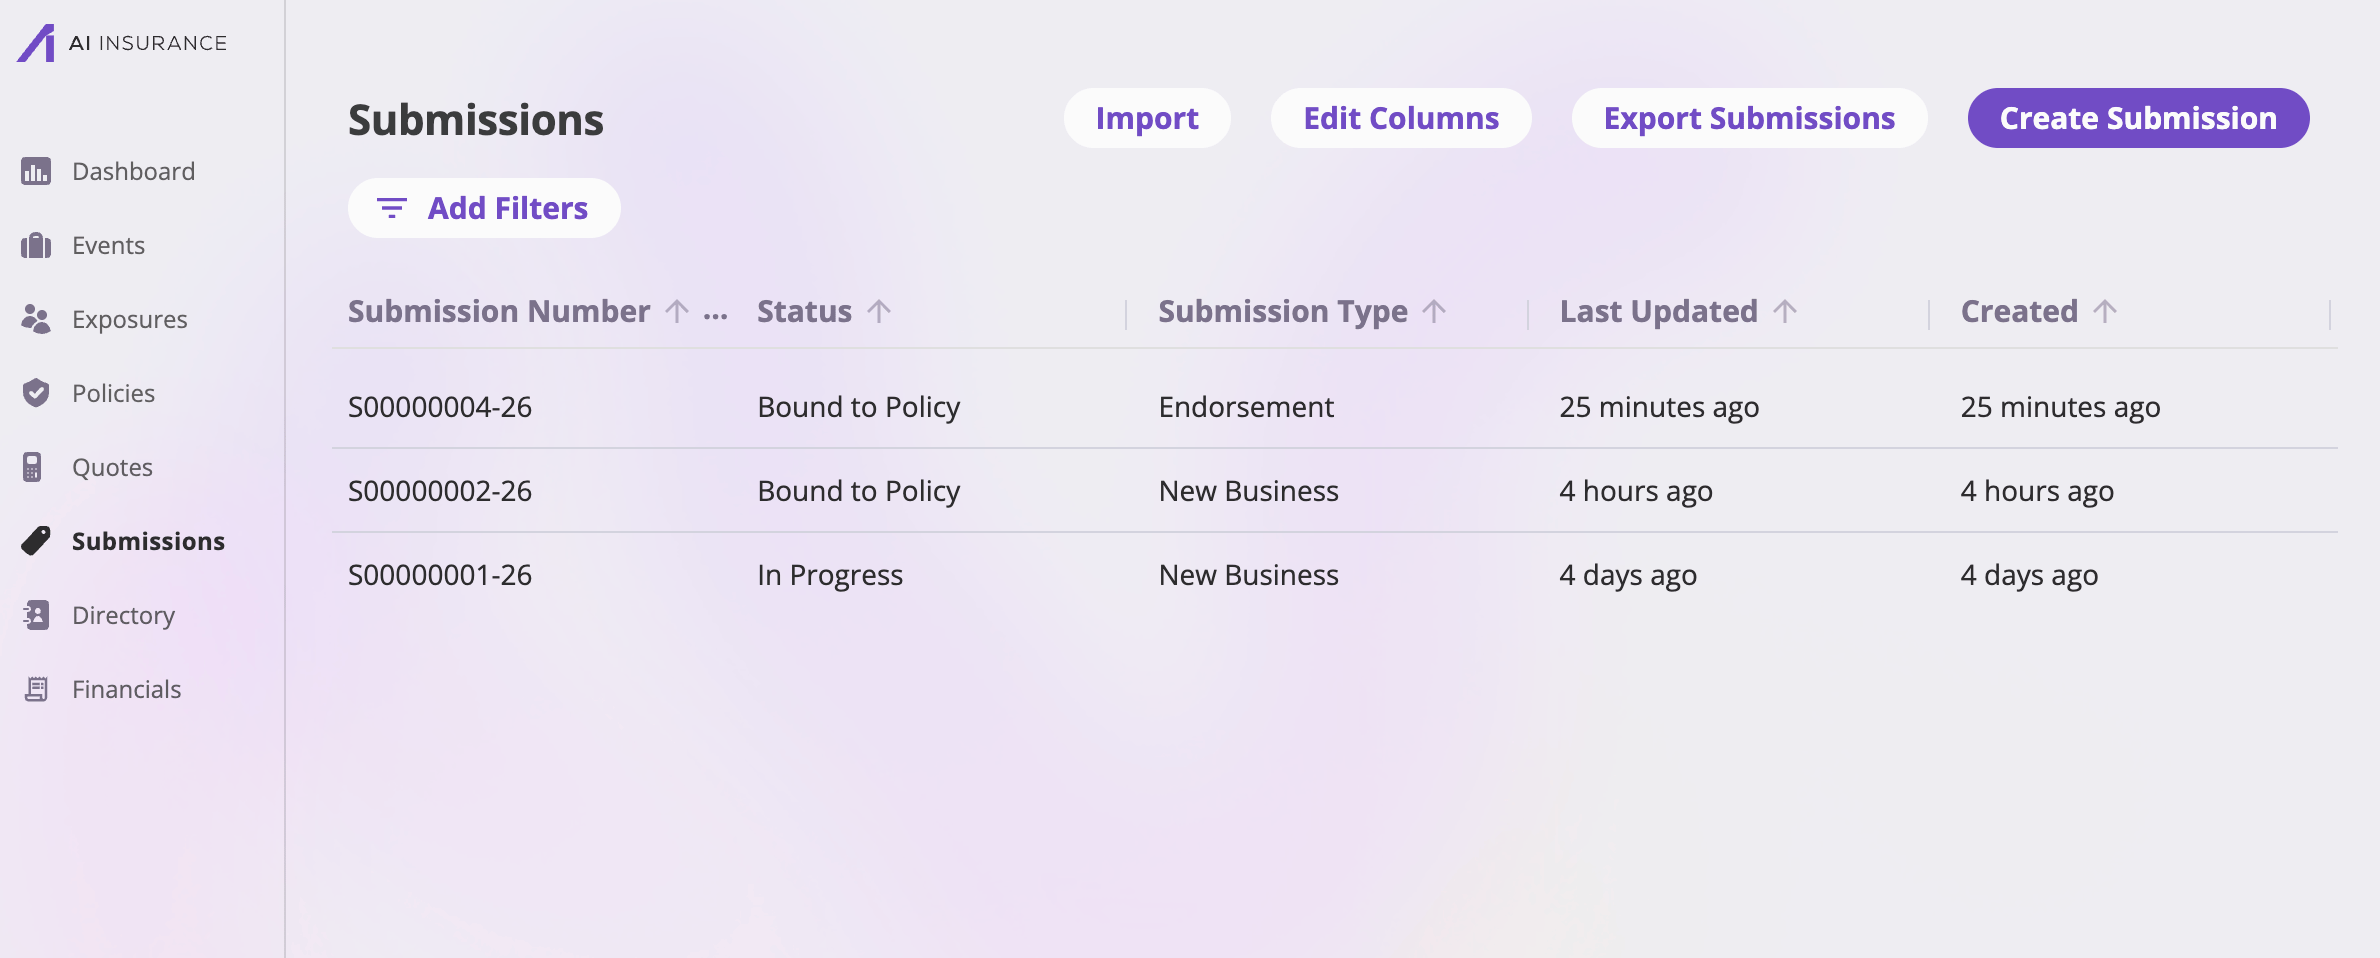
The Submissions list — Import, Edit Columns, Export Submissions, and Create Submission live in the toolbar.
You don’t have to finish the wizard for the submission to exist. Save once,
exit, and the submission (with its in-progress quote) is on the Submissions
list waiting for you.
Import submissions from documents
The Import page (Submissions → Import) turns real-world application documents into submissions: drop the files, and AI extraction reads them and builds a submission — and a draft quote — from what it finds.Upload files
The page starts with a dropzone. Drag files (or a whole folder) onto it, or click to browse. Supported types are the ones the extraction engine can actually read: PDF, PNG, JPEG, WebP, plain text, CSV, and Excel (.xlsx). Unsupported or oversized files are rejected up front with a message — nothing half-uploads. As soon as you drop, a dialog asks “What are you importing?” — every dropped file is listed by name, and you choose Submission or Policy. The choice is saved with the import so it never asks again. (The Policy option builds a policy record instead of a submission; this page covers the Submission flow.) Cancel abandons the drop entirely.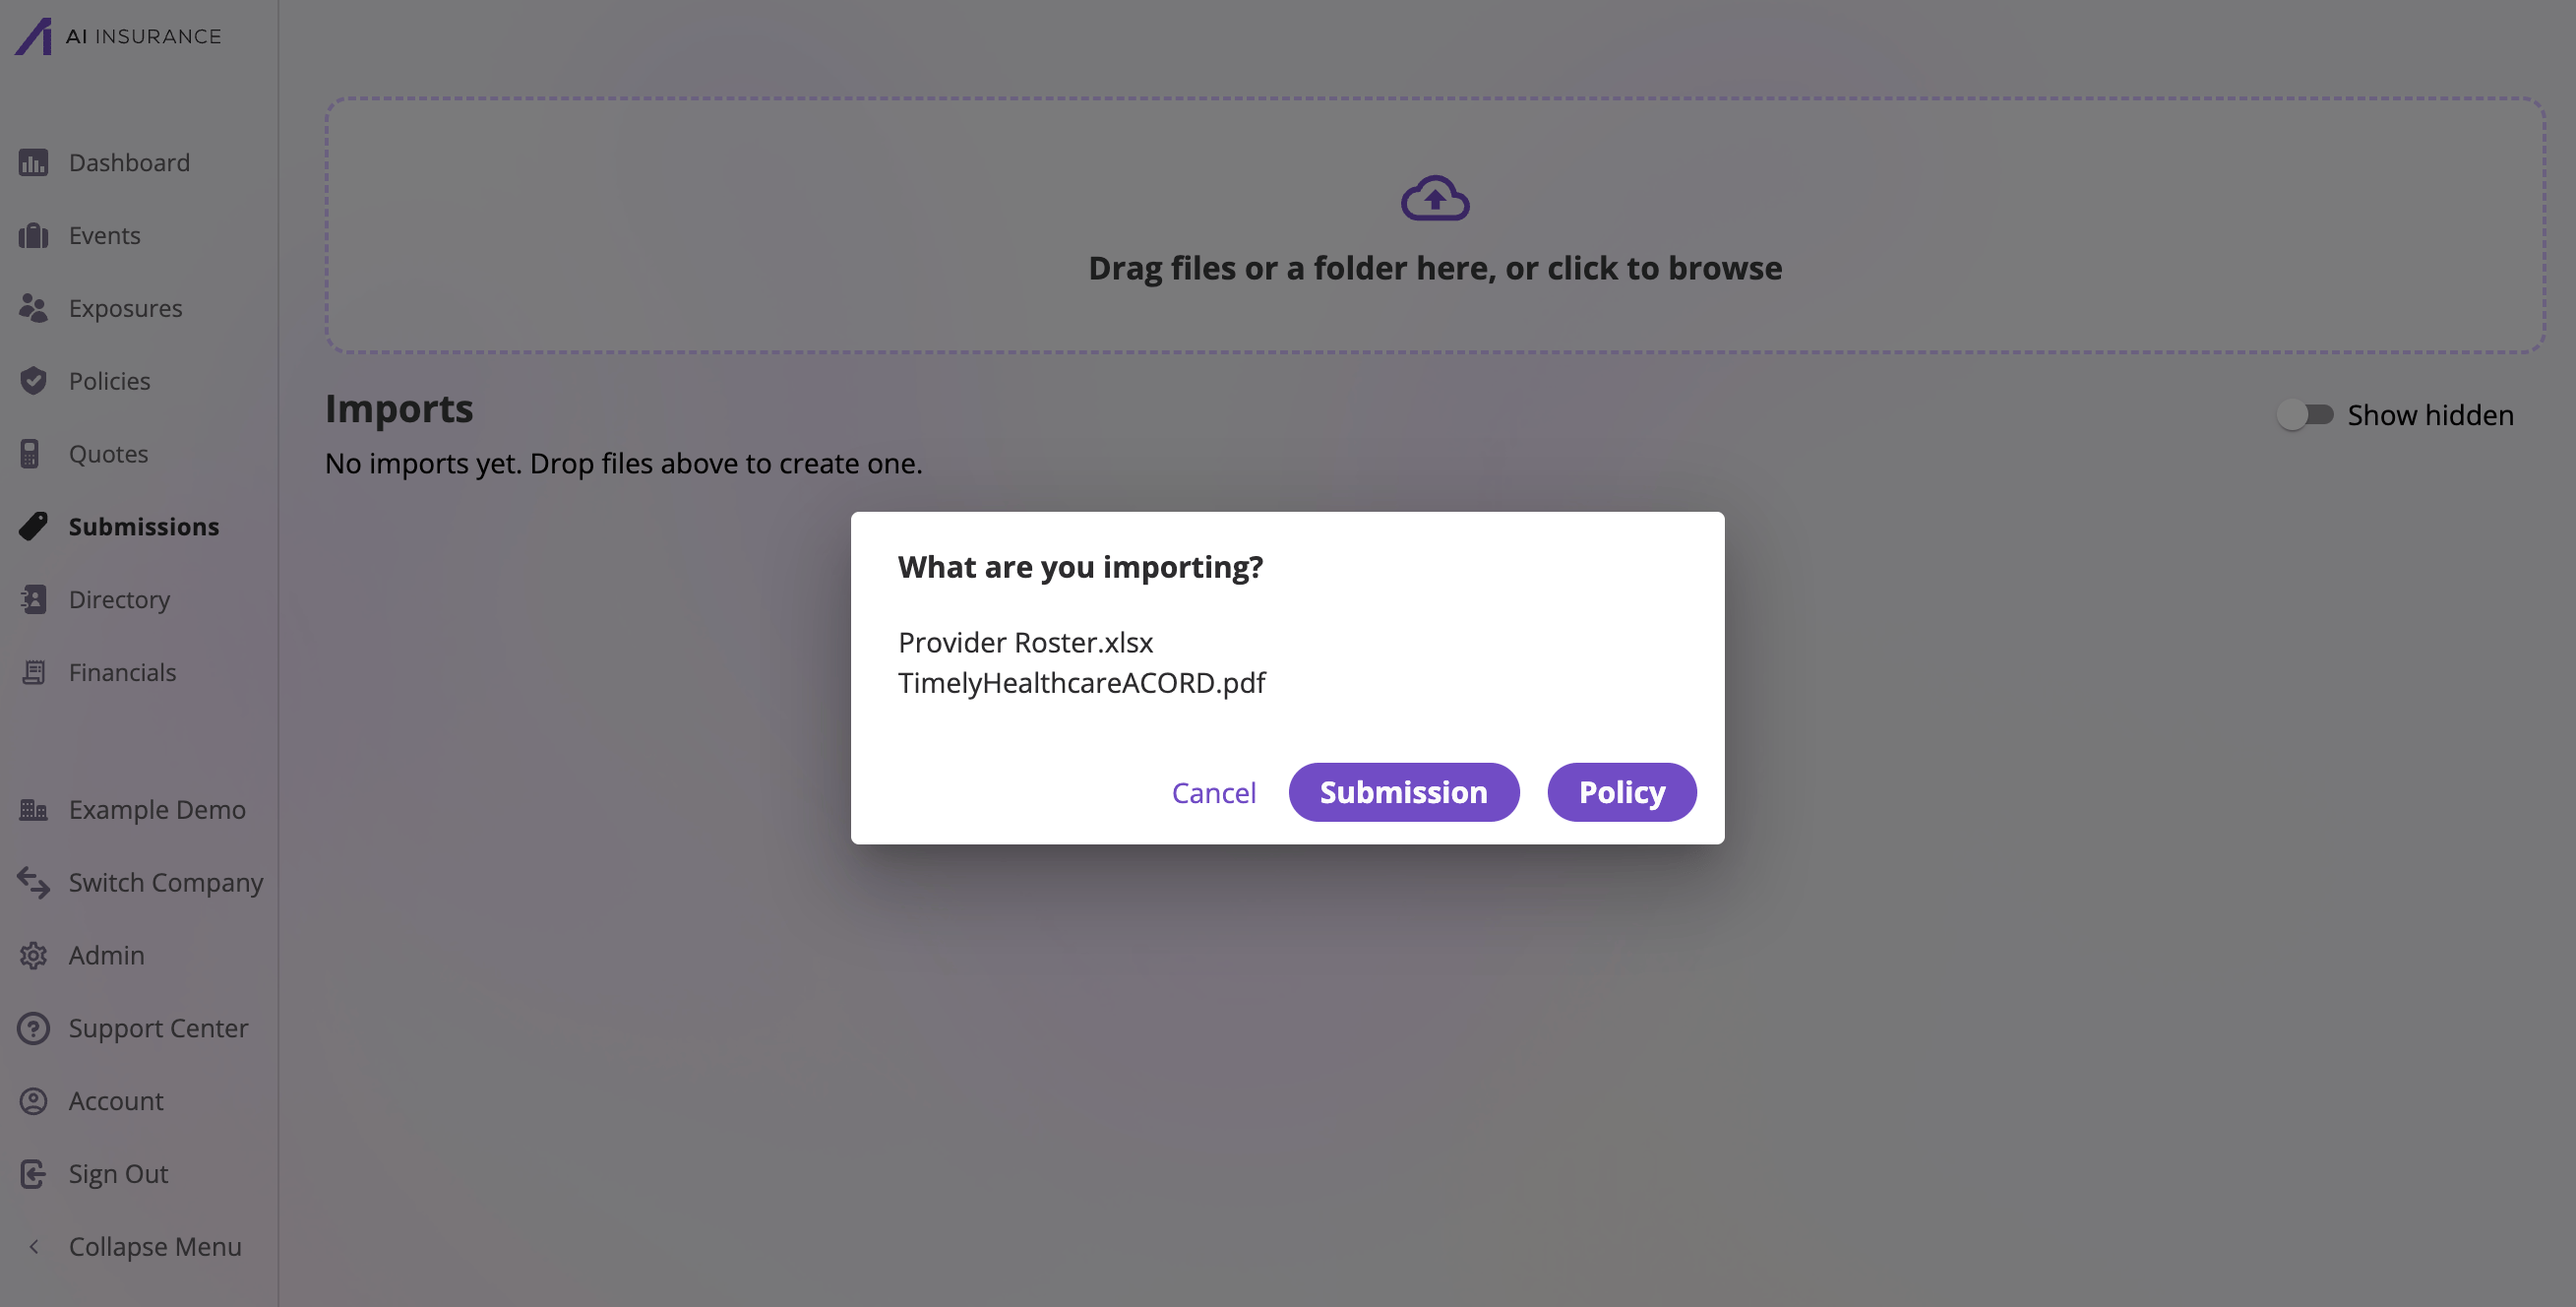
Dropping files prompts once for the import type.
The Imports table
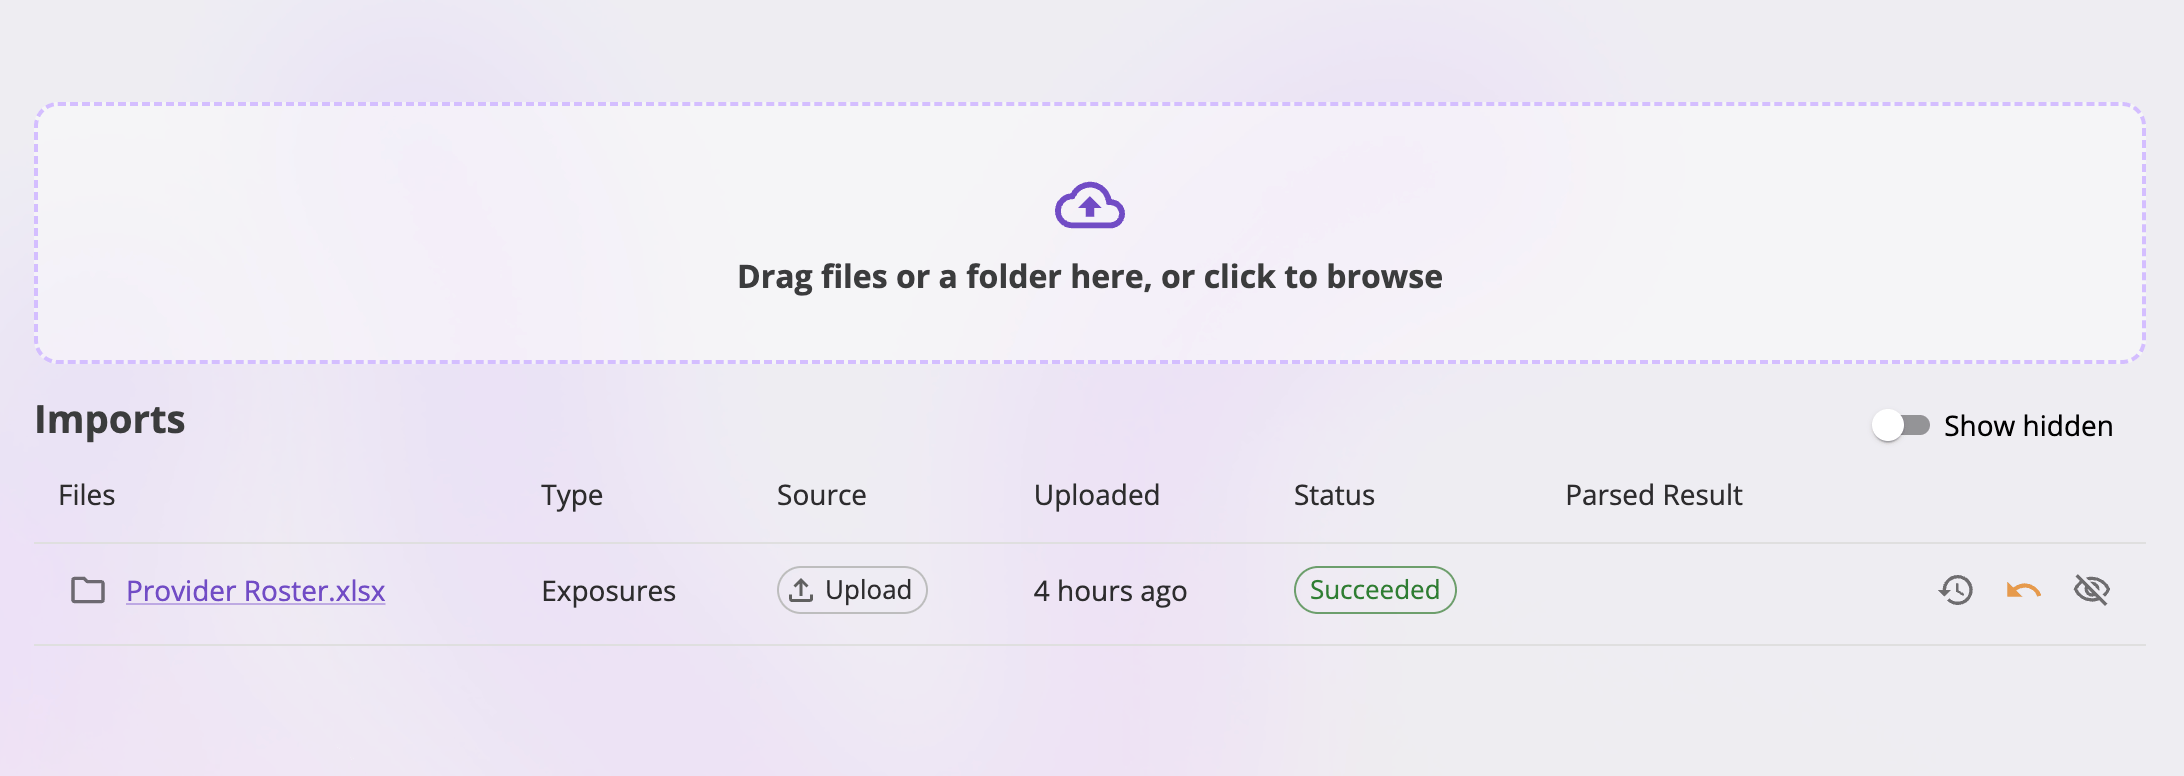
The Imports table — one row per import, with its type, source, status, and parsed result.
Row actions (right-hand icons):
Run the parse and watch it
Select the play icon to start the run. A parse has two stages — extracting the documents’ contents, then parsing them into a submission — and the row’s status chip (and the run history) shows live progress like “Extracting 1/2 · attempt 1” then “Parsing 2/2”. The table refreshes itself every few seconds while any run is live, so you can navigate away and come back. When the run succeeds, the Parsed Result column links to the quote the import created; the quote sits on a new submission built from the same documents, with the uploaded files attached. Open the quote to review what the AI extracted — everything is editable in the quote wizard — or follow Back to Submission from the quote to see the submission itself. When a run fails, the error is shown verbatim in the run history so you can see exactly what went wrong, and you can re-run.Run history and re-runs
The history icon on any row opens the import’s full run history: every run, newest first, with its status, type, started/finished times, a View Extract action (inspect or download the raw extracted data as JSON, once extraction succeeded), the parser used and how it was selected, and the run’s parsed result.
The run history — every parse run with status, timings, extract access, result, and a re-run menu.
- Re-run from Extract — re-parses using that run’s already-extracted data, skipping document extraction. Available once the run’s extraction succeeded.
- Re-run from Start — extracts and parses again from scratch. Always available.
Email a submission in
Your company can receive submissions by email. An administrator creates one or more inbox addresses (for exampleyour-company-submissions@inbox.aiinsurance.io) on the Company settings
page, each tied to an import type — a
submissions inbox or a policies inbox.
Anyone who emails application documents to a submissions inbox creates an
import on the Import page, exactly as if the attachments
had been dropped there — the row shows an email chip as its source, naming
the sender.
What happens next depends on whether the sender is recognized:
- Recognized sender (on your company’s allowed-senders list): the parse starts automatically — no one has to click Run. The row shows Starting… and then live progress, and the resulting quote appears in Parsed Result.
- Unrecognized sender: the email’s files are stored but nothing runs. The row shows a warning chip with the sender’s address and a Needs sender review status, and offers two actions to users who can manage company settings:

An email import from an unrecognized sender, parked until someone recognizes or blocks the sender.
Sender recognition and blocking are company-wide policy, not per-import
settings — both ask for confirmation. The full sender allow-list is managed
on the Company settings page.
Clearance warnings
When a submission’s primary insured matches another record your company already has, the submission’s detail page shows a clearance warning banner — one per match — so an underwriter spots a potential duplicate before working it up.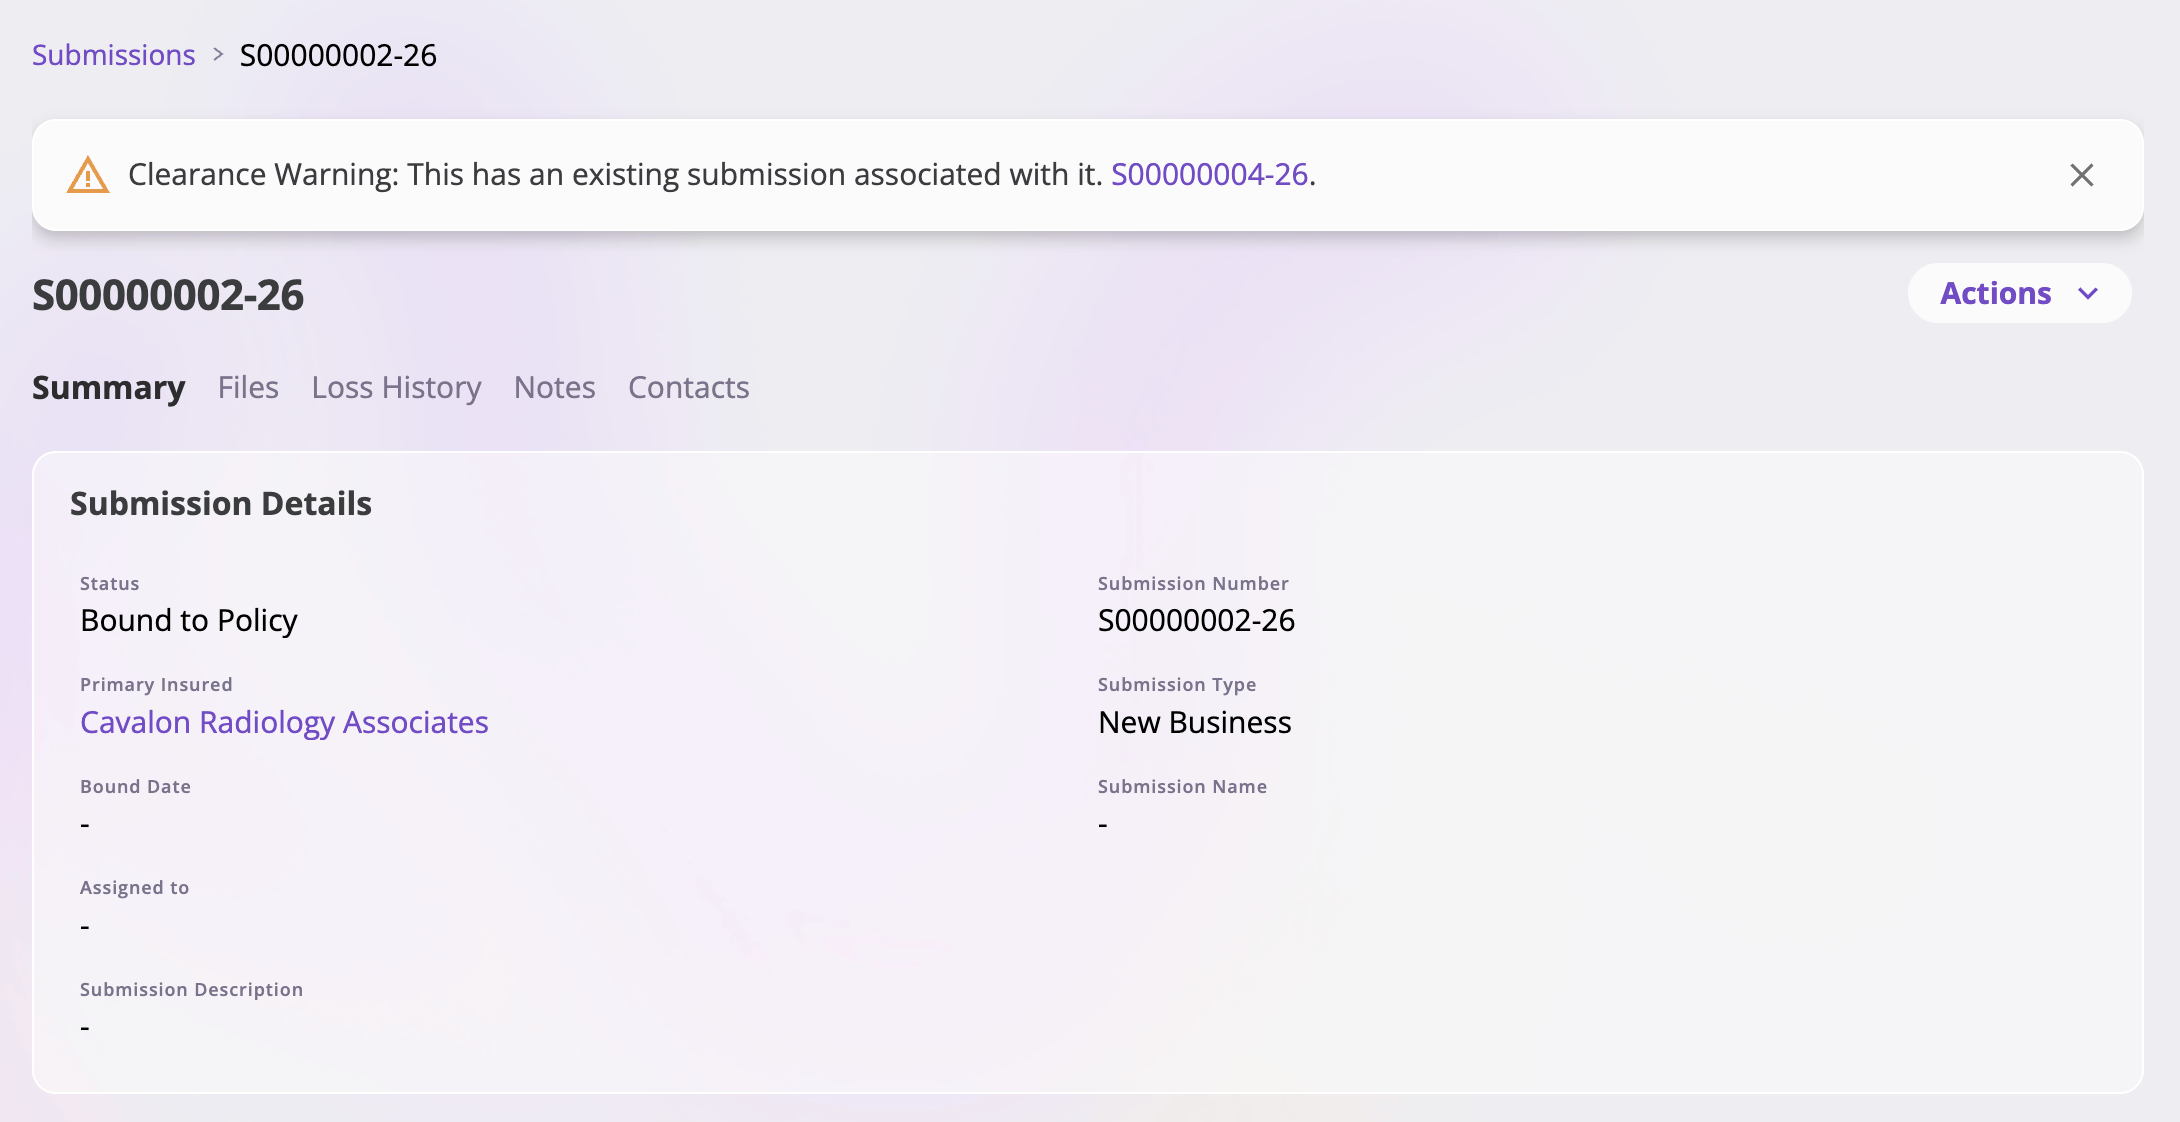
A clearance warning links straight to the existing record it matched.
- The match is on the primary insured’s name (ignoring case and extra whitespace) against your company’s other submissions.
- Each banner names the matching submission’s number; click it to open that submission and compare.
- Renewals are excluded on both sides — a renewal submission never shows clearance warnings, and never appears as a match, since a renewal is expected to share its prior term’s insured.
After the submission exists
Opening a submission from the list lands on its detail page: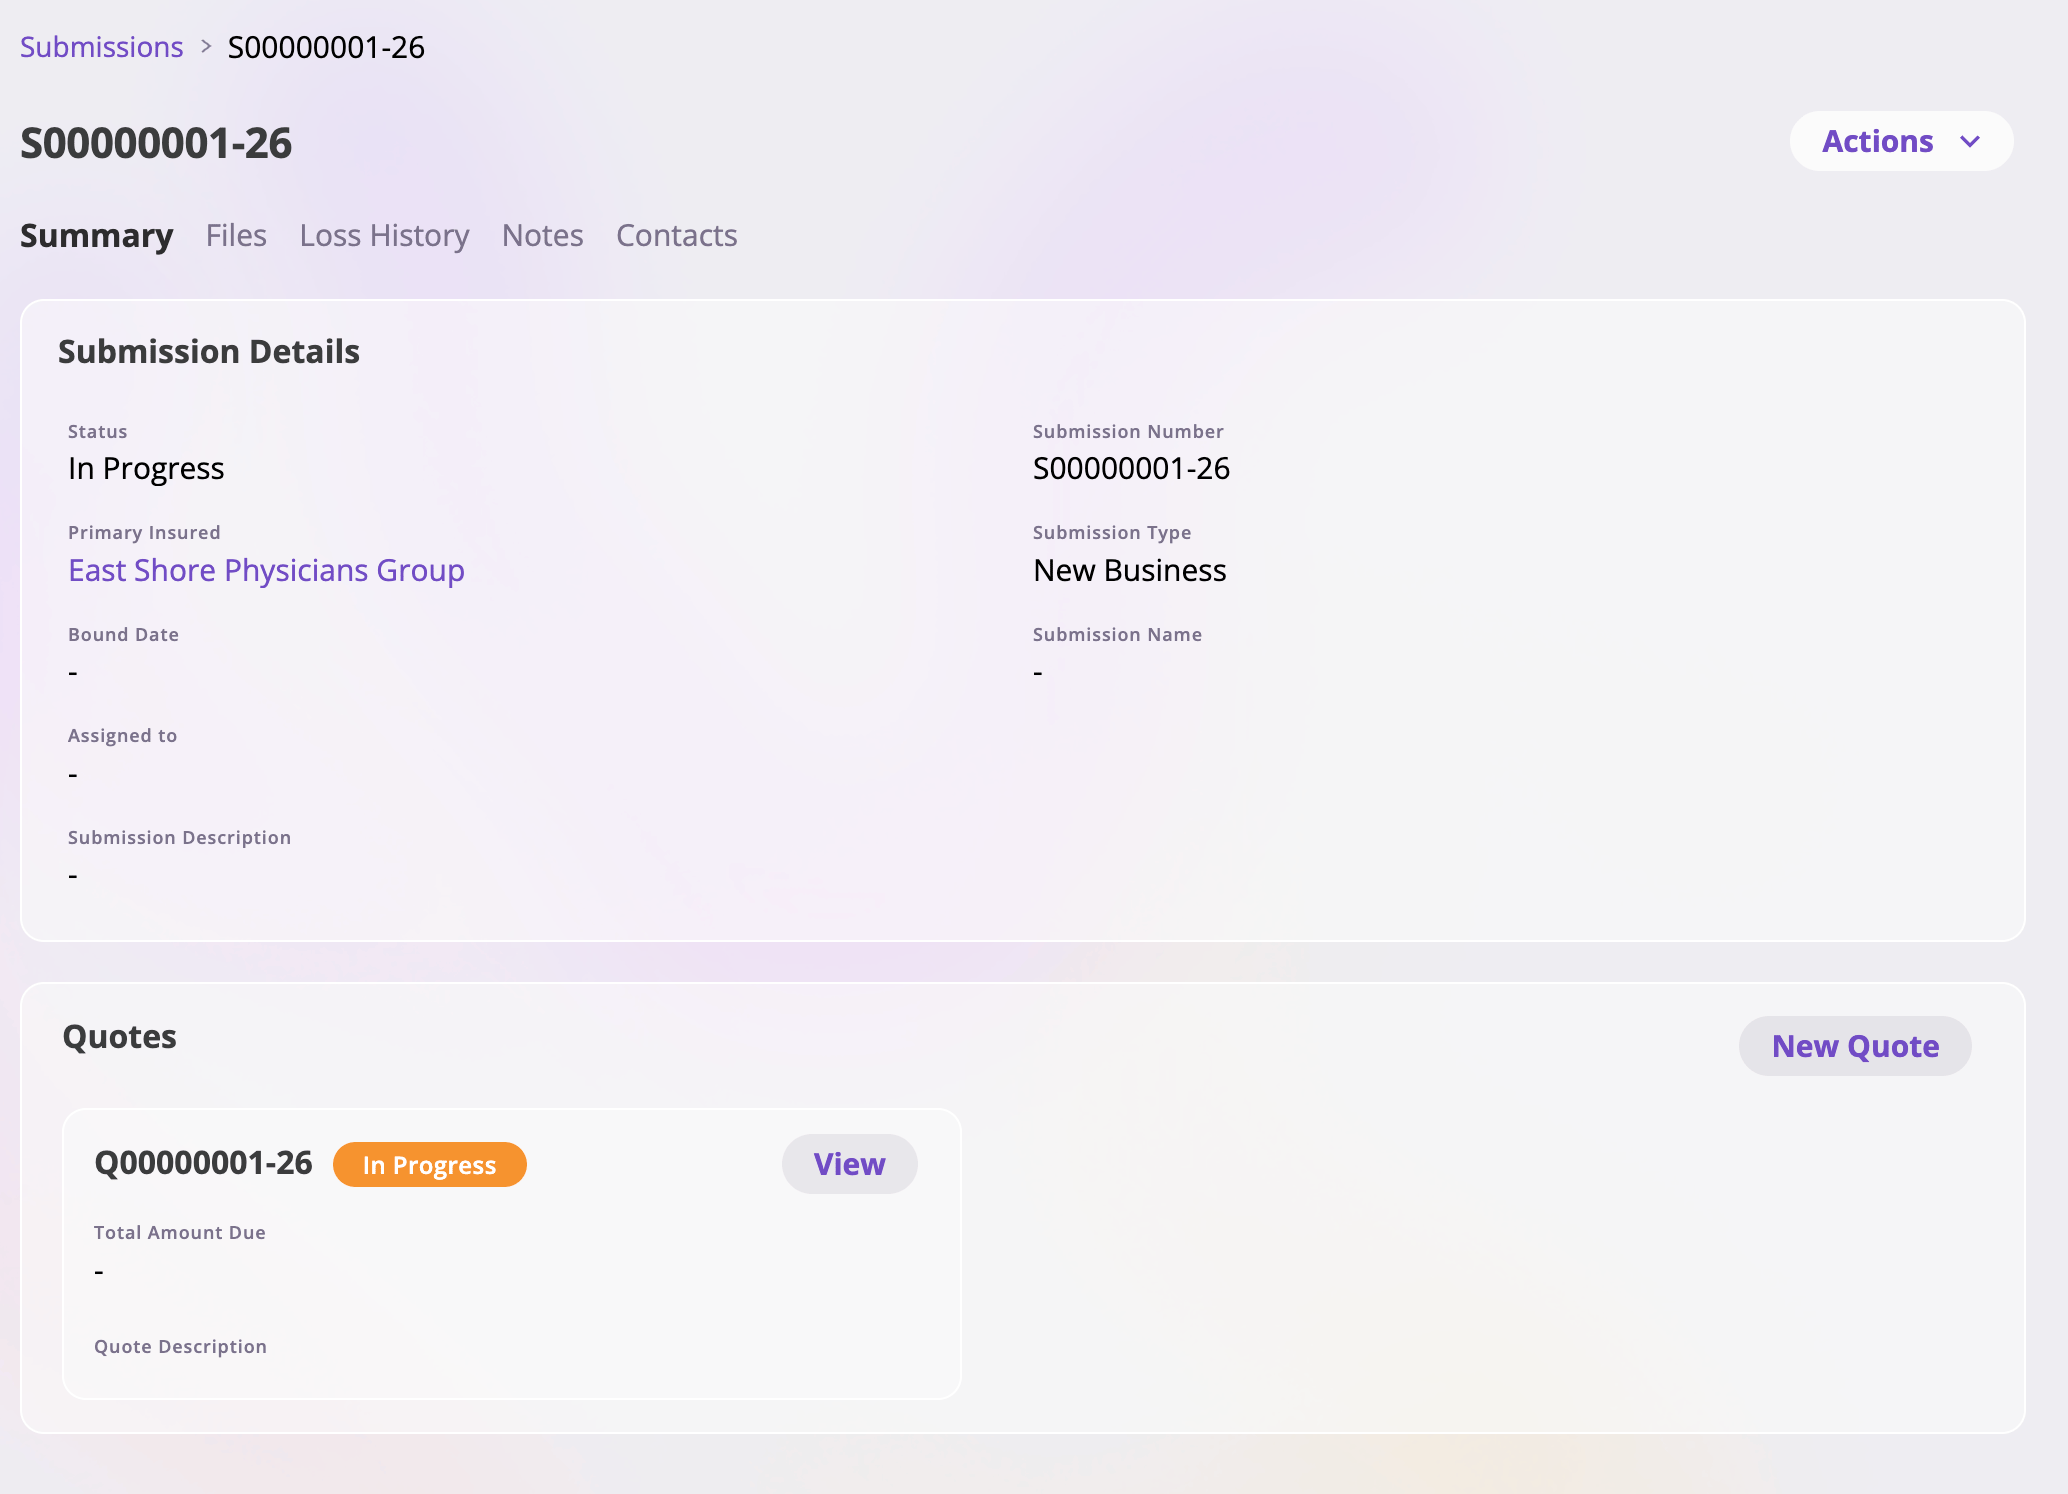
The submission detail page — summary fields, the Quotes card, and the tab bar.
- Tabs — Summary (the submission’s fields plus its Quotes card), Files, Loss History, Notes, and Contacts. Tabs your role can’t access don’t appear. See the Submissions feature reference for each tab in detail.
- Status — submissions carry a status through their life. The standard statuses are In Progress, Submitted, Quote in Progress, Quote Complete, Quote Accepted, Quote Sent, Bound to Policy, and Declined (labels can vary depending on how your company is configured).
- Actions menu — Delete Submission permanently deletes the submission after a confirmation. It’s disabled while the submission still has quotes: delete those first, since deleting a submission out from under its quotes would orphan them.
- Quotes card — every quote on the submission, each with its number, status, total amount due, and a View button. New Quote starts another quote: if the submission already has an active quote, the new one starts as a copy of the latest; otherwise it starts fresh from the submission’s data.