
Any role that can view members sees this tab — every standard role except
Client Member. Inviting users, changing roles, and removing users need
the Members permissions, which of the standard roles only Admin
holds. Other roles see the list but not the actions.
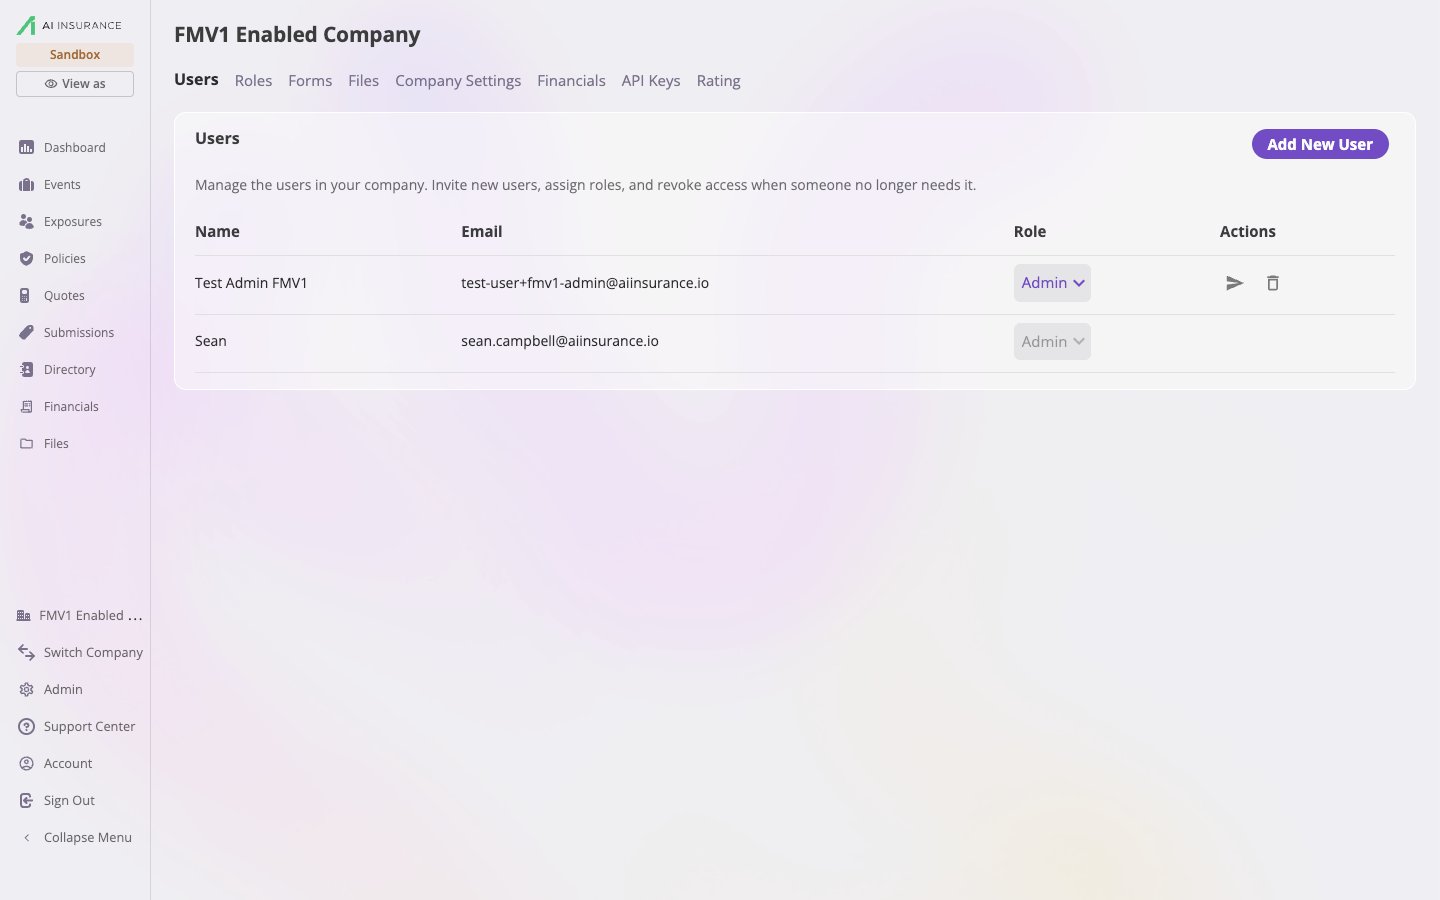
The Users tab: every member of your company, with an inline role editor and per-row actions.
Invite a user
1
Select Add New User
The Add New User button sits at the top right of the Users card.
2
Fill in the dialog
Pick a Role (the dropdown shows each role’s name and description), then
enter the user’s Name and Email. The Send email notification to
the added user checkbox is checked by default — leave it on to send the
invite email.
3
Select Add User
The user is added to your company with the chosen role. If you left the
notification on, they receive an “Account Added To <your company>”
email telling them which role they were given and where to sign in.
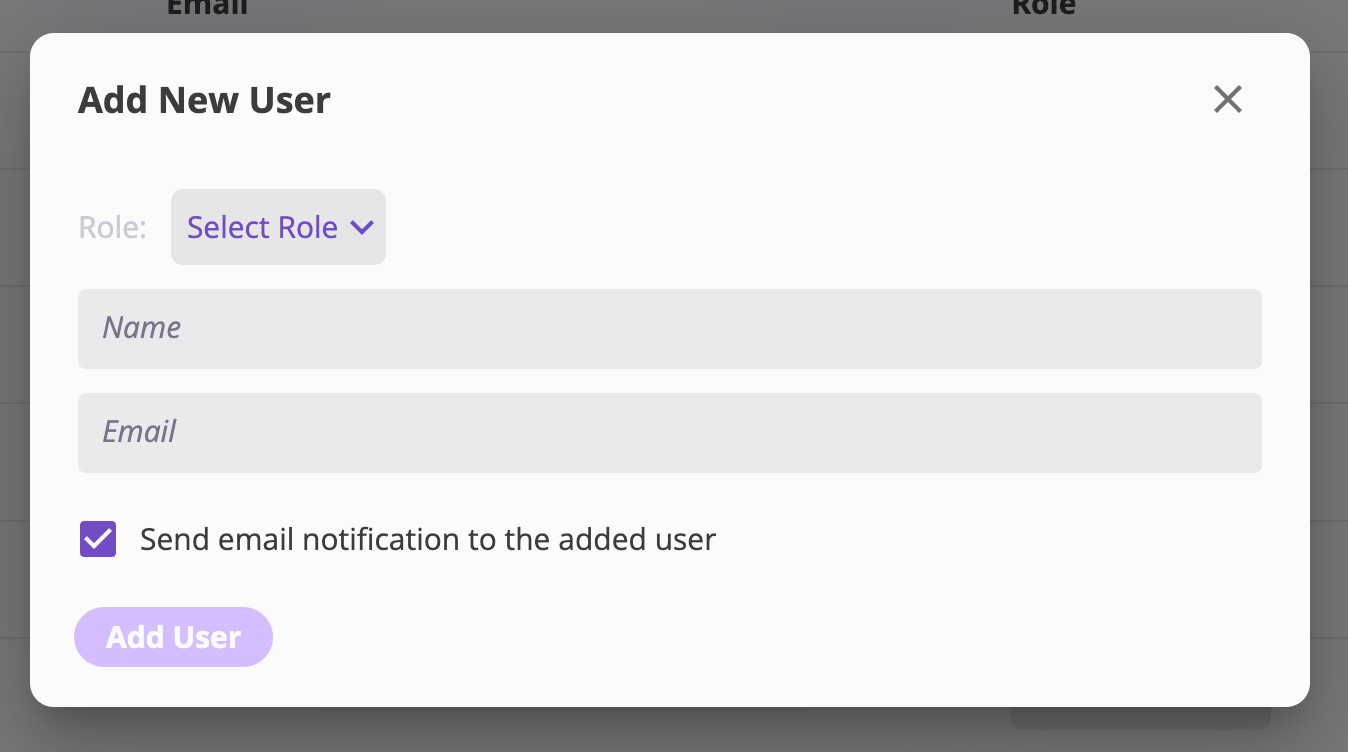
The Add New User dialog: role first, then name and email.
- The email address is the identity. The new user signs in with the email you invited — see Signing in.
- Duplicates are rejected. If someone with that email is already a member of your company, you’ll get an error instead of a second account. To change an existing member’s access, change their role instead.
- Re-adding works. A user you previously removed — or a user who belongs to a different company on the platform — can be invited again with the same email. They keep their existing sign-in and get access to your company with the role you chose.
- A failed email isn’t a failed invite. If the invite email couldn’t be sent, the user is still added — you’ll see a warning instead of a success message, and you can resend the invite from their row.
Which roles can you assign?
The Role dropdown lists your company’s roles: the eight standard roles (Admin, Manager, Viewer, Client Member, Captive Manager, Claims Adjuster, Underwriter, Finance) followed by any custom roles your admins have created. Every user holds exactly one role per company. If none of the standard roles fits — say you need someone who can edit claims but never delete one — an Admin can create a custom role and it appears in this dropdown straight away.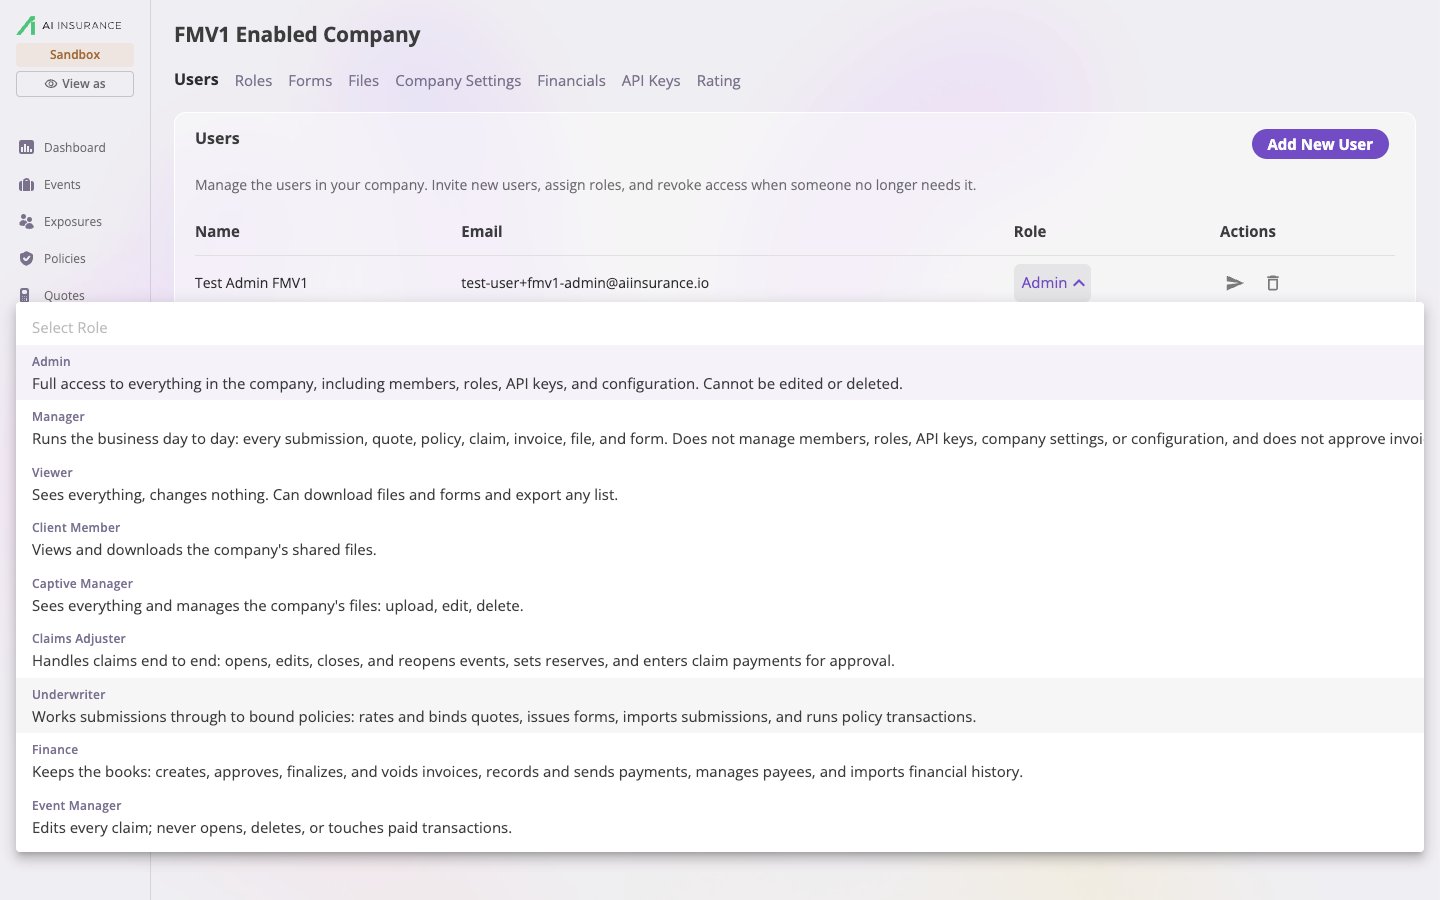
The role dropdown lists every role in your company with its description, custom roles included.
Change a user’s role
Each row’s Role column is an inline dropdown. Pick a new role and the change applies immediately — you’ll see a confirmation like “Updated <name> to role: Manager”, and the user’s access changes the next time their pages load. Two guardrails apply:- You can’t change your own role. Your own row’s dropdown is disabled; ask another admin.
- You can’t demote the last Admin. If the user is the only Admin in your company, moving them to another role is rejected with “You cannot change the role of the last admin in your company. Assign another admin first.” This keeps you from locking everyone out of user and role management.
Resend an invite
The send icon in a user’s Actions column re-sends the invite email — useful when someone lost the original message or it never arrived. Confirm the recipient in the dialog and select Confirm; you’ll see “Successfully sent new invite to <email>”.Remove a user
The trash icon in a user’s Actions column revokes their access to your company. The Remove User dialog confirms what removal means — once removed, the person can no longer access your company’s AI Insurance instance — and offers a Send email notification to user checkbox (checked by default) so they’re told their access was revoked.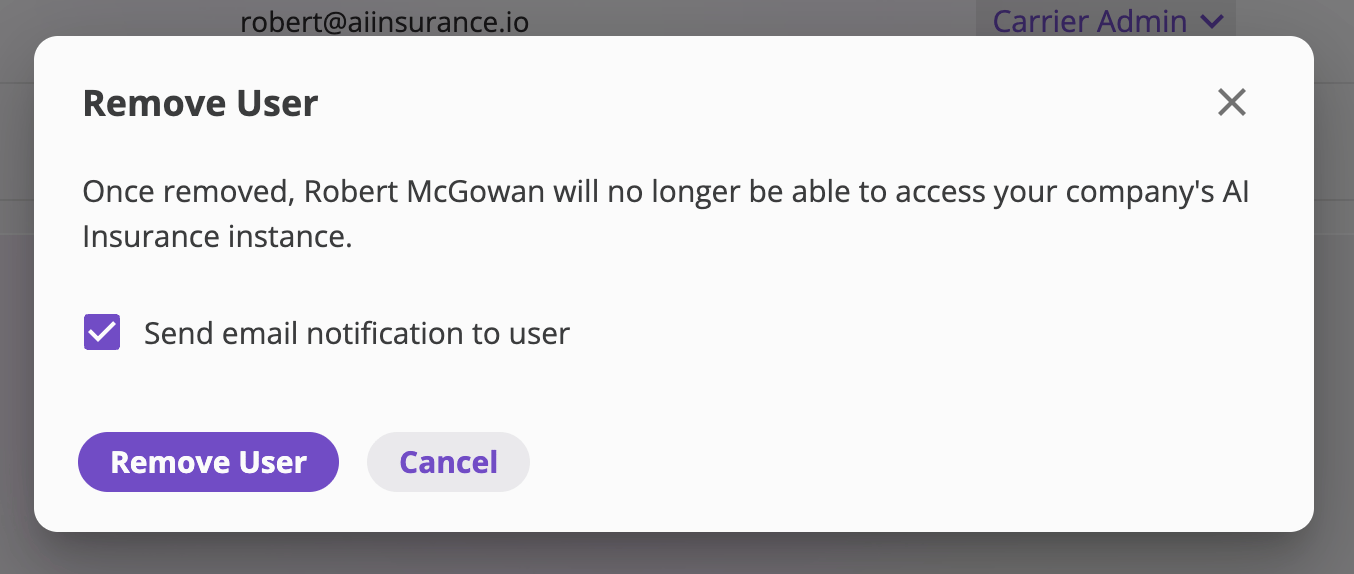
Removing a user revokes their access; a notification email is optional.